Measuring Windows for Blinds: The Simple Step-by-Step Guide
Measuring your windows for blinds sounds simple, right? Precision is everything and even a tiny mistake can cause big headaches. Get this. Just a quarter-inch off can mean your blinds will not fit at all. Most people stick to one quick measurement and hope for the best, but the not-so-obvious truth is that using the right tools and approach can actually save you money, time, and a world of frustration.
Table of Contents
- Tools You Need Before Measuring
- Step-By-Step Process For Accurate Measurements
- Inside Mount Vs. Outside Mount: What To Choose
- Fixing Common Measuring Mistakes
Quick Summary
| Takeaway | Explanation |
|---|---|
| Use a Metal Tape Measure | A metal tape measure is critical for ensuring accurate measurements due to its durability and non-stretching nature. |
| Double-Check Your Measurements | Always measure each dimension twice to confirm accuracy and prevent mistakes that could lead to ill-fitting blinds. |
| Consider Mount Type Based on Needs | Choose inside or outside mount based on your window’s aesthetic, functionality, and structural characteristics for optimal results. |
| Account for Window Frame Depth | Ensure there is enough depth in the window frame for inside mount blinds to fit correctly, usually requiring at least 2.5 inches. |
| Avoid Common Measuring Mistakes | Familiarize yourself with common errors, such as rounding dimensions or using the wrong tools, to achieve precise measurements. |
Tools You Need Before Measuring
Before diving into window measurements for blinds, having the right tools can make the process smooth and accurate. Precision is key when measuring windows, and the right equipment will help you avoid costly mistakes that could result in ill-fitting window treatments.
Here’s a checklist table summarizing the essential and advanced tools you should gather before measuring your windows for blinds:
| Tool | Essential/Advanced | Purpose | Have It Ready? |
|---|---|---|---|
| Metal Tape Measure | Essential | Ensures precise measurements | |
| Pencil and Notepad | Essential | Record measurements immediately | |
| Ladder or Step Stool | Essential | Safe access to higher window frames | |
| Digital Laser Measure | Advanced | Provides instant, precise digital readings | |
| Smartphone Measurement App | Advanced | Serves as backup for quick estimates |
Essential Measuring Equipment
Accurate measurements start with selecting the right tools. The Energy Trust of Oregon recommends using professional-grade measuring tools to ensure optimal results. Here are the fundamental tools you will need:
-
Metal Tape Measure: A high-quality metal tape measure is critical for precise measurements. Choose a tape measure that is at least 25 feet long and has clear, easy-to-read markings. Avoid fabric or cloth measuring tapes, which can stretch and provide inaccurate readings.
-
Pencil and Notepad: Keep a pencil and notepad handy to record your measurements immediately. Digital notes on a smartphone work too, but a physical record prevents potential digital mishaps.
-
Ladder or Step Stool: For windows higher up, a stable ladder or step stool is essential. Ensure it provides safe access to measure top window frames without stretching or compromising your balance.
Advanced Measurement Tools
While basic tools work well, some advanced options can enhance your measuring accuracy. Lawrence Berkeley National Laboratory highlights several technological approaches to window measurements:
-
Digital Laser Measure: A digital laser measure provides instant, precise measurements with the push of a button. These devices can quickly calculate distances and even compute area, reducing human error.
-
Smartphone Measurement Apps: Many modern smartphones offer built-in measurement applications that use camera technology to estimate distances. While not as reliable as professional tools, they can serve as a helpful backup.
Preparation and Safety Considerations
Before starting your measurements, prepare your workspace and tools. Remove any window coverings, ensure good lighting, and wear comfortable clothing that allows easy movement. Double-check that your ladder or step stool is on a flat, stable surface.
Always measure at least twice to confirm accuracy. Small measurement errors can lead to significant problems when ordering custom blinds. If you’re uncertain about any measurement, read more about our precise measurement guide for additional insights and tips.
Remember, taking your time and using the right tools will help you achieve perfect window blind measurements every time.
Step-by-Step Process for Accurate Measurements
Measuring windows for blinds requires precision and a systematic approach. The goal is to obtain accurate measurements that ensure your window treatments fit perfectly and look professionally installed.
Measuring Inside Mount Blinds
Inside mount blinds are installed within the window frame, creating a clean and streamlined appearance. According to the Building America Solution Center, proper window measurement is crucial for optimal energy efficiency and aesthetic appeal.
To measure for inside mount blinds:
-
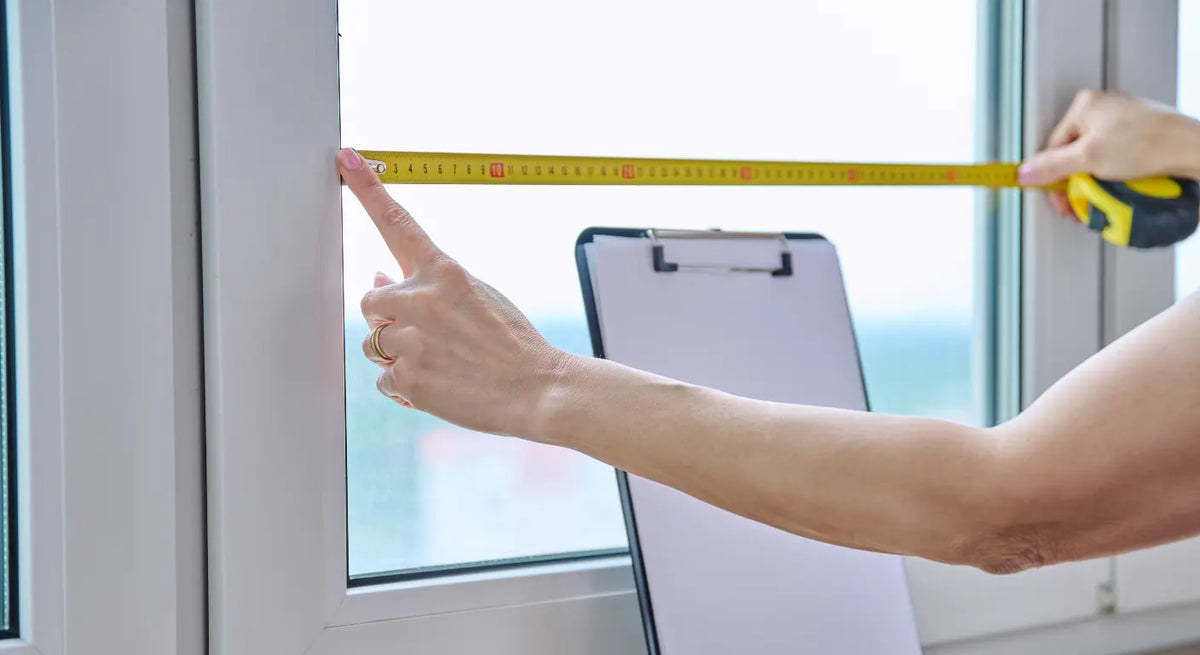
Width Measurement: Measure the width at the top, middle, and bottom of the window frame. Use the narrowest measurement to ensure the blinds will fit.
-
Height Measurement: Measure the height from the top of the window frame to the window sill on the left, center, and right sides. Record the shortest measurement.
-
Depth Consideration: Ensure your window frame has sufficient depth (typically at least 2.5 inches) to accommodate inside mount blinds.
Measuring Outside Mount Blinds
Outside mount blinds are installed outside the window frame, which can help create the illusion of larger windows and cover imperfections. Lawrence Berkeley National Laboratory emphasizes the importance of precise measurements for optimal window performance.
To measure for outside mount blinds:
-
Width Measurement: Measure the desired width, typically extending 2-3 inches beyond the window frame on each side. This provides better light blocking and creates a more visually appealing installation.
-
Height Measurement: Measure from where you want the top of the blinds to be placed to the desired bottom point. Typically, this is 3-4 inches above the window frame and extending to the desired length below the window.
-
Overlap Calculation: When measuring for outside mount, add extra width and height to ensure complete window coverage.
Pro Tips for Accurate Measurements
Precision is key when measuring windows for blinds. Follow these professional recommendations:
- Double Check: Always measure twice to confirm accuracy.
- Use a Metal Tape Measure: Fabric tape measures can stretch, leading to inaccurate measurements.
- Remove Existing Window Treatments: Clear the window area before measuring to get precise readings.
If you want more detailed guidance on selecting the perfect window treatments, our comprehensive measurement guide can help you navigate the process with confidence.
Remember, taking your time and being meticulous during the measuring process will help you achieve window blinds that look professionally installed and function perfectly.
Inside Mount vs. Outside Mount: What to Choose
Choosing between inside and outside mount blinds can significantly impact the aesthetic and functionality of your window treatments. Each mounting style offers unique advantages and considerations that can transform the look and feel of your living spaces.
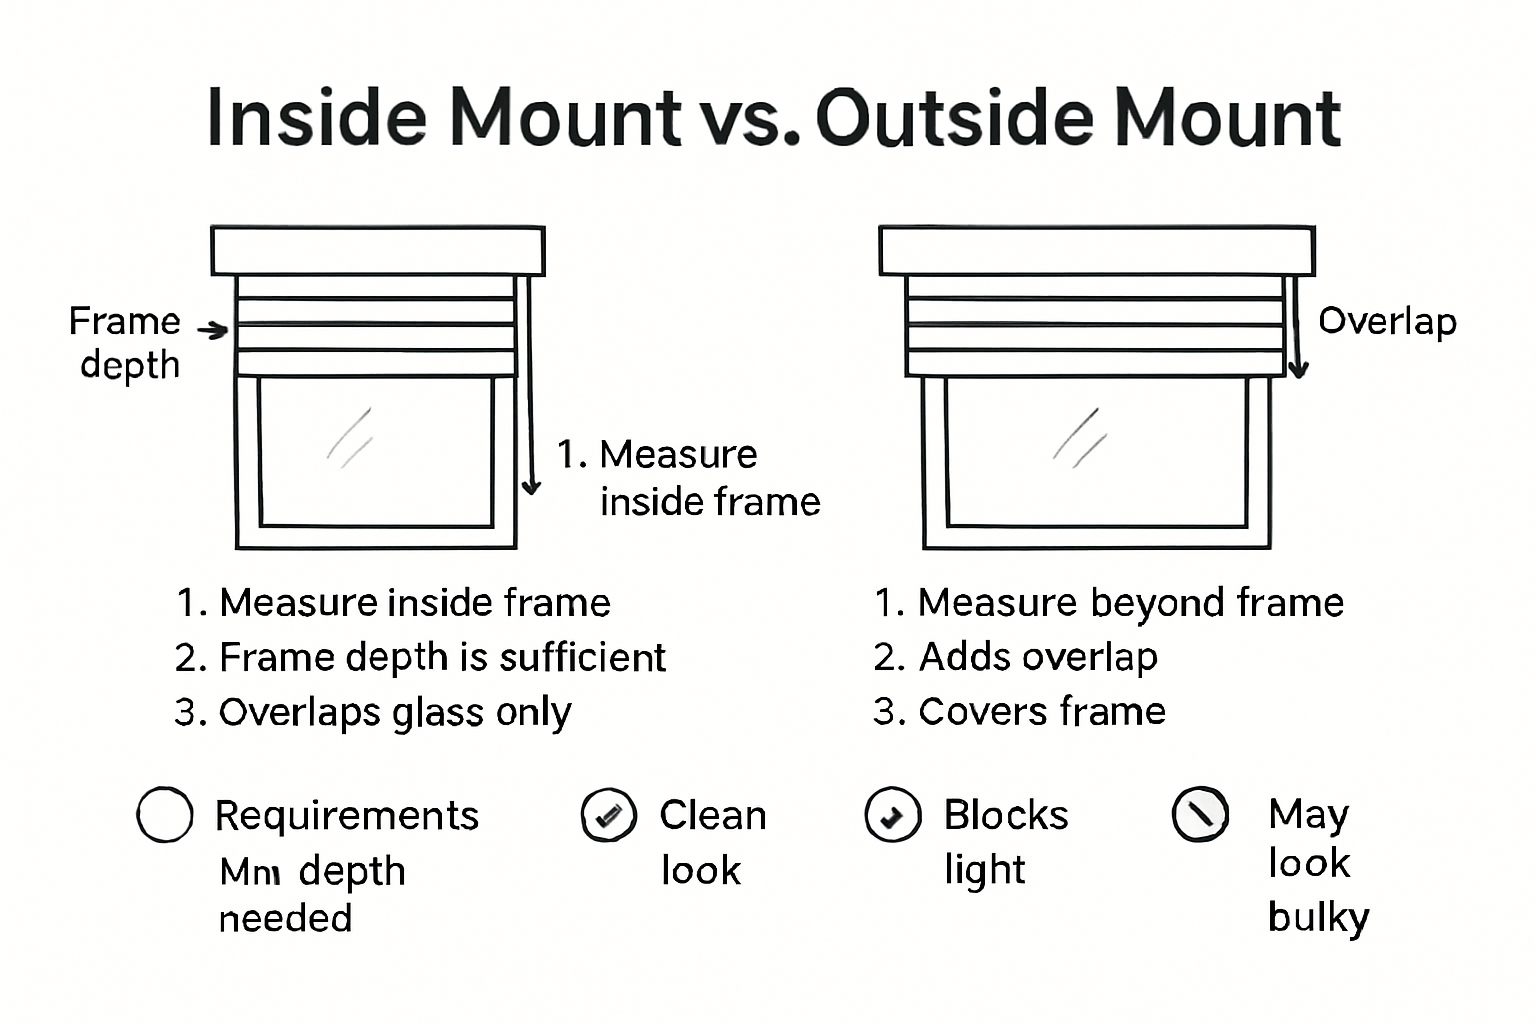
To help you decide between inside mount and outside mount blinds, the following table summarizes the main pros and cons of each option based on the article:
| Mount Type | Pros | Cons |
|---|---|---|
| Inside Mount Blinds | Clean, streamlined look Preserves window trim Ideal for modern interiors |
Limited to window depths ≥ 2.5" Reduced light control Requires precise measurements and compatible frames |
| Outside Mount Blinds | Works with nearly any window Enhanced light blocking Creates visual height Conceals window imperfections |
More visible hardware Can look bulky Requires additional wall space |
Understanding Inside Mount Blinds
Inside mount blinds are installed within the window frame, creating a sleek and minimalist appearance. The Tech Educator highlights that this mounting style works best for windows with deep, clean frames and minimal architectural complexity.
Pros of Inside Mount Blinds:
- Clean, Streamlined Look: Provides a neat, integrated appearance
- Preserves Window Trim: Allows original window architecture to remain visible
- Ideal for Modern Interiors: Complements contemporary design aesthetics
Cons of Inside Mount Blinds:
- Limited to Specific Window Depths: Requires minimum frame depth of 2.5 inches
- Reduced Light Control: May have slight light gaps around edges
- Not Suitable for All Window Frames: Requires precise measurements and compatible window structures
Exploring Outside Mount Blinds
Outside mount blinds are installed on the wall surrounding the window frame, offering more flexibility and design options. According to Gilder Lehrman Institute, this mounting style can address various window design challenges.
Pros of Outside Mount Blinds:
- Versatile Installation: Works with nearly any window type
- Enhanced Light Blocking: Covers window edges completely
- Creates Visual Height: Makes windows appear larger and more dramatic
- Conceals Window Imperfections: Ideal for windows with uneven frames or architectural limitations
Cons of Outside Mount Blinds:
- More Visible Hardware: Mounting brackets and fixtures are more prominent
- Can Look Bulky: Might appear less refined compared to inside mount
- Requires Additional Wall Space: Extends beyond actual window dimensions
Making Your Decision
Selecting the right mount depends on several critical factors:
- Window Architecture: Assess your window’s depth, frame condition, and surrounding wall space
- Design Aesthetic: Consider your interior design style and desired visual impact
- Functional Requirements: Evaluate light control, privacy needs, and insulation preferences
If you’re still uncertain about which mounting style suits your space, check out our comprehensive window treatment guide for more detailed insights.
Remember, there’s no universal right answer. The best choice depends on your specific windows, design preferences, and functional requirements. Take time to measure carefully, visualize the potential outcomes, and select the mount that best enhances your living space.
Fixing Common Measuring Mistakes
Measuring windows for blinds might seem straightforward, but several common errors can lead to costly and frustrating installation challenges. Understanding these potential pitfalls can help you avoid expensive mistakes and ensure a perfect fit for your window treatments.
Measurement Accuracy Errors
Precision is crucial when measuring windows for blinds. National Best Practices Manual for Building High Performance Schools emphasizes the critical nature of accurate measurements in architectural design.
Common Measurement Mistakes:
- Rounding Measurements: Never round your measurements. Even a quarter-inch difference can prevent blinds from fitting correctly.
- Using Incorrect Measuring Tools: Fabric tape measures stretch, leading to inaccurate readings. Always use a metal tape measure.
- Measuring Only Once: Always measure multiple times to confirm accuracy.
Overlooking Critical Measurement Considerations
Beyond basic width and height measurements, several nuanced factors can impact your blind installation. Research on Window Configuration Performance highlights the importance of comprehensive window assessment.
Critical Factors to Consider:
- Window Frame Depth: For inside mount blinds, measure the window frame’s depth to ensure sufficient space for mounting.
- Obstructions: Account for window handles, locks, or other architectural elements that might interfere with blind installation.
- Seasonal Variations: Windows can slightly expand or contract with temperature changes. Take measurements during moderate temperature conditions.
Handling Measurement Complexities
Some windows present unique challenges that require extra attention and specialized approaches. Assessment of Daylighting Quality underscores the importance of precise window measurements in achieving optimal interior environments.
Special Measurement Scenarios:
- Irregular Window Shapes: For arched, bay, or non-standard windows, consider professional measurement services.
- Multiple Window Units: When measuring adjacent or connected windows, treat each section individually.
- Architectural Variations: Pay special attention to window trim, molding, and potential structural irregularities.
If you’re feeling uncertain about your measurements, explore our detailed measurement guidance for additional expert tips and insights.
Remember, taking your time and being meticulous can save you from expensive remeasurement or return costs. When in doubt, consult a professional or request a complimentary measurement consultation to ensure perfect window blind installation.
Frequently Asked Questions
How do I measure my windows for inside mount blinds?
To measure for inside mount blinds, take the width measurement at the top, middle, and bottom of the window frame and use the narrowest measurement. For the height, measure from the top of the window frame to the window sill on the left, center, and right sides, recording the shortest measurement. Ensure the window frame depth is at least 2.5 inches to accommodate the blinds.
What are the advantages of outside mount blinds compared to inside mount blinds?
Outside mount blinds are installed outside the window frame, offering more flexibility and better light blocking. They can also make windows appear larger and conceal imperfections in the window frame. On the other hand, inside mount blinds provide a cleaner, more streamlined look but require specific window depths and can limit light control.
How can I avoid common measuring mistakes when measuring for blinds?
To avoid common measuring mistakes, always use a metal tape measure instead of a fabric one, measure each dimension multiple times for accuracy, and avoid rounding your measurements. Also, account for any obstructions like handles or locks that might affect the installation.
What tools do I need to measure windows for blinds accurately?
Essential tools include a metal tape measure, a pencil and notepad for recording measurements, and a ladder or step stool for accessing higher windows. Advanced tools such as a digital laser measure or smartphone measurement apps can also enhance accuracy but are not mandatory.
Measure with Confidence. Order with Precision.
You have just learned how a single quarter-inch can decide whether your blinds fit perfectly or need to go back to the store. Imagine the disappointment of measuring carefully then ordering a shade that still will not fit. Many buyers lose time and money on returns or live with less than perfect results because precise window measurements can feel stressful. You want to feel sure your new blinds will look great and function exactly as planned. That is where we step in.

You deserve a flawless fit for every room in your home. At Value Blinds Direct, we make it easy to turn your careful measurements into beautiful custom blinds and shades. Explore our best sellers for inspiration or shop our entire collection for the latest styles and energy-saving designs. Still unsure what to pick? Start your order now and enjoy free expert support so you get it right the first time.
Recommended
- How to Measure for Shades: A Simple Step-by-Step Guide
- Made to Measure Blinds - Easy Measurement & Installation Guide
- Measurement Tool
- Easy Installation
- Master the Art: How to Measure Windows for UK Homes
- How to Cut Window Film: Precision Tips for Pros 2025 – AEONCUT PPF Pre-cut Cutting software

Value Blinds®
Trusted window treatments provider
Value Blinds® is a trusted provider of Greenguard, OEKO-TEX, and FSC-certified window treatments based in Portland, Oregon. Specializing in sustainable, motorized, smart-controlled, and outdoor-ready blinds and shades, the company is built on a foundation of simplified shopping, premium eco-friendly materials, and transparent pricing without the inflated cost.