

Expert Motorized Shade Installation for a Seamless Upgrade
Installing motorized shades seems like a project best left to professionals, with all the measurements, wiring, and mounting steps involved. Yet here’s a shocker. Most homeowners can install their own motorized shades by just following a few careful steps and double-checking measurements to the nearest 1/8 inch. The real surprise is you probably already own most of the tools you need, which means upgrading your windows is closer to a weekend task than a massive renovation.
Table of Contents
- Step 1: Measure Your Window Dimensions Accurately
- Step 2: Choose the Right Motorized Shade Style
- Step 3: Gather Necessary Tools and Materials
- Step 4: Install the Mounting Brackets Securely
- Step 5: Attach the Motorized Shades to Brackets
- Step 6: Test Functionality and Make Adjustments
Quick Summary
| Key Point | Explanation |
|---|---|
| 1. Measure Windows Accurately | Take three width measurements at different points to ensure correct fitting of shades. Record to the nearest 1/8 inch for precision. |
| 2. Choose Appropriate Shade Style | Evaluate functional needs like light control and room decor to select the best motorized shade style for your space. |
| 3. Gather All Necessary Tools | Prepare tools like drills, screws, and measuring tapes in advance to streamline the installation process and avoid delays. |
| 4. Securely Install Mounting Brackets | Ensure that mounting brackets are properly aligned and fixed to wall studs to prevent instability and uneven operation of motorized shades. |
| 5. Test Shades for Functionality | Perform multiple operation tests after installation to ensure smooth movement and check for any alignment or connectivity issues. |
Step 1: Measure Your Window Dimensions Accurately
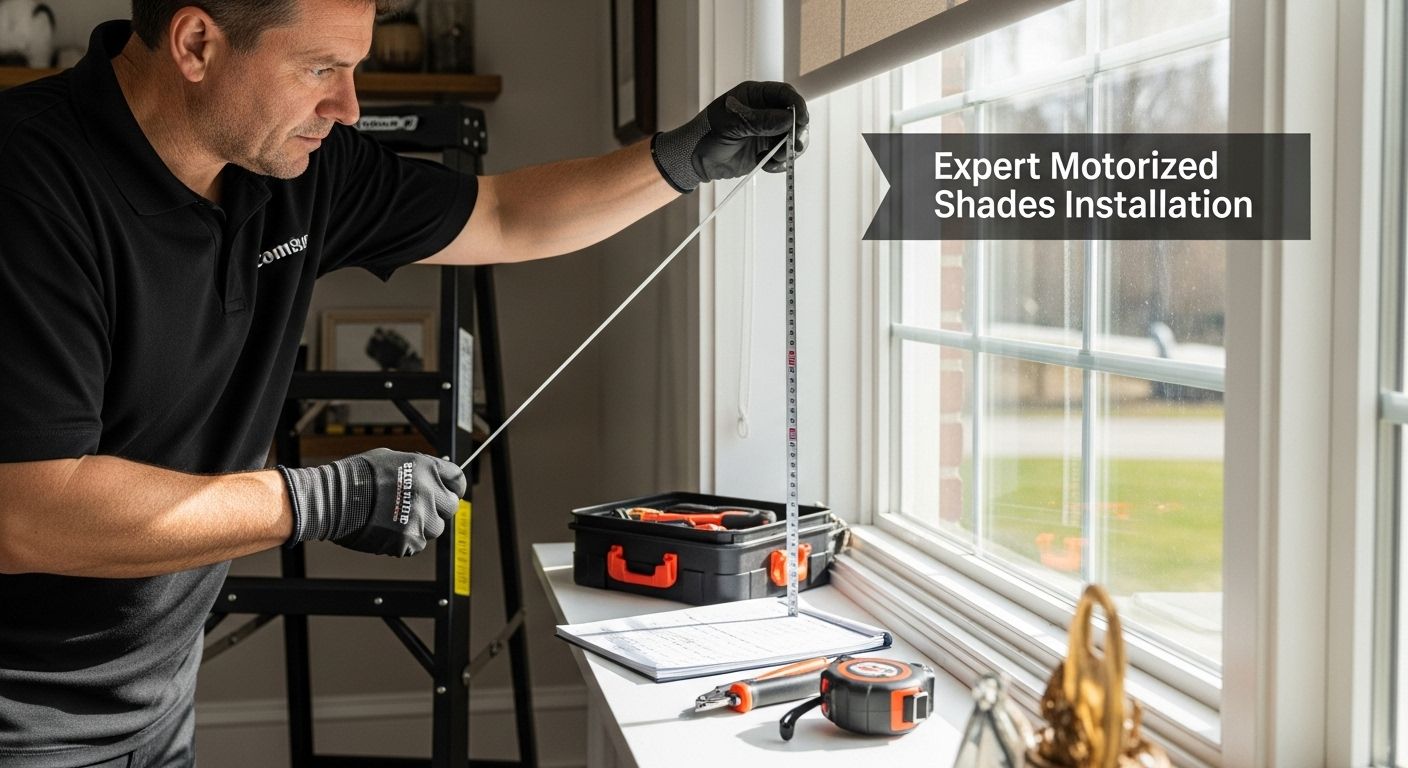
Accurate window measurements are the foundation of a successful motorized shade installation. Precise measurements ensure your shades will fit perfectly, operate smoothly, and provide the aesthetic and functional benefits you desire. Before you begin, gather essential tools like a metal measuring tape, pencil, notepad, and a sturdy ladder if needed.
Start by measuring the width of your window at three critical points: the top, middle, and bottom of the window frame. Windows are not always perfectly square, so capturing measurements at multiple points helps you understand any slight variations. Measure from the inside of the window frame, specifically the interior mounting surface where your motorized shades will be installed. Record each measurement to the nearest 1/8 inch for maximum precision.
For depth measurements, determine the mounting style you prefer. Inside mount requires at least 2 inches of depth inside the window frame, while outside mount allows more flexibility. When measuring for an outside mount, include extra width on each side to ensure complete window coverage. Learn more about precise window measurement techniques.
Verify your measurements by double-checking each dimension. Common measurement mistakes include:
- Forgetting to account for window frame irregularities
- Using a non-metal, stretchy measuring tape
- Measuring at an angle instead of straight across
- Not accounting for potential obstructions like window handles
Professional installers recommend measuring twice and confirming your numbers before ordering. If you’re uncertain about any measurement, consider scheduling a professional consultation to ensure absolute accuracy for your motorized shade installation.
Step 2: Choose the Right Motorized Shade Style
Selecting the perfect motorized shade style transforms your space by combining functionality with aesthetic appeal. The right window treatment not only controls light and provides privacy but also enhances your home’s overall design and energy efficiency. Explore innovative motorization options that match your specific needs and interior design vision.
Consider your primary objectives when choosing motorized shades. Different styles offer unique benefits. Roller shades provide clean, minimalist lines and excellent light control, perfect for modern spaces. Cellular shades deliver superior insulation, helping regulate indoor temperatures and reduce energy costs. Roman shades bring elegant, soft fabric textures that add warmth and sophistication to any room. Each style offers distinct motorization capabilities, so evaluate how the shade’s mechanism will integrate with your home’s layout and your personal preferences.
Evaluate key factors beyond aesthetic appeal. Assess room-specific requirements like sunlight exposure, privacy needs, and existing decor. South-facing windows might benefit from solar shades that reduce glare while maintaining outside views. Bedrooms could utilize blackout motorized shades for optimal light control and sleep quality. Consider material durability, cleaning requirements, and how the shade’s operation will complement your lifestyle.
Key considerations for motorized shade selection include:
- Light filtering capabilities
- Energy efficiency ratings
- Compatibility with smart home systems
- Noise levels during operation
- Battery life or power source requirements
Ultimately, the ideal motorized shade seamlessly blends technological convenience with your personal design aesthetic. Take time to explore samples, consult design professionals, and visualize how different styles will transform your living spaces.
This table summarizes the key features and unique benefits of popular motorized shade styles, making it easy to compare their characteristics before making a selection for your space.
| Shade Style | Key Benefits | Best Use Cases | Special Consideration |
|---|---|---|---|
| Roller Shades | Minimalist look, light control | Modern spaces, living rooms, offices | Excellent for clean lines, easy to clean |
| Cellular Shades | Superior insulation, energy saving | Bedrooms, any room with temperature swings | Great for energy efficiency |
| Roman Shades | Elegant, fabric textures | Bedrooms, formal dining, living rooms | Adds warmth and softness to decor |
| Solar Shades | Reduces glare, preserves views | South-facing, sun-exposed areas | Good balance of light & privacy |
| Blackout Shades | Maximum light blocking, privacy | Bedrooms, nurseries | Ideal for light-sensitive environments |
Step 3: Gather Necessary Tools and Materials
Successful motorized shade installation requires careful preparation and the right equipment. Collecting your tools and materials beforehand streamlines the entire process, preventing unnecessary interruptions and potential installation errors. Think of this step as your installation mission briefing, ensuring you have everything needed for a smooth and professional upgrade.
Power and mounting tools form the core of your installation kit. You will need a reliable power drill with multiple drill bit sizes, a level for precise alignment, an electronic stud finder, and a sturdy ladder that reaches your window height safely. Electric screwdrivers with interchangeable bits can make mounting mechanisms easier, especially when dealing with different screw types required for motorized shade brackets. Consider having a voltage detector on hand to ensure electrical safety when working near potential wiring.
Measurement and marking tools are equally critical. Your metal measuring tape from the previous step remains essential, but add a pencil with fine point for precise marking, a carpenter’s square for checking right angles, and painter’s tape to temporarily mark mounting locations without damaging walls. Laser levels can provide an extra layer of precision, helping you achieve perfectly straight installations across multiple windows.
Your motorized shade installation materials checklist should include:
- Mounting brackets specific to your shade style
- Appropriate screws and wall anchors
- Battery pack or power adapter for motorization
- Remote control or smart home hub
- Additional mounting hardware
Discover expert tips for smooth shade installation and ensure you have all necessary components before beginning. A well-prepared installer is halfway to success, transforming a potentially complex project into a manageable home improvement task.
The following table provides a concise checklist of essential tools and materials you need to prepare before starting your motorized shade installation. This will help ensure a smooth, hassle-free installation experience.
| Tool/Material | Purpose | Notes |
|---|---|---|
| Power drill | Drilling pilot holes and attaching screws | Have multiple drill bit sizes available |
| Level | Ensuring brackets and shades are straight | Laser level provides extra precision |
| Electronic stud finder | Locating wall studs | Maximizes bracket security |
| Metal measuring tape | Measuring windows and spacing | Record to nearest 1/8 inch |
| Pencil (fine point) | Marking bracket locations | Fine markings for increased accuracy |
| Sturdy ladder | Reaching high windows safely | Ensure stability and correct height |
| Mounting brackets | Supporting shade system | Use brackets specific to your shade |
| Screws & wall anchors | Securing brackets to the wall | Use appropriate type for your walls |
| Battery pack or power adapter | Powering shade motor | Ensure compatible with your system |
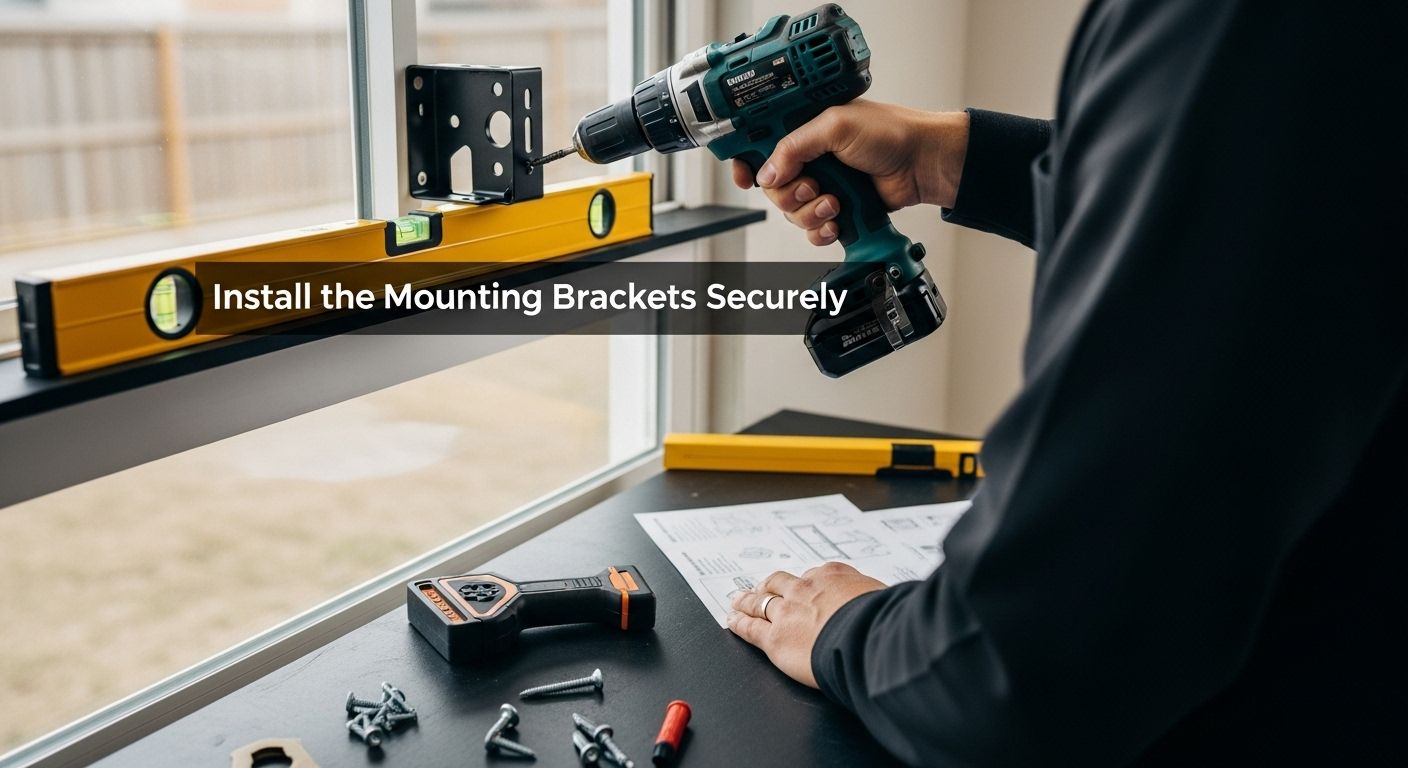
Step 4: Install the Mounting Brackets Securely
Mounting brackets are the critical foundation for your motorized shade installation, determining the stability, alignment, and overall performance of your window treatment. Precision is paramount in this step, as improperly installed brackets can lead to misalignment, uneven operation, and potential damage to both the shades and your window frames.
Begin by using your stud finder to locate and mark the wall studs near your window frame. Stud mounting provides the most secure installation, offering maximum support for heavier motorized shade systems. If studs are not conveniently located, use high-quality wall anchors rated for the weight of your specific shade system. Measure and mark your bracket locations meticulously, double-checking that they are level and equidistant from the window edges. Painter’s tape can help create temporary alignment guides, ensuring your markings remain precise and clean.
Drill pilot holes carefully to prevent wall damage and ensure smooth screw insertion. Select drill bits slightly smaller than your mounting screws to create a secure grip without compromising wall integrity. When installing brackets, apply consistent pressure and ensure each screw is fully seated but not over-tightened, which could strip the threads or crack the mounting surface. Learn more about professional mounting techniques to guarantee a flawless installation.
Critical bracket installation checkpoints include:
- Perfectly horizontal alignment
- Secure attachment to wall studs or appropriate anchors
- Consistent spacing on both sides of the window
- No visible wall damage or excessive screw protrusion
- Brackets capable of supporting motorized shade weight
After mounting, perform a gentle test by applying slight pressure to each bracket to confirm their stability. A well-installed bracket system should feel solid and immovable, providing the perfect foundation for your motorized shade’s smooth and reliable operation.
Step 5: Attach the Motorized Shades to Brackets
Attaching motorized shades to their mounting brackets is a delicate process that requires patience, precision, and careful handling. Each shade system has unique mounting mechanisms, so carefully review the manufacturer’s specific instructions before beginning. Having a helper can make this step significantly easier, especially when working with larger or heavier motorized shade systems that require two-person manipulation.
Start by positioning the motorized shade near the mounted brackets, ensuring the shade’s orientation matches the predetermined mounting direction. Most motorized shades have specific top and bottom indicators that must align correctly with your brackets. Gently slide the shade’s mounting rail into the bracket, applying even pressure and checking that each side connects smoothly. Some systems use spring-loaded clips, while others require manual screw attachment. Listen for a clear clicking sound that indicates secure placement, which confirms the shade is properly seated.
Power connection is a critical component of this step. Carefully route the motorization power cable or battery pack, ensuring no unnecessary tension or strain on the connection points. Explore professional installation techniques to understand cable management best practices. Use cable clips or included cable management solutions to keep wiring neat and prevent potential damage during shade operation.
Critical attachment verification points include:
- Shade moves smoothly without catching or binding
- No visible gaps between shade and mounting brackets
- Power cable securely connected and without strain
- Manual operation feels consistent and fluid
- No unusual sounds during initial test movements
Perform a series of test raises and lowerings to confirm the motorized shade operates correctly. Watch for smooth, consistent movement and listen for any unusual mechanical sounds that might indicate improper installation. A perfectly attached motorized shade should move silently and effortlessly across its full range of motion.
Step 6: Test Functionality and Make Adjustments
Testing your newly installed motorized shades is the critical final step that transforms your careful installation into a fully functional home improvement. Comprehensive testing ensures smooth operation and identifies any potential issues before you fully commit to the installation. Begin by charging or connecting the power source completely, then systematically test each shade’s operational capabilities using both the provided remote control and any integrated smart home systems.
Initiate testing by running multiple complete up and down cycles for each motorized shade, observing its movement closely. Watch for smooth, consistent motion without jerking, catching, or uneven travel. Pay special attention to the shade’s alignment and how it sits when fully extended or retracted. Slight adjustments to bracket positioning might be necessary if you notice any misalignment or uneven deployment. Listen carefully for any unusual mechanical sounds that could indicate potential future maintenance requirements or installation imperfections.
If your motorized shade system includes smart home integration, this is the moment to synchronize and verify connectivity. Explore advanced testing techniques to ensure seamless operation across different control platforms. Test voice commands, smartphone app controls, and any preset schedules or automation features. Some systems might require calibration to establish precise upper and lower limits for shade movement.
Critical functionality verification points include:
- Consistent and smooth movement across entire range
- Accurate response to all control methods
- No unusual sounds during operation
- Proper alignment at every position
- Complete battery charge or stable power connection
Remember that minor adjustments are normal and expected. Do not become discouraged if perfect performance is not immediate. Patience during this testing phase can prevent future operational issues and ensure your motorized shade system provides years of reliable, convenient service.
Ready for Flawless Motorized Shade Installation?
You have learned that accurate measurements and precision steps make all the difference when it comes to installing motorized shades. Maybe you are feeling uncertain about mounting brackets, worried about picking the perfect style, or just need a trusted source for quality products that match your needs. At Value Blinds, we help you avoid costly mistakes with expert guidance, easy-to-follow tools, and a curated selection of modern motorized options. If you want complete peace of mind and a seamless upgrade, discover our best-selling motorized shades and top-rated window treatments for all room types and sizes.

Why wait for extra help or a design mishap? Shop our most popular solutions at Value Blinds Direct and enjoy unbeatable convenience, customization, and quality, all backed by expert support. Transform your home today with selections trusted by homeowners and decorators nationwide. For our latest innovations and stylish upgrades, check out effortlessly stylish new arrivals and begin your installation journey now.
Frequently Asked Questions
How do I accurately measure my windows for motorized shades?
To accurately measure your windows for motorized shades, measure the width at three points—top, middle, and bottom—of the frame. Record each measurement to the nearest 1/8 inch. For depth, ensure you have enough space for your chosen mounting style, typically at least 2 inches for inside mounts.
What factors should I consider when choosing a motorized shade style?
When selecting a motorized shade, consider light-filtering capabilities, energy efficiency, compatibility with smart home systems, and noise levels during operation. Assess your room’s sunlight exposure and privacy needs as well as how the shade complements your existing decor.
What tools are necessary for installing motorized shades?
Essential tools for installing motorized shades include a power drill, level, electronic stud finder, metal measuring tape, pencil, and a sturdy ladder. You’ll also need the appropriate mounting brackets, screws, wall anchors, and power source for the motorized system.
How can I ensure that the motorized shades operate smoothly after installation?
To ensure smooth operation, perform multiple test runs of the shades after installation. Check for smooth, consistent movement and listen for any unusual sounds. Minor adjustments may be needed for alignment or to establish upper and lower limits for smart controls.


