
Easy to Install Blinds No Drilling: Step-by-Step Guide
No drill blinds offer a smart solution for renters and homeowners who want stylish windows without making permanent changes. With nearly 42 million households renting in the US alone, finding window treatments that require no screws or holes is more important than ever. Whether you want a quick upgrade or you value your security deposit, this step by step approach helps you measure, choose, and install no drill blinds with a secure and flawless finish.
Table of Contents
- Step 1: Measure and Clean Your Window Area
- Step 2: Select the Right No-Drill Blind Style
- Step 3: Attach Mounting Clips or Adhesive Brackets
- Step 4: Install and Adjust Blinds for a Perfect Fit
- Step 5: Test Security and Function of Installed Blinds
Quick Summary
| Key Point | Explanation |
|---|---|
| 1. Clean your window area thoroughly | Ensure a dust-free window frame for better adhesion, leading to a more professional result. |
| 2. Measure your window accurately | Measure the width at three points and use the smallest for fitting your blinds correctly. |
| 3. Choose the right mounting method | Select from tension rods, adhesive brackets, or magnetic mounts based on blind weight and style. |
| 4. Attach brackets securely | Align and press mounting clips firmly to ensure they hold the blinds without sagging or movement. |
| 5. Test functionality of installed blinds | Check for smooth movement and alignment to confirm secure installation before use. |
Step 1: Measure and Clean Your Window Area
Preparing your window area is a crucial first step in installing no drill blinds. This section will guide you through precise measurements and ensuring a clean surface that allows perfect window treatment installation.
Start by thoroughly cleaning your window frame and surrounding area. Use a microfiber cloth and gentle glass cleaner to remove dust, dirt, and any residue that might prevent adhesive mounting from working effectively. Pay special attention to the top and sides of the window frame where mounting brackets will be placed. A clean surface ensures stronger adhesion and a more professional looking final result.
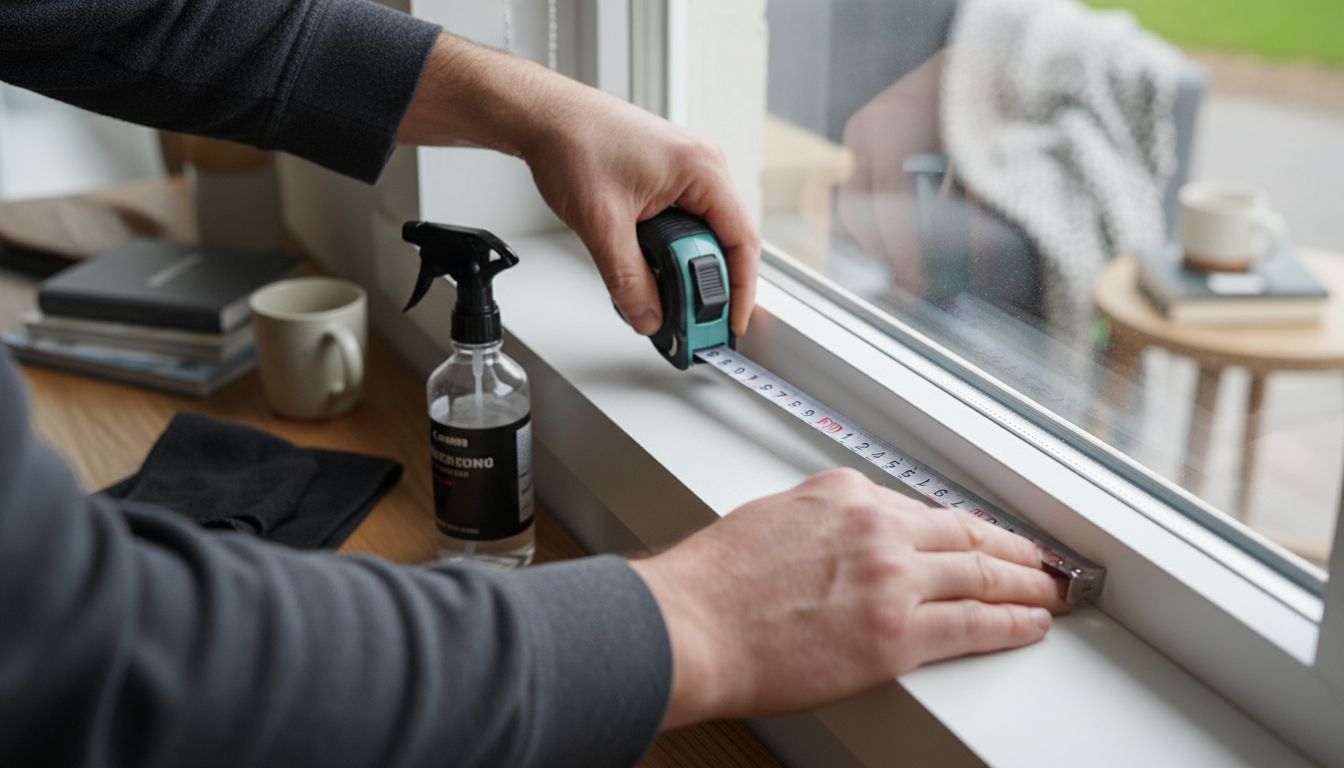
Taking accurate measurements is equally important. Measure the width of your window at three points: top, middle, and bottom. Record the smallest measurement to ensure your no drill blinds will fit correctly. For height, measure from the top of where you want the blinds mounted to the bottom of the window sill. Pro tip: Always measure twice to confirm accuracy and avoid costly mistakes.
Need more detailed guidance? Check out our step by step measuring guide for additional window treatment measurement insights.
Once your window is clean and precisely measured, you are ready to move on to selecting and preparing your no drill blind installation materials.
Step 2: Select the Right No-Drill Blind Style
Selecting the perfect no drill blind style requires understanding your specific window needs and installation constraints. According to ToolsWeek, multiple installation methods exist for homeowners seeking flexible window treatment solutions.
Your blind style selection depends on several key factors. Consider your window frame material, the weight of the blinds, and the aesthetic you want to achieve. ToolsWeek suggests four primary no drill mounting options: tension rods, adhesive brackets, magnetic mounts, and command strips. Each method offers unique advantages depending on your specific window characteristics.
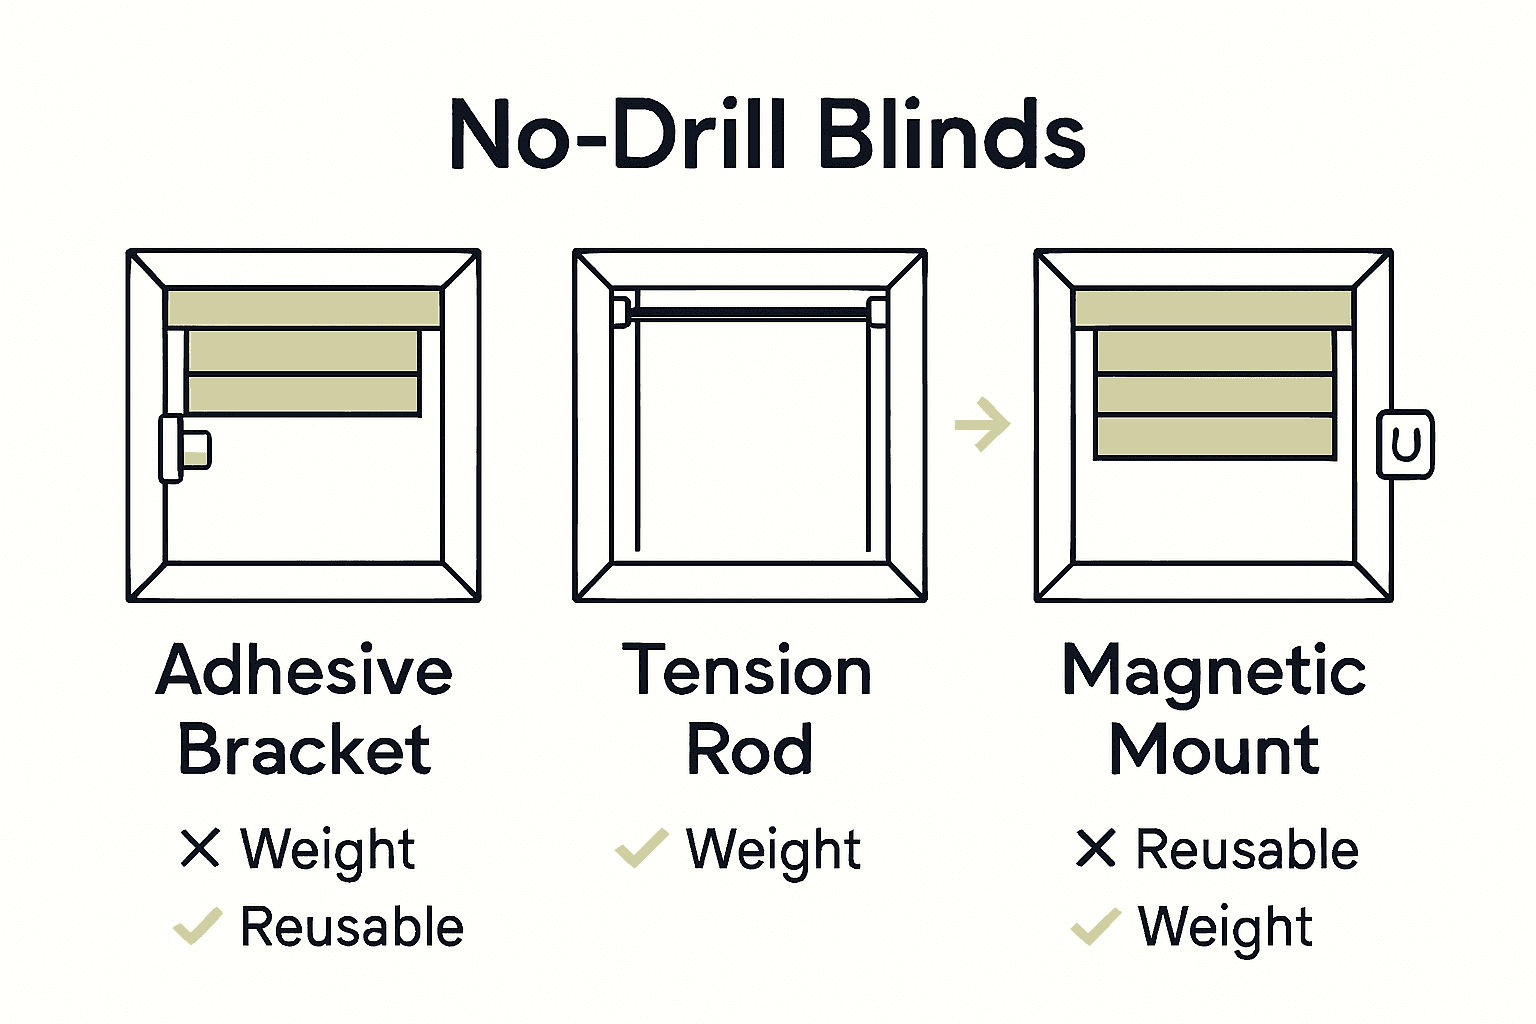
For lightweight blinds like cellular shades or thin roller blinds, adhesive brackets work wonderfully. Heavier wooden or thermal blinds might require more robust mounting solutions like magnetic mounts or tension rods. Want more insights into current window treatment trends? Check out our guide on choosing blinds for comprehensive styling advice.
When choosing your no drill blind style, prioritize both functionality and visual appeal. Measure your window dimensions carefully, assess the mounting surface, and select a blind type that complements your room’s design while ensuring secure installation.
Step 3: Attach Mounting Clips or Adhesive Brackets
Attaching mounting clips or adhesive brackets is a critical step in your no drill blind installation process. This phase determines the stability and security of your window treatment, ensuring a professional and reliable setup.
Carefully align your mounting clips or adhesive brackets with the precise measurement marks you created earlier. For adhesive brackets, thoroughly clean the surface and allow it to dry completely before application. Apply firm pressure for at least 30 seconds to ensure maximum adhesion. Pro tip: Use a level to guarantee your brackets are perfectly straight and aligned for a symmetrical look.
When working with adhesive mounting solutions, pay close attention to the weight capacity of the brackets. Lightweight cellular or roller shades work best with standard adhesive mounts, while heavier wooden blinds might require additional reinforcement or alternative mounting techniques. Remember that proper placement and careful installation will prevent future sagging or potential damage to your window treatments.
Be patient during this process. Take your time to position each bracket accurately and press firmly. A few extra minutes spent on precise installation can save you hours of potential readjustment later. Understanding how to choose blinds can provide additional insights into matching your mounting technique with your specific blind style.
Once your mounting clips or adhesive brackets are securely in place, you are ready to move on to the next step of hanging your no drill blinds.
Step 4: Install and Adjust Blinds for a Perfect Fit
Installing your no drill blinds is the exciting moment when your window transformation comes to life. This step requires careful precision and a gentle touch to ensure your blinds sit perfectly and function smoothly.
Carefully position the blinds into the mounting clips or adhesive brackets you have already secured. Start by engaging one side of the blind into the bracket and then gently press the other side until it clicks or settles into place. If your blinds come with tension mechanisms, adjust them to ensure even and smooth movement. Take your time during this process to prevent any unnecessary strain or potential damage to your new window treatment.
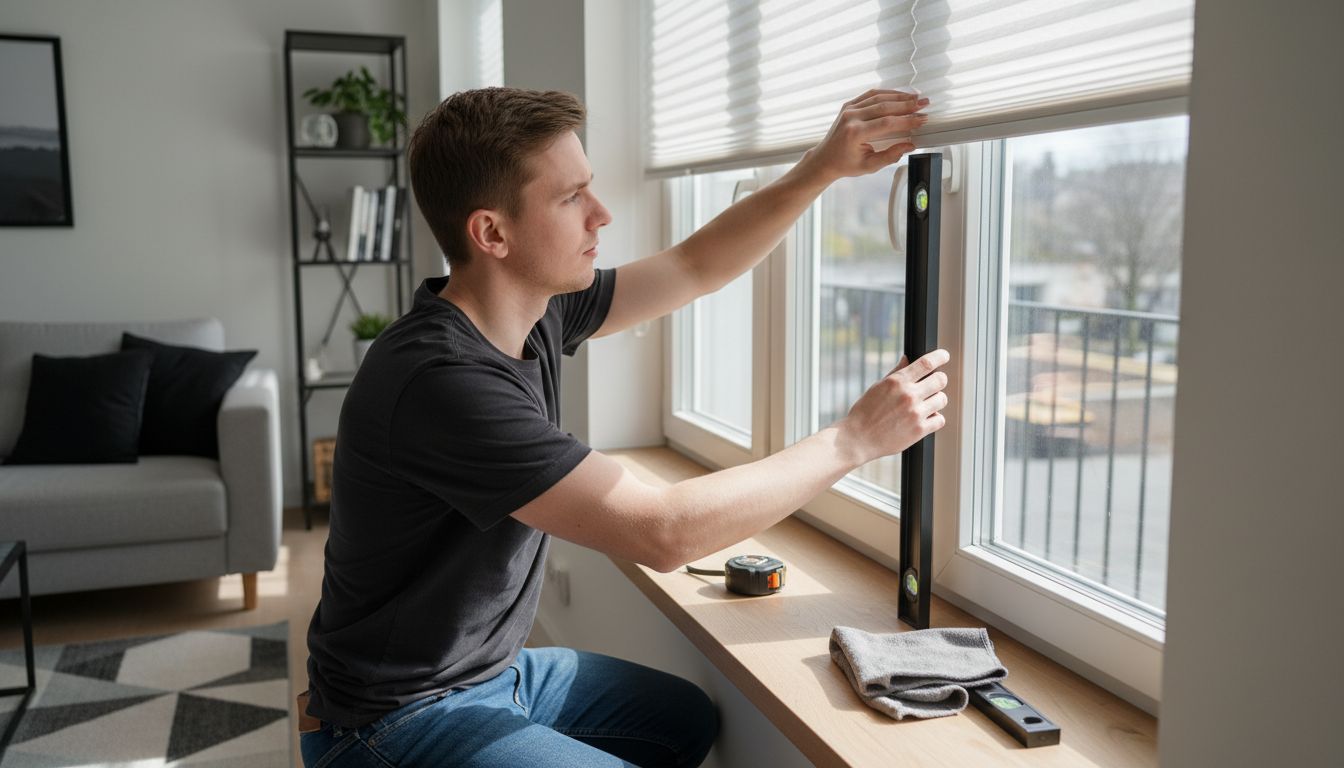
Alignment is crucial for a professional look. Check that your blinds are level by using a small spirit level or the level app on your smartphone. Make small adjustments as needed to ensure the blind hangs straight and operates without catching or dragging. For detailed guidance on achieving that perfect window fit, learn from our installation guide.
Test the functionality of your blinds by raising and lowering them several times. Listen for any unusual sounds and watch for smooth movement. If you notice any resistance or uneven operation, double check your mounting brackets and make minor adjustments. Your patience during this final installation stage will result in window treatments that look great and work perfectly.
Step 5: Test Security and Function of Installed Blinds
The final step in your no drill blind installation is ensuring complete security and smooth functionality. This critical phase confirms that your hard work has resulted in a professional window treatment that looks great and performs perfectly.
Begin by applying gentle pressure to each side of the blinds to test the strength of your adhesive brackets or mounting clips. Check for any wobbling or movement that might indicate an insecure installation. Raise and lower the blinds multiple times through their full range of motion, observing how smoothly they operate. Listen for any unusual sounds that could suggest misalignment or potential issues with your mounting.
PayAttention to the small details during this testing phase. Verify that the blinds remain level when fully extended and retract evenly without catching or jamming. If you encounter any resistance or uneven movement, carefully readjust the mounting brackets or clips. For additional insights into maintaining your new window treatments, check out our guide on installing cordless blinds which offers additional troubleshooting tips.
A thorough test now can prevent potential problems down the line. Gently tug on the blinds to simulate accidental pulling or bumping. If they remain securely in place with no signs of loosening, you can confidently enjoy your newly installed no drill window treatment. Congratulations on completing a successful DIY blind installation that enhances both the functionality and aesthetic of your space.
Discover Easy No-Drill Blinds That Fit Your Home Perfectly
Struggling with complicated blind installations that require messy drilling is a common frustration. This guide highlights how simple it can be to measure, mount, and adjust your no-drill blinds for a secure and attractive finish without damaging your walls or window frames. It addresses real challenges like finding the right mounting method and ensuring your blinds stay stable and functional every day.
Experience the satisfaction of easy installation combined with stylish and energy-efficient custom blinds from Value Blinds. Explore lightweight, cordless, and adhesive-mounted options designed for effortless setup and lasting durability. Our New Arrivals feature the latest in no-drill blind technology, so you can enjoy hassle-free window treatments that match your style.

Ready to upgrade your windows today Enjoy browsing our extensive selection at Value Blinds and use our expert measurement guides and customization tools to find the perfect no-drill blinds for your home. Don’t wait to transform your space with easy-to-install shades that combine beauty and convenience.
Also, check out our Fire Retardant collection for safe and stylish options that meet your family’s needs.
Frequently Asked Questions
How do I measure my windows for easy no drill blinds installation?
To measure your windows for no drill blinds, measure the width at three points (top, middle, and bottom) and record the smallest measurement. For height, measure from the top where you want the blinds mounted to the bottom of the window sill. Always ensure to measure twice for accuracy to avoid mistakes.
What cleaning method should I use for the window area before installing no drill blinds?
Thoroughly clean your window frame and surrounding area using a microfiber cloth and gentle glass cleaner. Remove all dust and residue, particularly from the areas where mounting brackets will be placed, to ensure better adhesion and a professional-looking finish.
Which no drill blind style is best for my window?
The best no drill blind style will depend on your window frame material, weight of the blinds, and desired aesthetic. Consider lightweight options like cellular shades with adhesive brackets, or heavier styles like wooden blinds that may need magnetic mounts or tension rods for secure installation.
How do I ensure my adhesive brackets are installed correctly?
To install adhesive brackets correctly, clean the surface first, then apply pressure for at least 30 seconds after adhering. Use a level to make sure the brackets are straight and aligned, which will secure your blinds effectively and prevent future sagging.
What should I do if my no drill blinds are not functioning smoothly?
If your blinds aren’t functioning smoothly, double-check the alignment and adjust your mounting brackets as needed. Carefully raise and lower the blinds several times to test their motion, ensuring they operate freely without catching or jamming.
How can I test the security of my installed no drill blinds?
Test the security of your installed no drill blinds by applying gentle pressure to both sides and observing for any wobbling. Raise and lower the blinds through their full range of motion to confirm they stay level and do not loosen, ensuring a secure installation.


