
How to Clean Blinds Naturally for Spotless Results
Did you know that indoor air can be up to five times more polluted than outdoor air if dust and grime are left unchecked? Clean blinds are not just about how your home looks, they can help protect your health and the planet. By switching to natural cleaning methods, you avoid harsh chemicals while achieving spotless, refreshed blinds. Learn how a few eco friendly supplies and simple steps can make your windows gleam and your living space healthier.
Quick Summary
| Key Point | Explanation |
|---|---|
| 1. Use Eco-Friendly Cleaning Supplies | Gather safe, certified natural cleaning supplies to minimize chemicals and environmental impact. |
| 2. Remove Dust Systematically | Start cleaning at the top, moving downwards and using microfiber cloths or a soft vacuum brush to effectively trap dust. |
| 3. Prepare a Natural Cleaning Solution | Mix equal parts white vinegar and warm water, optionally adding mild dish soap or baking soda for tougher grime. |
| 4. Dry Blinds Thoroughly | Use a clean microfiber cloth to wipe each slat from top to bottom, preventing water spots and streaking for a pristine finish. |
| 5. Inspect for Residue | After cleaning, check each slat from different angles to ensure no dirt or residue remains, and re-clean as necessary. |
Table of Contents
- Step 1: Gather Natural Cleaning Supplies For Blinds
- Step 2: Remove Dust And Debris From All Blind Surfaces
- Step 3: Apply Natural Cleaning Solution To Stubborn Spots
- Step 4: Wipe And Dry Blinds Thoroughly For A Streak-Free Finish
- Step 5: Inspect Blinds To Ensure Spotless, Residue-Free Results
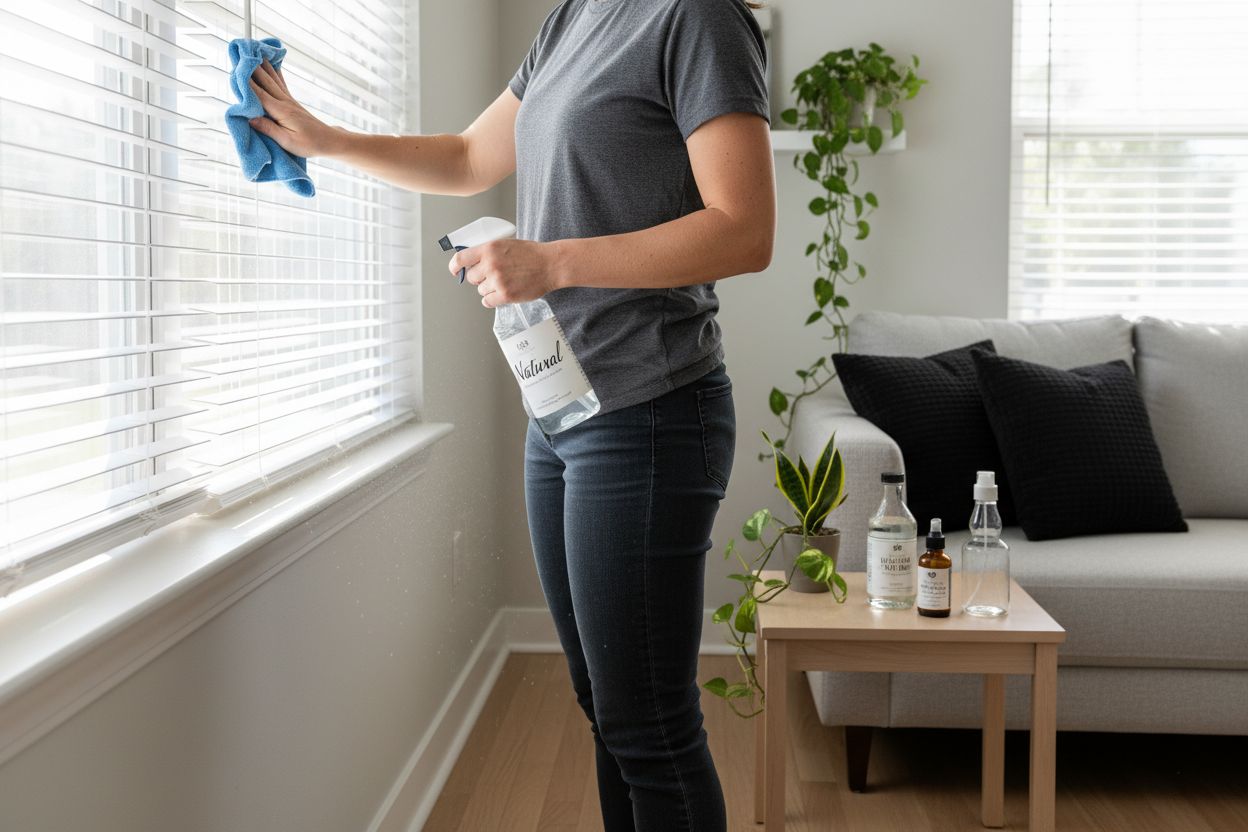
Step 1: Gather natural cleaning supplies for blinds
Cleaning your blinds naturally starts with assembling the right eco friendly supplies. You want a collection of cleaning materials that are safe for your home and the environment. According to research from The Guardian, choosing third party certified products can help reduce harmful chemical exposure and minimize environmental impact.
Start by gathering these natural cleaning essentials:
Here’s a quick comparison of natural cleaning supplies for blinds:
| Cleaning Supply | Eco-Friendly? | Main Purpose |
|---|---|---|
| White vinegar | Yes | Cuts grease, disinfects |
| Warm water | Yes | Dilutes agents, gentle clean |
| Microfiber cloths | Yes | Traps dust, reusable |
| Witch hazel | Yes | Mild antibacterial cleaner |
| Soft vacuum brush | Yes | Removes dust and debris |
| Clean spray bottle | Yes | Applies solutions evenly |
- White vinegar
- Warm water
- Microfiber cloths
- Witch hazel (a gentle biodegradable cleaning agent)
- Soft brush attachment for your vacuum
- Clean spray bottle
Witch hazel serves as an excellent natural cleaner with mild antibacterial properties.
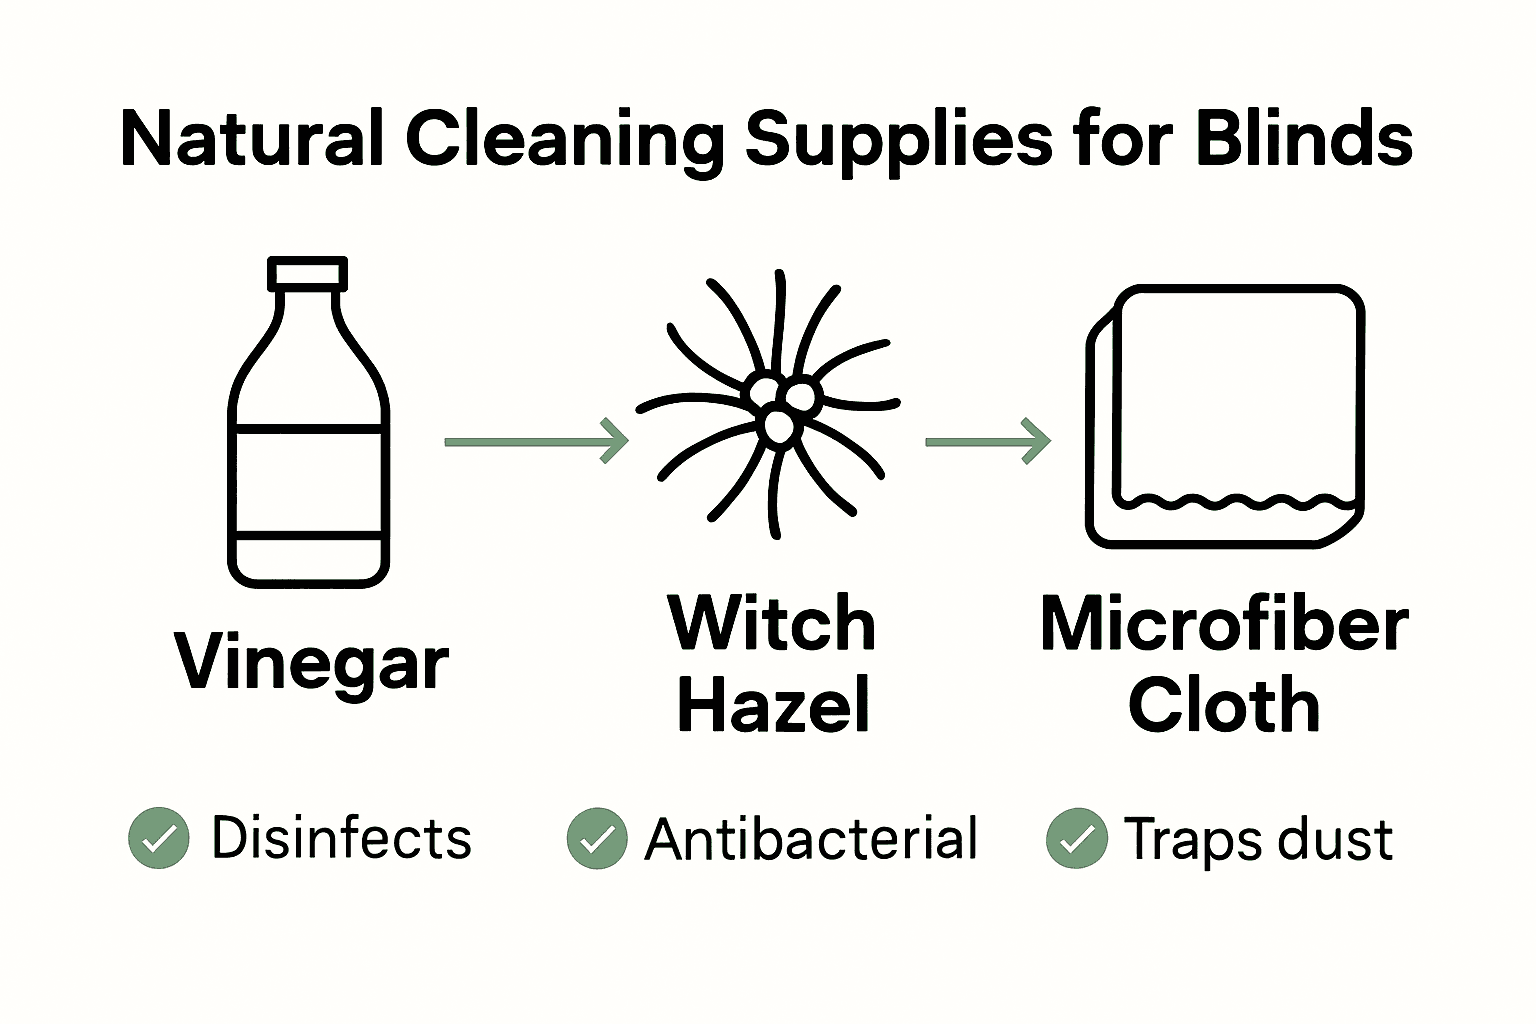 As noted by Tom’s Guide, it works wonderfully for light cleaning tasks and can be easily mixed with water.
Pro Tip: Always opt for cleaning products with third party environmental certifications like Safer Choice or EWG Verified to ensure maximum safety and minimal environmental impact.
By selecting these natural supplies, you are preparing for a thorough yet gentle blind cleaning process that protects both your window treatments and your living environment. Gather your materials and get ready to transform your dusty blinds into sparkling clean surfaces.
Ready to start cleaning? Let’s move on to preparing your natural cleaning solution.
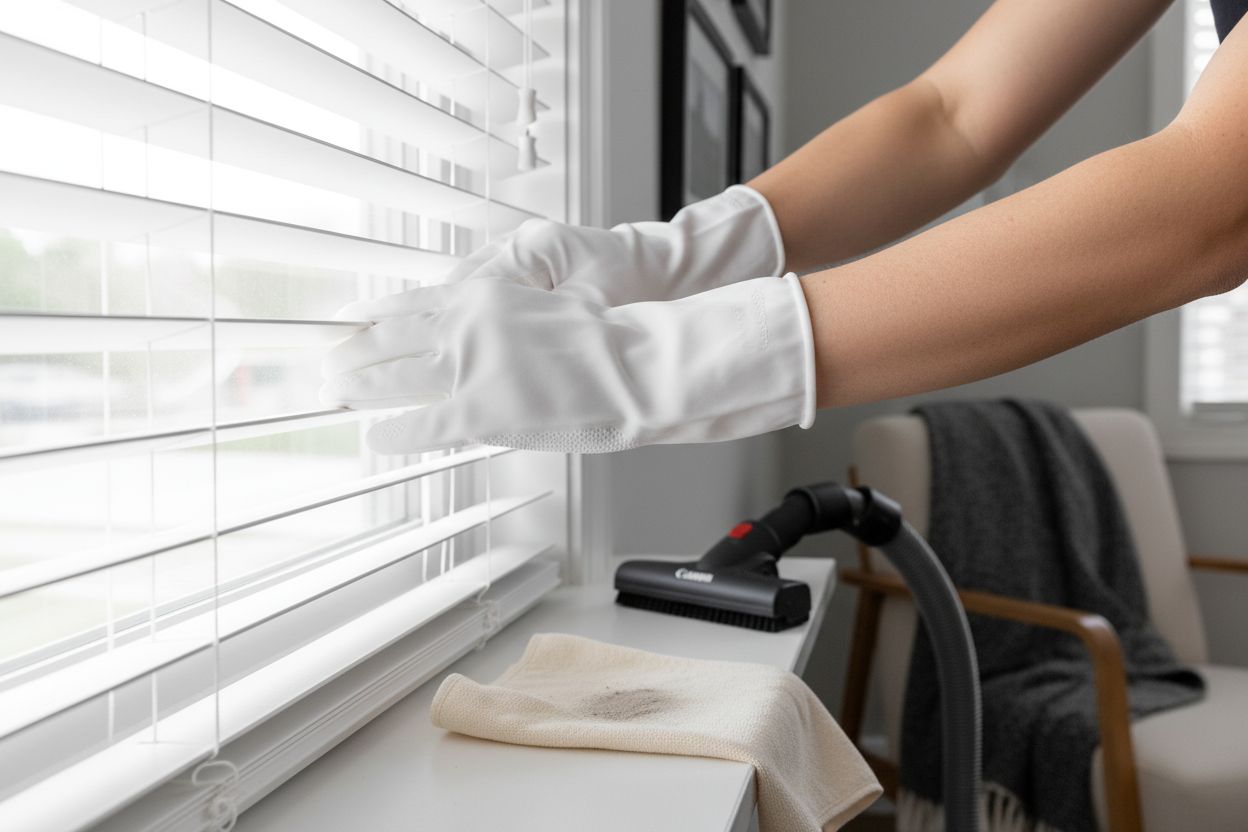
Step 2: Remove dust and debris from all blind surfaces
Removing dust and debris from your blinds is a crucial first step in achieving a thorough cleaning. According to Good Housekeeping, the key is to start at the top and work your way down systematically.
Grab your microfiber cloth or vacuum with a soft brush attachment. These tools are perfect for trapping and lifting dust without spreading it around. As research from In The Wash suggests, use your vacuum on low suction to gently remove dust from both sides of the slats.
Here is your step by step approach:
- Put on your microfiber dusting gloves or hold a microfiber cloth
- Start at the top of your blinds
- Work methodically from left to right
- Gently wipe each slat individually
- Use downward strokes to collect dust effectively
- For stubborn dust use your vacuum brush attachment
Pro Tip: Always move in one direction to prevent dust from scattering and ensure a more thorough clean.
By carefully removing dust and debris now you are preparing your blinds for deeper cleaning. No more dusty surfaces or allergen buildup.
 Your blinds will look fresher and cleaner with just a few minutes of careful attention.
With the dust removed we are now ready to prepare our natural cleaning solution for a deeper clean.
Step 3: Apply natural cleaning solution to stubborn spots
Now that you have removed the dust, it is time to tackle those stubborn spots and grime that seem to have made a permanent home on your blinds. According to E Cloth, creating a simple natural cleaning solution using equal parts white distilled vinegar and water can work wonders.
Prepare your cleaning mixture by combining:
- White distilled vinegar
- Warm water
- Optional: Few drops of mild dish soap
As recommended by Architectural Digest, you can enhance your cleaning power by adding a sprinkle of baking soda for extra grime fighting capabilities. Lightly mist your microfiber cloth with the solution rather than saturating the blinds directly.
Work methodically across each slat, applying gentle pressure to lift away dirt and stains. Focus on areas with visible marks or accumulated grime. The key is to clean thoroughly without oversaturating the material.
Pro Tip: Always test your cleaning solution on a small inconspicuous area first to ensure it does not damage or discolor your specific blind material.
Move slowly and deliberately, allowing the natural cleaning agents to break down stubborn spots. Remember that patience is your best tool in achieving a truly deep clean.
With your blinds now spot free and sparkling, we are ready to move on to the final drying and finishing steps.
Step 4: Wipe and dry blinds thoroughly for a streak-free finish
Your hard work cleaning the blinds comes down to this final crucial step: achieving a spotless streak-free finish. Proper drying is just as important as the cleaning process itself to prevent water spots and potential damage to your window treatments.
Start by using a clean dry microfiber cloth to gently pat and wipe each slat. Work systematically from top to bottom ensuring you remove all moisture. Use light dabbing motions rather than aggressive rubbing which might leave lint or cause potential damage.
For different blind materials use these specific approaches:
- Wooden blinds need extra gentle patting
- Fabric blinds require careful blotting
- Vinyl or plastic blinds can handle slightly more pressure
If you have multiple sets of blinds consider using separate microfiber cloths to prevent cross contamination and ensure each set gets individual attention.
Pro Tip: Always keep a few dedicated clean microfiber cloths specifically for drying to avoid reintroducing dust or dirt.
Open your windows slightly after cleaning to allow air circulation. This helps eliminate any residual moisture and prevents potential mildew growth. Natural airflow is your best friend in achieving those final sparkling results.
Check each slat carefully to confirm no water droplets remain. Your patience in this final stage determines whether your blinds look professionally cleaned or just hastily wiped down.
Check out our guide on maintaining window treatments for long term care tips that will keep your blinds looking pristine between deep cleaning sessions.
Step 5: Inspect blinds to ensure spotless, residue-free results
The final and most critical step in your blind cleaning journey is a thorough inspection. This is where you transform from a cleaning novice to a detail oriented professional who ensures every single slat meets your highest standards.
Begin by stepping back and examining your blinds from different angles and lighting conditions. Natural daylight works best for revealing any missed spots or lingering residue. Move closer and systematically check each individual slat starting from the top moving downward.
Focus your inspection on these key areas:
- Edges and corners where dust tends to accumulate
- Bottom rail where grime frequently builds up
- Spaces between slats that are easy to overlook
- Areas near cords or mounting brackets
Pro Tip: Use a clean white cloth to gently run across slats. If the cloth picks up any dirt your cleaning is not yet complete.
If you discover any remaining spots simply revisit those specific areas with your microfiber cloth and natural cleaning solution. Patience is crucial in achieving professional grade results. Remember that thoroughness trumps speed in blind cleaning.
Explore our guide on maintaining window treatments to learn how to keep your blinds looking pristine between deep cleaning sessions. With practice your blind cleaning skills will become more refined and efficient.
Upgrade Your Window Treatments for Effortless Clean and Lasting Beauty
You have taken important steps in learning how to clean blinds naturally so your home stays fresh and healthy. But if you are tired of time-consuming cleaning routines or find your existing blinds are still collecting dust and stubborn spots despite your best efforts, there is a better solution ready for you. Discover our Best Sellers to see the most loved products that combine easy maintenance with a modern look.

Why keep spending extra time scrubbing old window treatments when you can choose high-quality, customizable blinds and shades that are designed for simple cleaning and long-term durability? With the newest styles featured on our New Arrivals page and the full product selection at Value Blinds Direct, you can find blinds that match your vision, improve your home’s air quality, and make everyday care effortless. Visit us today to browse, request free swatches, and transform your space with confidence.
Frequently Asked Questions
How do I gather natural cleaning supplies for cleaning blinds?
Start by assembling eco-friendly materials like white vinegar, warm water, microfiber cloths, witch hazel, a soft vacuum brush, and a clean spray bottle. Ensure each item is certified for environmental safety to minimize chemical exposure and impact on the environment.
What is the best way to remove dust from blinds before deep cleaning?
Use a microfiber cloth or a vacuum with a soft brush attachment to gently trap and lift dust from the top of the blinds down to the bottom. Work systematically from left to right with downward strokes for thorough dust removal and to avoid spreading debris.
How can I create a natural cleaning solution for stubborn spots on my blinds?
Mix equal parts white distilled vinegar and warm water for an effective natural cleaning solution. Optionally, you can add a few drops of mild dish soap for enhanced cleaning power, applying the mixture lightly to avoid oversaturating the blinds.
What steps should I take to ensure my blinds are streak-free after cleaning?
Wipe and dry each slat thoroughly using a clean dry microfiber cloth, applying light dabbing motions for different materials. Always check for moisture and ensure a thorough drying to prevent streaks and potential damage.
How do I inspect my blinds after cleaning to make sure they are spotlessly clean?
Carefully examine each slat from various angles and lighting conditions to spot any missed areas. Use a clean white cloth to test for lingering dirt by running it along the slats; if it picks up any residue, repeat the cleaning in those specific areas.
What is the best frequency for cleaning blinds naturally to maintain their appearance?
Aim to clean your blinds every 4-6 weeks to keep them looking pristine and free from allergens. Regular dusting and spot cleaning can help reduce the buildup and make the deep cleaning process easier each time.


