
How to Repair Broken Blinds: A Step-by-Step Guide
Broken blinds can turn even the brightest room into a daily headache. Most people think fixing them is a hassle or requires a whole new set, yet the majority of blind issues come down to just a few simple repairs like broken strings or stuck slats. You might be surprised to learn these repairs can often be handled with basic tools you already have at home, saving you both time and money.
Table of Contents
- Step 1: Assess The Damage To Your Blinds
- Step 2: Gather Essential Repair Tools And Materials
- Step 3: Remove The Blinds For Easy Access
- Step 4: Repair Or Replace Broken Components
- Step 5: Reinstall The Blinds And Test For Functionality
Quick Summary
| Key Point | Explanation |
|---|---|
| 1. Assess damage thoroughly before repair | Conduct a detailed inspection of all blind components to identify issues that need addressing. This informs repair strategies and prevents unnecessary costs. |
| 2. Gather essential tools for repair | Collect basic and specialized tools like screwdrivers and replacement cords to ensure you can effectively tackle the repairs needed for your blinds. |
| 3. Use proper techniques to remove blinds | Follow careful methods to remove blinds safely without causing damage, allowing for easier and more thorough repairs on your window treatments. |
| 4. Distinguish between repair and replacement needs | Determine if damaged components can be repaired or if replacements are necessary to restore full functionality of the blinds effectively. |
| 5. Test functionality after reinstallation | After reinstalling the blinds, ensure they operate smoothly by checking for alignment, movement, and any unusual noises to guarantee quality restoration. |
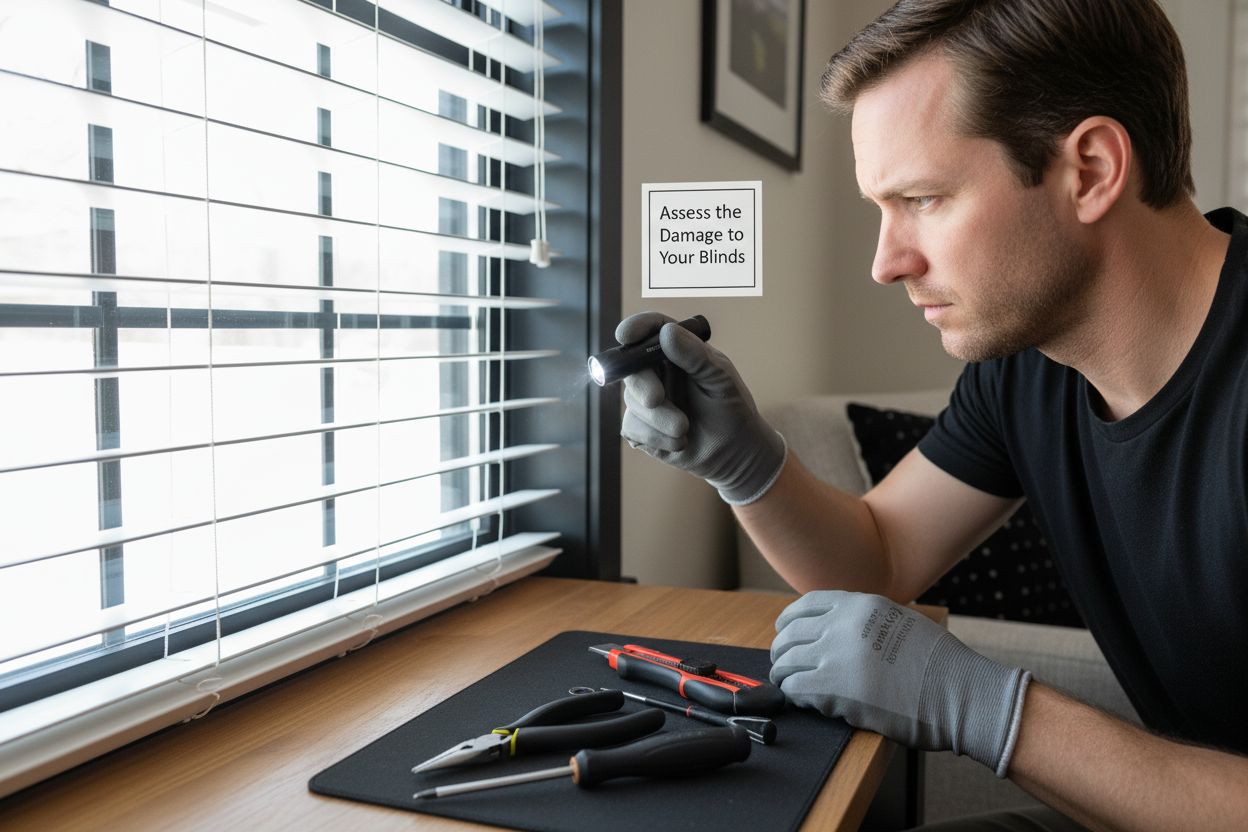
Step 1: Assess the Damage to Your Blinds
Repairing broken blinds starts with a careful and systematic assessment of the damage. Understanding the specific issues will help you determine the most effective repair strategy and avoid unnecessary work or expenses. This critical first step involves a thorough visual and functional examination of your window treatments.
Begin by fully extending the blinds and examining them in good lighting. Look for clear signs of damage such as bent or broken slats, frayed lift cords, damaged mounting brackets, or issues with the tilting mechanism. Some common problems include slats that won’t stay level, broken strings, or mechanisms that no longer rotate smoothly.
Carefully inspect each individual component of the blinds. Check the headrail where the lifting and tilting mechanisms are housed. Look for cracks, loose screws, or signs of wear that might indicate mechanical failure. Examine the bottom rail and verify it moves freely without catching or binding. Pay special attention to the lift cords running through the slats, checking for fraying, knots, or areas where the cord might have become disconnected.
As you perform your assessment, gently test the functionality of different blind components. Slowly raise and lower the blinds, watching for any irregular movements or resistance. Try rotating the slats to see if they adjust uniformly. Note any areas of stiffness, unusual sounds, or points where the blinds seem to stick or malfunction. These observations will be crucial in determining whether you can perform a DIY repair or need professional intervention.
For those interested in more detailed guidance on window treatment maintenance, check out our comprehensive guide to cleaning and maintaining window blinds. This additional resource can help you understand preventative care that might reduce future repair needs.
After a comprehensive assessment, categorize the damage into specific types:
- Structural damage to slats or rails
- Mechanical issues with lifting or tilting mechanisms
- Cord and string problems
- Mounting bracket or headrail complications
By systematically documenting these issues, you’ll be well prepared for the next steps in your blind repair process. Each type of damage will require a slightly different approach, so your careful assessment now will save time and frustration in subsequent repair stages.
Step 2: Gather Essential Repair Tools and Materials
After assessing the damage to your blinds, collecting the right tools and materials is crucial for an effective repair. A well-prepared workspace can make the difference between a successful fix and a frustrating experience. This step focuses on assembling a comprehensive toolkit that will enable you to address most common blind repair issues with confidence and precision.
Basic hand tools are the foundation of any blind repair project. You will need a few essential items that are likely already in your home toolkit. A small Phillips head screwdriver is critical for removing and replacing mounting brackets or adjusting internal mechanisms. Needle nose pliers provide the precision grip needed for manipulating small parts like cords or delicate mechanical components. An adjustable wrench can help with tightening or loosening stubborn connections, while a utility knife might be necessary for trimming frayed cords or making precise adjustments.
For more specialized blind repairs, consider adding some specific materials to your arsenal. Replacement lift cords in matching colors can restore functionality to damaged window treatments. Cord locks, small plastic or metal components that help control cord movement, are often inexpensive and can quickly resolve lifting mechanism issues. Slat clips or plastic brackets might be needed to replace broken connectors that hold blind slats in alignment.
Measurement tools play a significant role in successful blind repairs. A metal tape measure will help you accurately determine cord lengths or verify replacement part dimensions. A level can ensure your blinds are perfectly aligned after repairs, preventing future mechanical stress. Some repair enthusiasts also find painter’s tape helpful for marking positions or temporarily holding components in place during complex repairs.
Protective equipment should not be overlooked. Safety glasses can prevent small parts from causing eye injuries, while work gloves might protect your hands when handling metal brackets or making more aggressive repairs. A clean workspace with good lighting will make your repair process smoother and more precise.
The following table summarizes essential tools and materials needed for common blind repair tasks, helping you prepare your workspace and ensure a smooth repair process.
| Tool / Material | Purpose | Notes |
|---|---|---|
| Phillips head screwdriver | Remove/secure brackets and brackets screws | Critical for most blind types |
| Needle nose pliers | Grip small parts and manipulate cords | Useful for tight spaces |
| Adjustable wrench | Tighten or loosen connections | Sometimes needed for mounting |
| Utility knife | Trim frayed cords, precise adjustments | Exercise caution when cutting |
| Metal tape measure | Measure cord lengths and components | Ensures accurate replacements |
| Replacement lift cords | Fix worn or broken cords | Match color and thickness |
| Cord locks | Control cord movement | Replace if original is faulty |
| Safety glasses | Eye protection during repairs | Especially for metal components |
For those seeking additional guidance on window treatment maintenance, our comprehensive guide to installing cordless blinds offers valuable insights into handling delicate blind mechanisms.
Essential tools for blind repair include:
- Phillips head screwdriver
- Needle nose pliers
- Adjustable wrench
- Utility knife
- Metal tape measure
- Replacement lift cords
- Cord locks
- Safety glasses
By methodically gathering these tools and materials before beginning your repair, you will be well-prepared to tackle most blind repair challenges efficiently and effectively.

Step 3: Remove the Blinds for Easy Access
Removing your blinds requires patience, precision, and a systematic approach. This critical step provides the necessary access to perform thorough repairs and ensures you can work comfortably without being constrained by the window mounting. Safety and careful technique are paramount during the removal process to prevent additional damage to your window treatments or mounting hardware.
Begin by fully extending the blinds to their maximum length, which allows you to see all mounting points and provides clear access to brackets. Most blinds are secured using two primary mounting styles: inside mount brackets within the window frame or outside mount brackets attached directly to the wall or window trim. Carefully examine the type of mounting system your blinds utilize, as this will determine your removal strategy.
For inside mount blinds, you will typically find small release clips or tabs on the mounting brackets. Gently press these clips while simultaneously lifting the blind away from the bracket. Some designs require you to slightly tilt the blind downward while releasing to disengage the headrail. Move slowly and support the entire blind’s weight to prevent sudden drops that could cause additional damage. If the clips seem stiff, use your needle nose pliers to carefully manipulate them without applying excessive force.
Outside mount blinds often use screws to secure mounting brackets to the wall or window frame. Use your Phillips head screwdriver to carefully remove these screws, keeping them in a small container to prevent loss. Work methodically, removing one side of the bracket at a time to maintain balance and prevent the blind from falling unexpectedly. If the screws are painted over or seem stuck, a utility knife can help carefully break the paint seal without damaging the surrounding wall.
For those interested in more detailed guidance on blind maintenance, our comprehensive guide to changing blind slats offers additional insights into handling delicate window treatments.
Key precautions during blind removal include:
- Always support the blind’s full weight during removal
- Work slowly and deliberately
- Keep track of all screws and mounting hardware
- Avoid sudden movements that could cause additional stress
Once removed, place the blinds on a clean, flat surface with enough space to work comfortably. Organize your mounting hardware and take a moment to clean the blinds and inspect them thoroughly before beginning repair work. This methodical approach sets the stage for successful blind restoration.
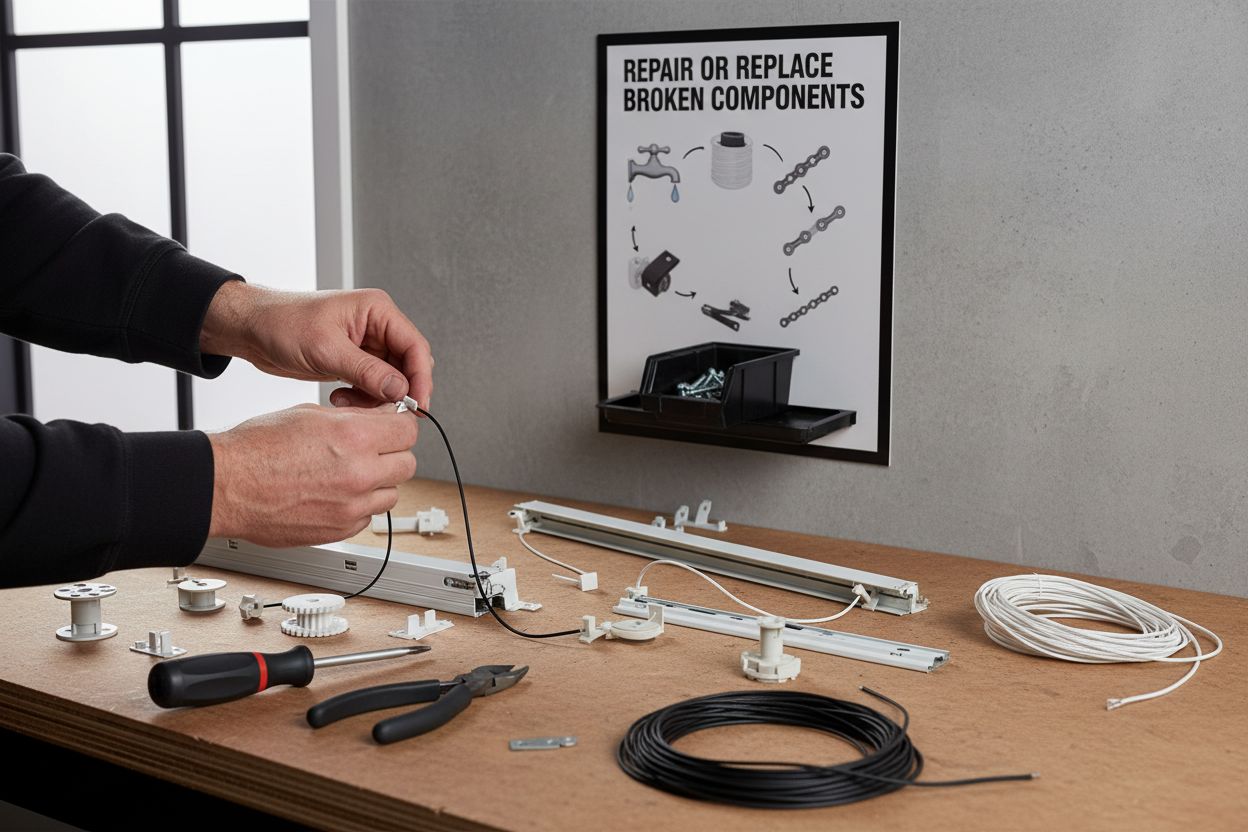
Step 4: Repair or Replace Broken Components
Repairing broken blind components demands careful attention and a strategic approach. This critical step transforms your assessment and preparation into actual restoration, addressing specific damage identified during earlier stages. Understanding when to repair versus replace is key to successful blind restoration.
Begin with damaged slats, which are often the most frequent repair need. Minor bends can sometimes be carefully straightened using pliers, applying gentle pressure to return the slat to its original position. For more significant damage, complete slat replacement becomes necessary. Matching replacement slats requires precise measurement and potentially sourcing components from the original manufacturer or finding compatible alternatives.
Cord mechanisms represent another complex repair area. Lift cords are particularly vulnerable to wear and fraying, requiring meticulous replacement techniques. According to home maintenance guidelines, replacing lift cords involves carefully threading new cord through the blind’s internal routing system, ensuring proper tension and alignment. Use needle nose pliers to guide the new cord through small openings, maintaining consistent length and preventing twisting or knotting.
Mechanical components like cord locks, tilting mechanisms, and mounting brackets often require complete replacement rather than repair. When purchasing replacement parts, bring your original components or precise measurements to ensure compatibility. Specialty hardware stores and online retailers specializing in window treatments can provide exact matches or suitable alternatives. Take photos of the damaged components to assist sales representatives in identifying the right replacement.
Some repair scenarios might involve more intricate fixes. Headrail damage, for instance, could require carefully realigning internal tracks or replacing entire sections. This demands a steady hand and potentially consulting manufacturer instructions specific to your blind model. Some complex repairs might ultimately prove more cost effective by purchasing new blinds, especially if multiple components are significantly damaged.
Key considerations during component repair include:
- Verify exact measurements before purchasing replacements
- Match original component specifications precisely
- Test repaired mechanisms gradually
- Assess overall blind condition versus repair cost
After completing repairs, perform a comprehensive functionality test. Raise and lower the blinds multiple times, checking for smooth operation, even slat alignment, and consistent cord movement. Listen for unusual sounds and observe any irregular movements that might indicate incomplete or improper repair. Patience and methodical testing ensure your restored blinds will function effectively and look professionally repaired.
Step 5: Reinstall the Blinds and Test for Functionality
Reinstalling your repaired blinds marks the final stage of your restoration project. This crucial step requires precision, patience, and a methodical approach to ensure your window treatments function perfectly after repair. Proper reinstallation is just as important as the repair work itself, determining the long term success of your efforts.
Begin by carefully aligning the mounting brackets, referencing the marks or positions you noted during initial removal. If you are working with inside mount blinds, ensure the headrail fits smoothly into the bracket clips without forcing or twisting. For outside mount installations, position the brackets exactly where they were originally mounted, using your level to confirm perfect horizontal alignment. Small variations can cause significant operational issues, so take your time during this process.
Secure the mounting brackets using the original screws, tightening them evenly but not over tightening, which could strip the threads or warp the bracket. If the original screw holes seem worn, consider using slightly larger screws or installing wall anchors for additional stability. Gently test the brackets’ stability by applying light pressure before fully installing the blind.
For those dealing with more complex window treatment systems, our guide to troubleshooting motorized blinds offers additional insights into advanced installation techniques. Understanding nuanced mounting requirements can prevent future operational issues.
Once mounted, perform a comprehensive functionality test. Raise and lower the blinds multiple times, observing smooth cord movement and consistent slat alignment. Check the tilting mechanism by rotating the wand or cord, ensuring slats move uniformly without catching or binding. Listen for any unusual sounds that might indicate misalignment or incomplete repair. Pay special attention to the bottom rail’s movement and verify that the blind extends and retracts completely without resistance.
Key verification steps include:
- Confirm horizontal alignment using a level
- Test full range of motion multiple times
- Check cord and tilting mechanism smoothness
- Verify no unusual sounds during operation
- Ensure even slat positioning at all heights
If you encounter any persistent issues during testing, do not hesitate to readjust the mounting brackets or revisit earlier repair steps. Patience and attention to detail will ensure your blinds not only look restored but function as smoothly as when they were new.
This troubleshooting table organizes common blind problems, their possible causes, and solutions referenced throughout the guide to assist you during the repair and testing process.
| Problem | Possible Cause | Solution |
|---|---|---|
| Slats won’t stay level | Bent or broken slats | Straighten or replace slats |
| Blinds won’t raise/lower smoothly | Frayed/damaged lift cords | Replace lift cords |
| Slats don’t rotate evenly | Faulty tilting mechanism | Repair or replace tilter |
| Stiff or sticking movements | Dust/debris or misaligned components | Clean, realign, or lubricate parts |
| Loose mounting | Worn or stripped bracket screws | Use larger screws or anchors |
| Unusual noises during operation | Misalignment or incomplete repair | Readjust installation, retest |
Tired of Wasting Time on Blind Repairs? Upgrade Your Space Instead
Fixing broken blinds can be frustrating. If you find yourself constantly dealing with bent slats, worn cords, or faulty lifting mechanisms, you are not alone. Sometimes, even after your best DIY efforts, blinds still fail to look or operate as you want. Why struggle with time-consuming repairs when a customized, long-lasting solution is within reach? Discover our Best Sellers and explore the most trusted options for modern window treatments.

Experience the difference with Value Blinds. Shop our wide range of styles, enjoy expert support, and give your home the perfect finishing touch today. If you want to see what is trending right now, check out our New Arrivals for the latest in style and innovation. Do not let the hassle of old repairs delay your home transformation. Visit us now and take the first step toward effortless style and durability.
Frequently Asked Questions
What are common issues that can occur with blinds?
Common issues include bent or broken slats, frayed lift cords, damage to mounting brackets, and tilting mechanism problems that prevent the slats from adjusting smoothly.
How do I assess the damage before attempting to repair my blinds?
Begin by fully extending the blinds and examining them under good lighting for any visible damage. Check each component, including slats, lift cords, headrail, and mounting brackets, while also testing their functionality.
When should I choose to repair blinds instead of replacing them?
If the damage involves minor issues like bent slats or frayed cords, repairs may be feasible. However, if multiple components are significantly damaged or the blinds no longer function properly after repairs, replacement might be more cost-effective.
What tools do I need for repairing my blinds at home?
Essential tools include a Phillips head screwdriver, needle nose pliers, adjustable wrench, utility knife, metal tape measure, replacement lift cords, and cord locks. Protective equipment like safety glasses and work gloves is also recommended.


