Corner Window Blinds: Measure, Choose, and Install Right
For most 90° corner windows, the fastest reliable approach is to measure each side from the corner outward, pick a cellular or reversed-roll roller shade, and choose a mitred headbox for a seamless look or a butt-joint box for an easier retrofit. This one decision tree covers the majority of corner window situations you’ll encounter.
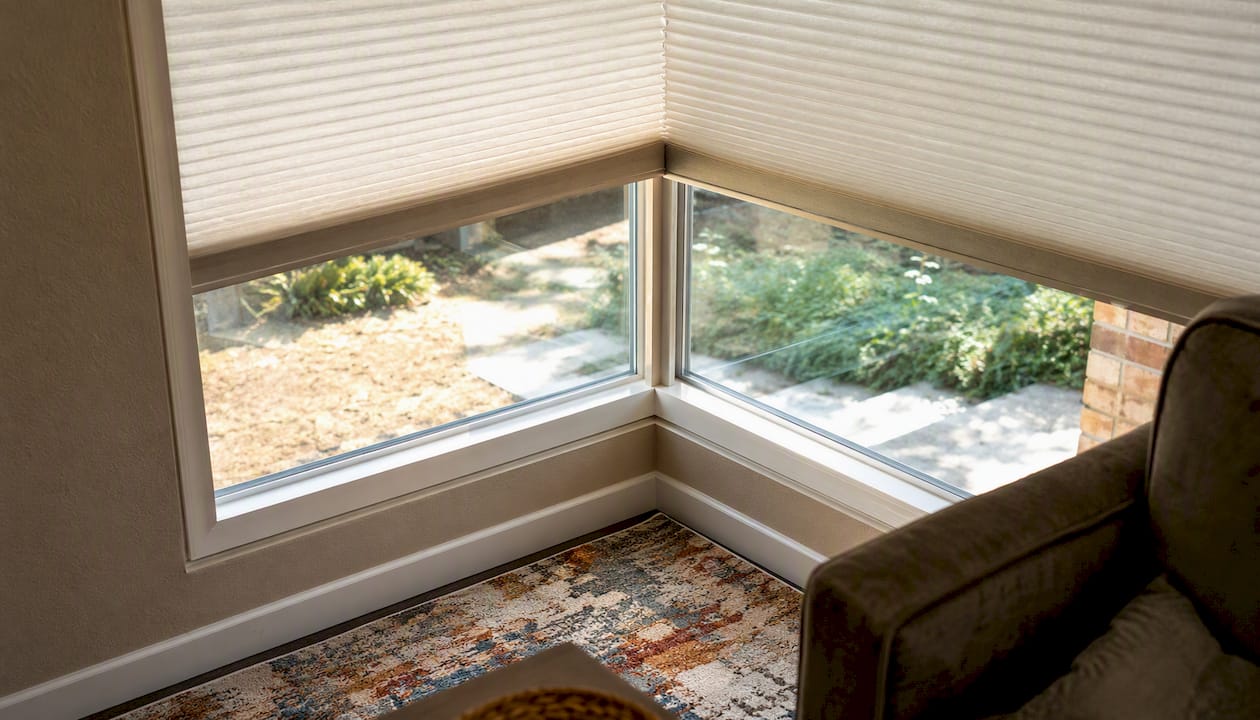
Quick recommendation: Cellular shades are the go-to for inside-mount corner installations because their compact profile lets both blinds sit close together at the corner with minimal gap.
Before you order anything, here are your three immediate next steps:
- Measure each window side from the corner outward, recording width, drop, and reveal depth separately for each pane.
- Pick your mount type — inside mount for a clean look, outside mount for flexibility, and decide whether you want a mitred or butt-joint headbox.
- Order with vendor support — request a sketch confirmation, swatch samples, and motor wiring diagrams if you’re going motorized.
Table of Contents
- How do you measure a 90° corner window for blinds?
- What mounting and headbox options work for corner windows?
- Which blind styles actually work best in corner windows?
- When do motorized or zip-guided systems make sense?
- DIY installation checklist for corner blinds
- How do you fix light gaps and alignment problems at corners?
- What do corner blinds typically cost, and when should you hire a pro?
- How to order custom corner blinds and what to expect from vendor support
- Key Takeaways
- The case for going custom vs. keeping it simple
- Valueblindsdirect makes custom corner blinds straightforward
- Useful sources and further reading
How do you measure a 90° corner window for blinds?
The single most important principle: measure each window side independently, starting from the deepest point of the corner and working outward. Never treat a corner window as one unit. Each pane gets its own width, drop, and reveal depth recorded separately.
Inside-mount measurement steps
- Measure the width of each window opening at the top, middle, and bottom of the frame. Record the narrowest measurement. Vendors typically deduct 1/4" to 3/8" for clearance, so give them the exact frame dimension and let them apply the deduction.
- Measure into the corner. Place your tape at the very back of the reveal where the two windows meet. Record how far each window extends from that corner point to the outer edge of its frame.
- Measure the drop at the left, center, and right of each opening. Use the shortest measurement for inside mount.
- Measure the reveal depth. Most inside-mount blinds need at least 2" of depth (3" or more for motorized). Note any obstructions like handles, locks, or mullions that reduce usable depth.
- Sketch the corner. Mark which side is left and which is right when facing the window, note the corner depth, and flag any trim or sill projections.
Outside-mount measurement steps
- Measure the width you want the blind to cover, adding at least 1.5" on each side beyond the frame for light blockage.
- Measure the drop from where the headrail will mount to the sill or floor, adding 2"–3" for overlap at the bottom.
- Note wall depth and any trim that could interfere with bracket placement.
The “butt” blind: which side goes first?
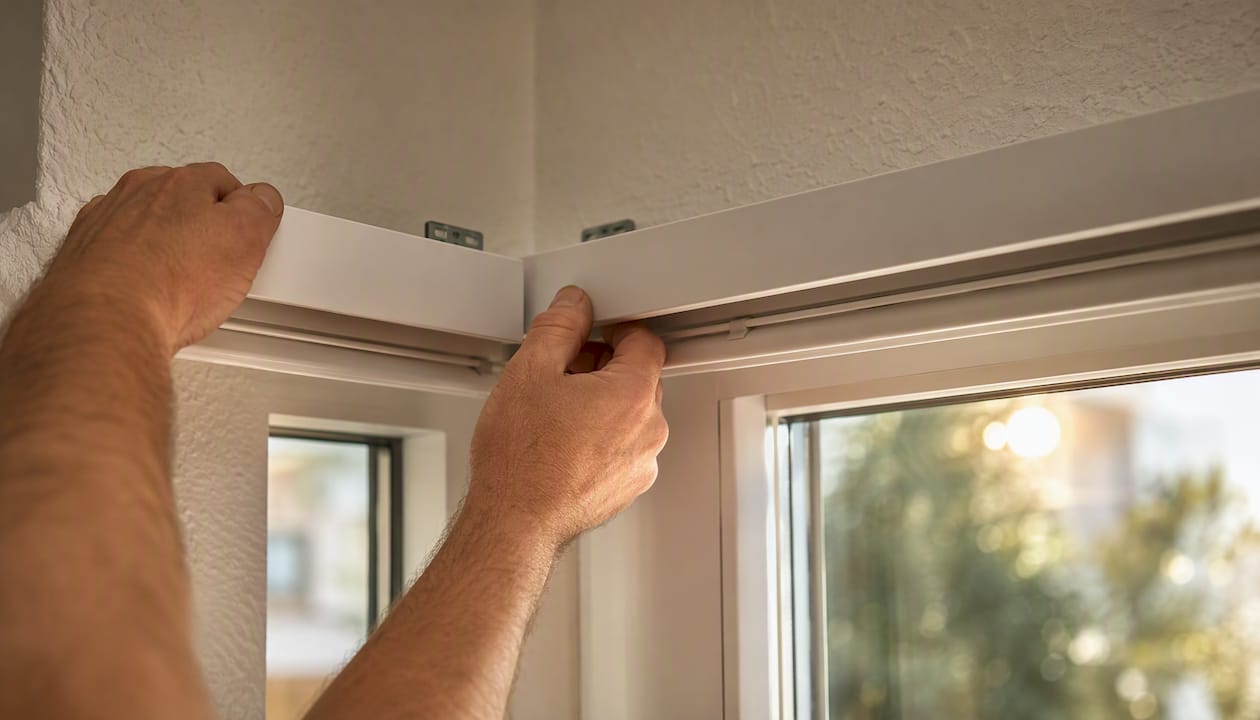
One blind will be the butt blind — it mounts flush against the corner wall. The other blind passes in front of it. The butt blind’s headrail sits deeper in the corner; the passing blind’s headrail overlaps it slightly. Choose the side with more wall clearance as the butt blind. If both sides are equal, pick the side that gets less direct sunlight so the overlap shadow is less noticeable.
| Measurement | Inside Mount | Outside Mount |
|---|---|---|
| Width | Narrowest of 3 readings; vendor deducts clearance | Frame width + 1.5" per side minimum |
| Drop | Shortest of 3 readings | Desired coverage + 2"–3" overlap |
| Reveal depth | Min. 2" (3"+ for motorized) | N/A — mounts on wall/trim |
| Corner depth | Measure from corner back to frame edge | Note trim projection |
Pro Tip: Never measure the trim face as your width — measure the inside of the frame opening. Trim-to-trim measurements are the most common DIY mistake, and they’ll give you a blind that’s too wide to fit inside the reveal.
What mounting and headbox options work for corner windows?
Mitred headboxes produce a seamless, symmetrical look at the corner join, but they require precise 45° cuts and professional-level installation. Butt-joint boxes are far more forgiving for retrofits and DIY projects — one box simply butts against the other at the corner, and a small gap is covered by the passing blind’s fabric.
| Mount / Headbox Type | Best For | Install Difficulty | Gap / Blackout | Motorization | Typical Cost / Lead Time |
|---|---|---|---|---|---|
| Mitred concealed box | Seamless aesthetics, new builds | High — pro recommended | Excellent with side channels | Yes | Higher cost; 3–6 weeks |
| Butt-joint box | Retrofit, DIY, budget-conscious | Low to medium | Good; one blind passes other | Yes | Moderate; 2–4 weeks |
| Outside mount (no box) | Maximum flexibility, uneven reveals | Low | Moderate; add side channels | Yes (cordless or motorized) | Lowest cost; 1–3 weeks |
| Double-height stacked box | Tight corners, minimal horizontal gap | High — pro recommended | Excellent | Yes | Higher cost; 4–6 weeks |
| Recessed pelmet / recess track | New construction or full renovation | Very high — plan early | Best possible | Yes | Highest cost; 6–10 weeks |
Side channels: when do you actually need them?
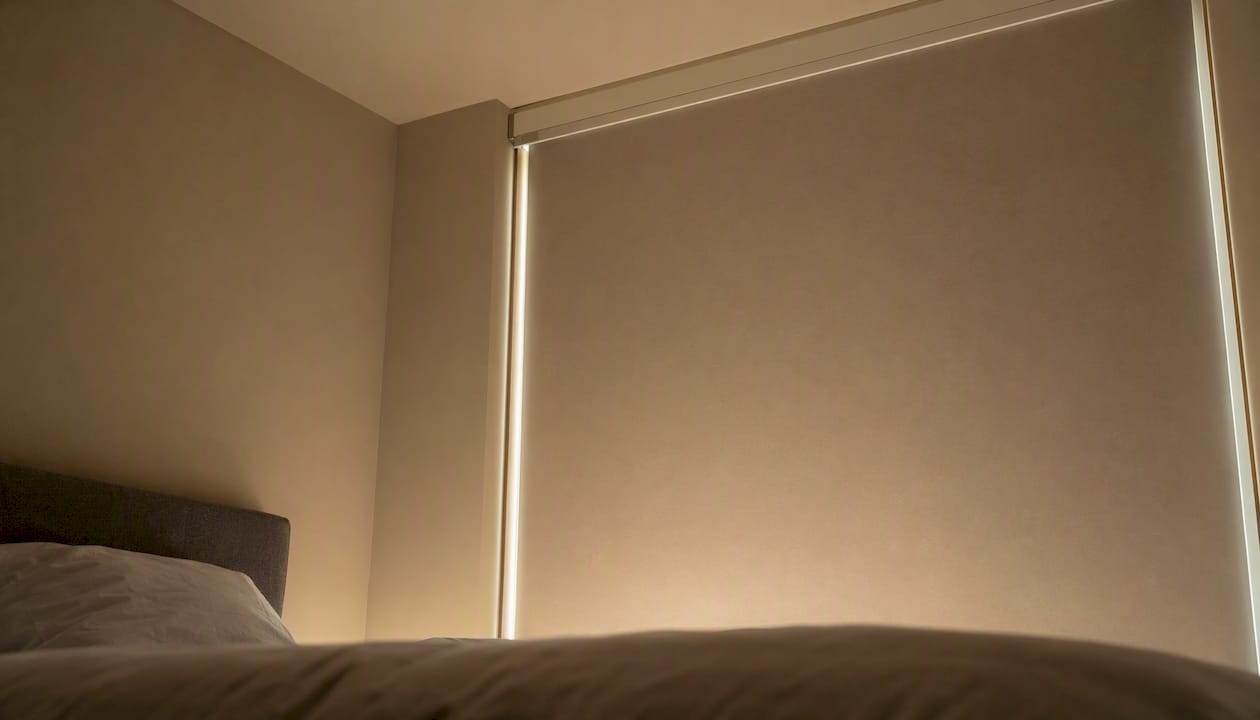
Side channels are aluminum or fabric-wrapped tracks that guide the blind’s edge along the wall, sealing out light at the sides. They’re worth adding when you need true blackout performance — a bedroom, nursery, or media room. The trade-off is that they reduce the visible glass area slightly and make the installation look more industrial. For living rooms where light control (not blackout) is the goal, skip them and rely on a reverse-roll fabric position instead.
Recessed boxes and pelmets
If you’re building new or doing a full renovation, planning window treatments before construction is the single most effective way to get a seamless result. A recessed headbox or pelmet built into the ceiling line during framing lets both blinds disappear completely when raised. Retrofitting that same result afterward is significantly harder and usually more expensive. If you’re mid-renovation right now, this is the moment to plan it. 🏗️
A double-height concealment box is a clever middle ground: two blinds are stacked vertically inside one taller box, so both can travel toward the glass without creating a large horizontal gap between their headrails. It’s an advanced option, but it solves the gap problem elegantly when a full recess isn’t possible.
Which blind styles actually work best in corner windows?
Cellular (honeycomb) blinds and reversed-roll roller shades are the most practical choices for inside-mount corner installations. Their compact profiles let two blinds sit closely together at the corner with the smallest possible gap. Here’s how each major style stacks up.
Cellular (honeycomb) shades ⭐ Top pick
- Compact headrail fits tight reveals (often under 2" depth)
- Energy-efficient honeycomb cells add insulation value at corner glass, which tends to lose more heat than centered windows
- Can be concealed behind pelmets or headboxes for a clean look
- Available cordless and motorized
- Stack size is small, preserving the view when raised
Roller shades
- Reverse-roll orientation (fabric falling toward the room) positions the fabric closer to the corner, reducing the light gap
- Slim headrail works well in tight reveals
- Motorized versions allow synchronized operation for glass-on-glass corners
- Stack is minimal when raised
- Fabric choice matters: blackout fabrics with side channels give strong light control; solar fabrics preserve the view
Roman shades
- Bulkier stack when raised — can block part of the view at the top of the window
- Beautiful aesthetic, especially in living rooms and reading nooks
- Less practical for tight inside-mount corners because the folded stack adds depth
- Best used outside-mount where stack size isn’t constrained by the reveal
Venetian blinds (horizontal slats)
- Slats can be angled to direct light away from the corner join, which is a nice trick
- Harder to fit in tight reveals due to headrail depth
- Dust accumulates on slats at corner angles, making cleaning trickier
- Not ideal for blackout; gaps between slats let light through at the corner
Woven wood / natural shades
- Adds warmth and texture — great for living rooms and sunrooms
- Weave gaps mean limited light control; not suitable for blackout needs
- Outside mount works better than inside mount for most woven styles
- Motorized woven shades are available and look stunning in panoramic corner settings
| Style | Corner Gap | Stack Size | Light Control | Motorization | Best Corner Use |
|---|---|---|---|---|---|
| Cellular | Small | Minimal | Good to blackout | Yes | Inside mount, insulation priority |
| Roller (reverse roll) | Smallest | Minimal | Good to blackout | Yes | Inside or outside mount |
| Roman | Medium | Large | Good | Yes | Outside mount, aesthetic priority |
| Venetian | Medium | Medium | Moderate | Limited | Outside mount, light direction |
| Woven wood | Large | Medium | Low | Yes | Outside mount, texture/warmth |
Pro Tip: For thermal performance at corner glass, choose a cordless cellular shade with a blackout or room-darkening liner. The honeycomb cells trap air against the glass, and the cordless lift keeps the profile slim enough for most inside-mount corner reveals.
When do motorized or zip-guided systems make sense?
For glass-on-glass corner windows — where two panes meet at the corner with no wall section between them — zip-guided and motorized roller systems are the best technical solution. They remove the need for a visible corner guide rail and let both sides operate simultaneously, preserving the panoramic view that makes glass-on-glass corners worth having in the first place. 🪟✨
How these systems work
Zip-guided systems use a fabric with a beaded or zipped edge that runs inside a slim aluminum channel. At the corner, a patented joining mechanism connects the two channels so both blinds travel together without a bulky central post. Synchronized dual motors (one per blind) are controlled by a single remote, app, or smart home hub, so both sides raise and lower in perfect unison.
Single-motor setups drive one blind while a mechanical linkage pulls the second — simpler and less expensive, but less precise for large or heavy fabrics.
When motorized is worth the investment:
- Your corner window is floor-to-ceiling or spans more than 6 feet per side
- Preserving an unobstructed panoramic view is a priority
- You want smart home integration (Alexa, Google Home, or a dedicated hub)
- Manual operation would require a ladder or awkward reach into the corner
When to stick with manual:
- Windows are standard height (under 84") and easily reachable
- Budget is a primary constraint
- The corner has a wall section between panes (not true glass-on-glass)
Design constraints to plan for: motorized systems need a headbox with at least 3" of depth for the motor housing, access for wiring (hardwired or battery pack), and precise bracket alignment so both blinds travel plumb. Budget extra time for the electrician if you’re going hardwired.
DIY installation checklist for corner blinds
Most DIY installs go smoothly when you mount the butt blind first, use it as your alignment reference, and then fit the passing blind in front. Rushing the sequence is the most common reason corners end up misaligned. 🔧
Step-by-step installation
- Gather your tools: drill, level, pencil, measuring tape, screwdriver, wall anchors (for drywall), and a helper for larger blinds.
- Mark bracket positions for the butt blind. Use a level to confirm the marks are perfectly horizontal. For inside mount, mark inside the frame; for outside mount, mark on the wall or trim.
- Install the butt blind brackets and headrail. Snap the headrail into the brackets and test that it sits level. This blind sets the reference height for the entire corner.
- Lower the butt blind fully and check that the fabric hangs plumb. Adjust bracket shims if needed.
- Mark bracket positions for the passing blind, matching the same height as the butt blind’s headrail. The passing blind’s headrail will sit slightly in front of the butt blind’s.
- Install the passing blind brackets and headrail. Confirm both headrails are at the same height and that the passing blind’s fabric overlaps the butt blind’s fabric at the corner by at least 1"–2".
- Test both blinds through a full raise and lower cycle. Check for fabric skew, uneven roll, or binding at the corner.
- For motorized installs: connect motor wiring before snapping headrails into brackets. Test the motor direction before final mounting — reversing direction after installation is a pain.
Safety note: Use a sturdy step ladder rated for your weight plus tools. For drywall installs, always use wall anchors rated for the blind’s weight. Never run motor wiring yourself if you’re connecting to a hardwired circuit — hire a licensed electrician for that step.
Pro Tip: If the fabric on a roller shade skews to one side when lowered, the headrail isn’t perfectly level. Loosen the bracket on the high side, slip a thin cardboard shim behind it, and re-check with a level before tightening.
How do you fix light gaps and alignment problems at corners?
The most common corner blind problems each have a direct fix — no need to start over.
- Light gap at the corner join: Switch to a reverse-roll fabric position so the fabric falls toward the room and sits closer to the corner. Alternatively, add side channels to seal the edge, or use a butt-joint setup where the passing blind’s fabric overlaps the butt blind by at least 1"–2".
- Uneven fabric stack when raised: Re-tension the spring mechanism (for cordless) or adjust the roll stop on the motor controller. If the fabric is rolling unevenly, the headrail may not be level — re-check with a level and shim as needed.
- Blackout failure at the corner: Side channels are the most reliable fix. A pelmet or valance above the headrails also blocks top-edge light leakage. For the corner join specifically, one blind passing in front of the other eliminates the gap entirely.
- Blind won’t sit flat against the glass: The reveal depth may be too shallow. Switch to an outside-mount bracket or use a low-profile headrail designed for shallow reveals.
- Fabric bunching at the corner: The passing blind may be too wide. Confirm the width measurement and check that the headrail isn’t contacting the butt blind’s bracket.
Pro Tip: To minimize visible hardware while maximizing blackout, use a butt-joint setup with the passing blind’s fabric in reverse-roll orientation. That combination closes the corner gap without adding side channels, keeping the look clean. Add a slim fabric-wrapped pelmet above both headrails if you still see top-edge light leakage.
What do corner blinds typically cost, and when should you hire a pro?
Retrofit off-the-shelf options are the fastest and least expensive route. Custom concealed headboxes and motorized zip systems sit at the other end of the spectrum — worth it when the architecture demands it, but a real budget commitment.
| Solution Type | Typical Cost Range | Lead Time | What Drives Cost Up |
|---|---|---|---|
| Outside-mount retrofit roller or cellular | — | 1–3 weeks | Blackout fabric, larger sizes |
| Inside-mount custom cellular or roller | — | 2–4 weeks | Motorization, specialty fabrics |
| Butt-joint concealed headbox (custom) | — | 3–6 weeks | Fabric, motor, site measurement |
| Mitred concealed headbox (custom) | — | 4–8 weeks | Precision cuts, pro install, motor |
| Motorized zip-guided system | — | 6 weeks | Motor controls, wiring, site visits |
Note: Ranges reflect typical U.S. retail and custom fabrication pricing and will vary by region, fabric, and vendor.
When to hire a professional
- Glass-on-glass corners — with no wall section between panes — zip-guided systems require precise channel alignment that’s very hard to DIY.
Planning treatments during a renovation is the smartest way to avoid the highest costs. Integrating a recessed headbox during framing costs a fraction of what it takes to retrofit one later.
How to order custom corner blinds and what to expect from vendor support
When ordering custom corner blinds, give your vendor clear measurements for each side, specify your mount type and headbox preference, request a sketch confirmation before fabrication, and ask for motor wiring diagrams if you’re going motorized. That checklist prevents the most common order errors.
What to confirm before your order is placed
- Measurement verification: confirm the vendor has your width, drop, and reveal depth for each window side separately.
- Headbox type: mitred, butt-joint, or outside mount — and which side is the butt blind.
- Motor specification: single motor with linkage, synchronized dual motors, battery pack, or hardwired.
- Side-channel requirement: yes or no, and which sides need them.
- Fabric and finish: request swatches before committing to a color or opacity level.
- Lead time and warranty: confirm fabrication timeline and what the return or remake policy covers.
- Installation support: ask whether the vendor provides installation instructions, video guides, or a measurement helpline.
Valueblindsdirect offers a Window Treatment Design Studio where you can get measurement guidance, browse product options, and confirm your corner configuration before placing an order. Free swatches are available so you can check fabric opacity and color in your actual lighting conditions before committing.
What good vendor support looks like for corner windows: Your vendor should confirm measurements in writing, specify which blind is the butt blind, provide a headbox diagram or sketch, and offer a clear remake or adjustment policy if the fit isn’t right. If a vendor can’t confirm your corner configuration before fabrication, that’s a red flag worth taking seriously.
Key Takeaways
Cellular and reversed-roll roller shades with a butt-joint headbox give most homeowners the best balance of fit, light control, and DIY-friendly installation for 90° corner windows.
| Point | Details |
|---|---|
| Measure each side independently | Record width, drop, and reveal depth from the corner outward for each pane separately. |
| Choose headbox based on goals | Mitred boxes for seamless aesthetics; butt-joint for retrofit ease and DIY tolerance. |
| Reverse roll closes the gap | Specifying reverse-roll fabric orientation at order time reduces the corner light gap without side channels. |
| Motorized zip systems for glass-on-glass | Synchronized motors and zip-guided channels preserve panoramic views but add significant cost and lead time. |
| Valueblindsdirect for custom support | Use the Design Studio and free swatches to confirm your corner configuration before fabricating. |
The case for going custom vs. keeping it simple
There’s a version of this decision that gets overcomplicated fast. Homeowners see glass-on-glass corner windows in design magazines and assume they need a $2,000 motorized zip system for every corner in their house. Most of the time, that’s not true.
If your corner windows have even a small wall section between the panes — even 2"–3" of drywall — a butt-joint inside-mount setup with a reversed-roll cellular shade handles the situation cleanly and affordably. The gap at the corner join is small, the install is manageable for a competent DIYer, and the result looks intentional rather than improvised.
Custom concealed solutions earn their cost when architectural cohesion genuinely matters: a living room with floor-to-ceiling glass, a primary bedroom where blackout is non-negotiable, or a renovation where the headbox can be built into the ceiling line from the start. In those cases, the investment pays off every day in how the room looks and functions.
The mistake worth avoiding is spending custom money on a retrofit situation that a well-chosen off-the-shelf blind would have solved just as well. Design professionals note that unified treatments make a space feel larger and more polished — and that effect doesn’t require a mitred headbox. It requires choosing the right fabric, the right opacity, and the right mount type for your specific corner.
Start with the simpler solution. Upgrade only when the simpler one genuinely can’t do the job.
Valueblindsdirect makes custom corner blinds straightforward
Corner windows don’t have to mean complicated orders. Valueblindsdirect gives you cordless and motorized cellular shades built for tight inside-mount reveals, plus roller shades that can be specified in reverse-roll orientation to close the corner gap from day one. Free swatches let you confirm fabric opacity and color in your actual space before you commit to a custom order.

The Window Treatment Design Studio walks you through your corner configuration step by step — mount type, headbox style, fabric, and motor options — so your order arrives ready to install, not ready to guess at. Order your swatches, confirm your measurements with the design team, and get your corner windows covered the right way. 🎉
Useful sources and further reading
- Corner Window Solutions — Renson — technical overview of zip-guided and motorized systems for glass-on-glass corners
- Corner Window Treatments — SavannaBrooke — design perspective on unified vs. mixed treatments and visual cohesion
- Bay Window Blinds: Best Types, Fit, and Style Tips — Valueblindsdirect — related multi-plane window fitting guidance
- Valueblindsdirect Blinds Collection — full product catalog for cellular, roller, roman, and woven options