How to Measure Windows for Roller Blinds Perfectly
TL;DR:
- Accurate window measurement is essential before ordering roller blinds to ensure a proper fit and avoid costly mistakes.
- Measuring at three points for width and height, using the smallest dimensions for inside mounts, and adding overlap for outside mounts are crucial steps.
Getting roller blinds that fit perfectly starts before you ever place an order. Knowing how to measure windows for roller blinds is the single most important step in the entire process, yet it’s where most homeowners make costly mistakes. A blind that’s even a quarter inch too wide won’t sit inside the frame, and one that’s too narrow leaves light gaps on the sides. This guide covers every step you need, from gathering your tools to measuring for inside and outside mount installations, so you can order with confidence and avoid the frustration of a poor fit.
Table of Contents
- Key takeaways
- How to measure windows for roller blinds: tools and prep
- Measuring for inside mount roller blinds
- Measuring for outside mount roller blinds
- Troubleshooting common measurement mistakes
- Verifying your measurements before ordering
- My take on why “close enough” never works
- Get the perfect fit with Valueblindsdirect
- FAQ
Key takeaways
| Point | Details |
|---|---|
| Measure three times per dimension | Take width and height at three separate points to catch uneven frames before ordering. |
| Choose your mount type first | Deciding between inside and outside mount changes how you take every measurement in this guide. |
| Use the smallest measurement | For inside mount, always order based on the narrowest width and shortest height you recorded. |
| Add overlap for outside mount | Outside mount blinds need 2 to 4 inches of extra width per side for proper light coverage. |
| Double-check before ordering | Accurate measurements directly reduce returns and poor-fit issues when buying custom roller blinds. |
How to measure windows for roller blinds: tools and prep
Before you hold up a tape measure, you need to make a few decisions. The right preparation separates a clean, professional result from a frustrating redo.
The tools you need
- A steel tape measure (not a fabric tape or a retractable plastic one)
- A pencil and notepad, or your phone’s notes app
- A step stool if your windows are tall
- A level, especially for outside mount installations
Reading to the nearest 1/8 inch is the standard for roller shade sizing. If your measurement falls between two 1/8-inch marks, round down. That small habit prevents ordering a blind that’s too large to fit.
Inside mount vs. outside mount: decide before you measure
Your mount type determines your entire approach, so lock this in first.
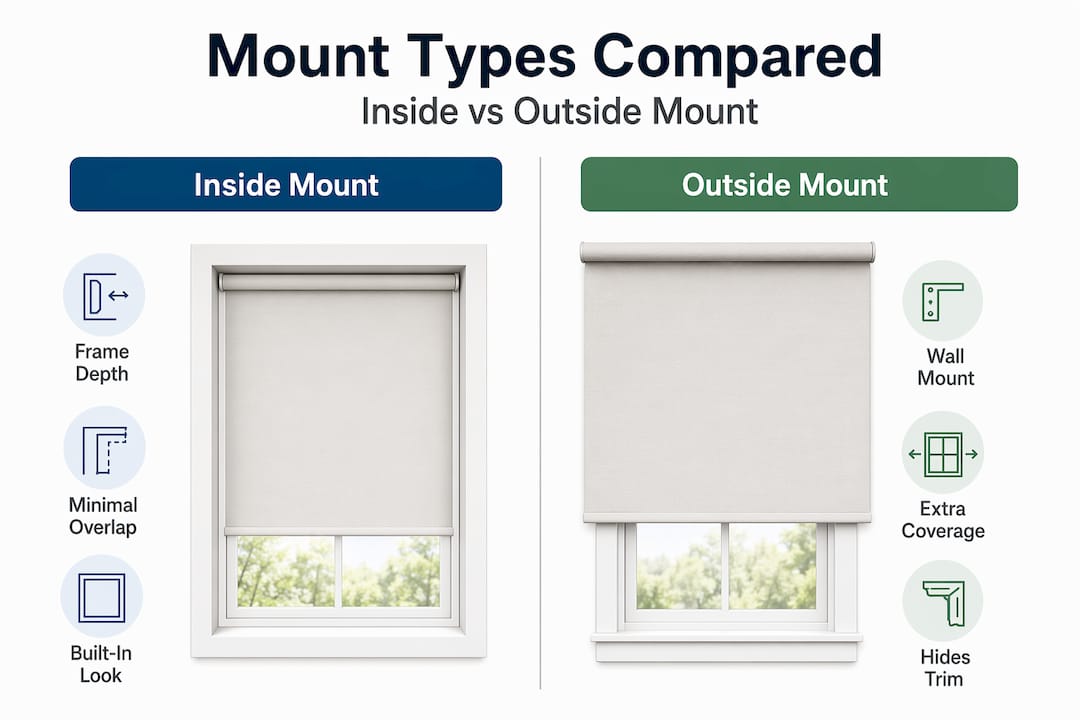
Inside mount means the blind sits inside the window recess. It gives a clean, built-in look but requires enough frame depth to accommodate the headrail. Check your window recess depth before committing.
Outside mount means the blind mounts on the wall or window casing above the opening. This works on any window, hides an ugly frame, and gives you total control over how much coverage you get.
| Mount type | Best for | Key measurement note |
|---|---|---|
| Inside mount | Deep-set frames, clean look | Use smallest recorded dimension |
| Outside mount | Shallow frames, maximum coverage | Add overlap allowance to actual opening |
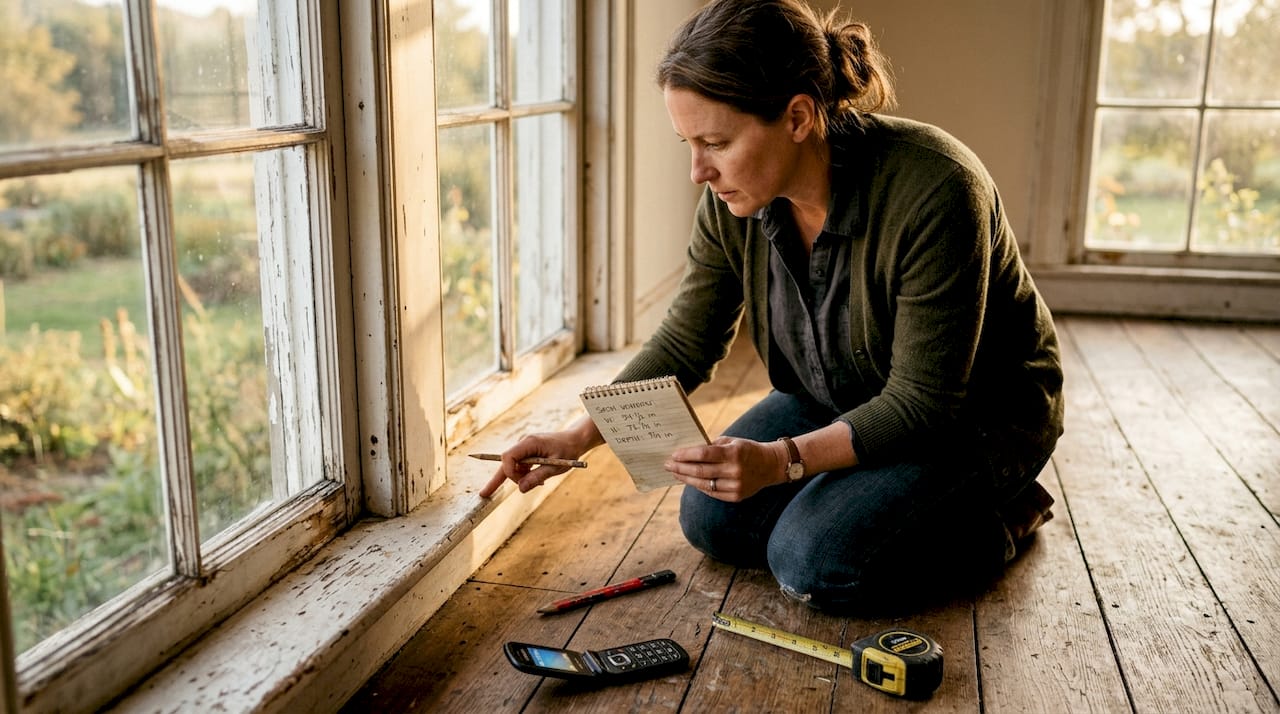
Pro Tip: Always measure at three points across the width (top, middle, bottom) and three points for height (left, middle, right). Window frames are rarely perfectly square, and finding the narrowest or shortest point before ordering saves you from a blind that won’t close or fit flush.
Measuring for inside mount roller blinds
Inside mount installation gives roller blinds a sleek, recessed look. The measuring process is straightforward, but the margin for error is tighter than outside mount.
Step-by-step width measurement
- Open your notepad and label three rows: Top, Middle, Bottom.
- Place your steel tape measure at the leftmost interior edge of the window frame at the top of the opening.
- Measure straight across to the right interior edge. Write down the exact figure to the nearest 1/8 inch.
- Repeat the same measurement at the middle of the window height.
- Repeat again at the bottom of the window opening.
- Circle the smallest number. That is your ordering width.
Using the smallest width measurement ensures the blind fits inside the recess without binding against the frame. Manufacturers typically apply a small deduction to the width you submit, so you don’t need to subtract anything yourself. Always confirm this with the supplier before ordering.
Step-by-step height measurement
- Label three more rows: Left, Center, Right.
- Measure from the top interior edge of the window frame straight down to the sill at the left side.
- Repeat at the center.
- Repeat at the right side.
- Use the smallest height measurement for your order.
Pro Tip: Write each measurement as “W x H” on a dedicated sheet and take a photo of the window after measuring. When you’re ordering online, having a photo next to your notes catches errors before you submit.
What to watch for in inside mount windows
Window frames in older homes are almost never perfectly square. Window casings measured at three points routinely show variations of 1/4 inch or more from top to bottom. That difference matters when the blind has to slide down inside the recess without catching. Also check that the recess is deep enough to accommodate the headrail. Most roller blind headrails need at least 2 to 3 inches of recess depth.
Measuring for outside mount roller blinds
Outside mount gives you more flexibility and is often the better choice for shallow windows or for anyone who wants maximum light blocking. The measuring approach is different because you’re defining coverage area, not just the opening size.
Step-by-step width measurement
- Measure the actual window opening width from frame edge to frame edge.
- Add your desired overlap on each side. The standard is 2 to 4 inches per side, which means adding 4 to 8 inches total to the opening width.
- Write down this final number as your blind width.
Outside mount roller blinds require overlap allowances on both sides for proper coverage and to prevent light from spilling around the edges. If light blockage is your primary goal, go with 3 to 4 inches per side. For a purely decorative installation where some light leak is acceptable, 2 inches per side is fine.
Step-by-step height measurement
- Decide where the blind will mount above the window. For maximum coverage, mount as close to the ceiling or crown molding as practical.
- Measure from your chosen mounting point straight down to your desired bottom point. That might be the sill, a few inches below the sill, or the floor for a dramatic look.
- Write this down as your blind height.
Consider clearance for any trim, hardware, or wall switches near the sides of the window. For motorized roller blinds, account for where the motor sits and whether it needs additional clearance above the opening.
Measure the height at least twice before ordering. Outside mount height directly controls how much of the wall the blind covers, and adding height after the fact means ordering a replacement.
Troubleshooting common measurement mistakes
Even careful DIYers run into problems. Here are the most common measurement errors and how to avoid them.
- Measuring only once at one point. A single measurement misses any variation in the frame. Skipping the three-point approach is the most frequent reason a blind arrives and won’t fit.
- Letting the tape sag. A metal tape held horizontally across a wide window can bow in the middle, adding a false inch or more. Keep the tape taut and level.
- Rounding in the wrong direction. For inside mount, always round down. Rounding up gives you a blind that’s physically too wide for the opening.
- Forgetting about double roller blinds. Double roller blinds require additional wall clearance because of the dual-roll mechanism. If you’re ordering a sheer and blackout combo, check that the wall space beside the window can handle two sets of brackets side by side.
- Ignoring frame condition. Warped, painted-over, or damaged frames can add unexpected bulk. Always measure inside the clear opening, not edge to edge of the trim.
Pro Tip: For irregular or arched window shapes, measure the widest and tallest points of the opening and note the shape clearly on your order. Many suppliers have specialty fitting options for non-rectangular windows.
“DIY approximate measurements often cause light gaps that undermine both the look and the thermal performance of window treatments.” Professional installers consistently point to precision in measuring as the single biggest factor separating a great result from a frustrating one.
If you’re uncertain about any measurement or dealing with a complex window layout, a professional measuring service is worth the cost. The price of one incorrect custom blind order almost always exceeds the cost of a professional consultation.
Verifying your measurements before ordering
Before you submit your order, run through this final checklist.
- Cross-reference every width measurement against your three recorded points and confirm you’re using the smallest for inside mount.
- Check that your height measurements are labeled correctly and reflect the mount type you chose.
- Confirm the blind you’re ordering matches your mount type (inside or outside).
- Look up the manufacturer’s deduction policy. Most suppliers deduct a small amount from inside mount width automatically. Know whether that applies to your order.
- Review your window’s orientation. Sun path and window orientation influence which fabric type and light-filtering level makes sense, so factor that into your product selection as well as your measurements.
| Final check | Why it matters |
|---|---|
| Three-point width confirmed | Catches frame irregularities that a single measurement misses |
| Mount type verified | Inside vs. outside mount requires completely different measurement logic |
| Manufacturer deduction noted | Prevents ordering a blind that arrives undersized by surprise |
| Height double-checked | Outside mount height controls total coverage area |
Correct measurements reduce returns and fit issues significantly. Custom roller blinds are made to your submitted dimensions, so a measurement error becomes a product error. Taking ten extra minutes to verify pays off every time.
My take on why “close enough” never works
I’ve seen hundreds of roller blind installations, and the ones that disappoint almost always trace back to the same moment: someone measured once, got a number that felt right, and ordered. The blind arrives, and it’s either a struggle to fit inside the frame or it leaves a noticeable gap on one side that lets in a stripe of light every morning.
What I’ve found in my experience is that DIYers tend to underestimate how much variation exists inside a single window frame. A quarter inch might sound like nothing, but on a roller blind, that’s the difference between a clean drop and a blind that cants slightly to one side or binds when you try to roll it up.
The double roller blind trend is worth a special mention here. They’re genuinely useful for controlling both light and privacy in one system, but the measurement requirements are more demanding. You need to account for two headrails, the gap between them, and the wall clearance on both sides. I’ve watched homeowners order a great double roller setup only to find there’s no room on the side wall for one set of brackets.
My advice: treat measurement as a skill worth doing properly, not a box to check. The three-point method takes three extra minutes per window. That three minutes is the best investment you’ll make in your blind project.
— Sunny
Get the perfect fit with Valueblindsdirect

Now that you have your measurements in hand, ordering the right blind is the satisfying part. Valueblindsdirect offers a full range of custom roller blinds including cordless and no-drill options, blackout fabrics, and motorized shades built to the exact dimensions you submit. Every product is made to order, which means your careful measuring translates directly into a blind that fits and performs the way you expect.
If you want expert help selecting the right style, fabric, and fit for each room, the Window Treatment Design Studio at Valueblindsdirect walks you through the full customization process. From sheer rollers to full blackout motorized systems, the team can match your measurements to the right product so you don’t have to guess. Use the measurements you took today and order with confidence.
FAQ
What is the best way to measure windows for roller blinds?
Use a steel tape measure and take measurements at three points for both width and height inside the window frame. For inside mount, use the smallest recorded dimension to order.
How much overlap should I add for outside mount roller blinds?
Add 2 to 4 inches of overlap on each side of the window opening, for a total addition of 4 to 8 inches to your actual opening width.
Do I need to deduct anything from my inside mount measurement?
Most manufacturers apply their own deduction to inside mount width automatically. Confirm this policy with your supplier before submitting your order.
Can I measure for roller blinds without a steel tape measure?
A steel tape is strongly recommended. Fabric tapes stretch, and retractable plastic tapes can bow across wide windows, leading to inaccurate readings that affect the final fit.
How do I measure for double roller blinds?
Measure the window the same way as a standard roller blind, then confirm that the wall space beside the window can accommodate two sets of brackets and the additional headrail width that a dual-roll mechanism requires.
Recommended
- How to Measure Blinds to Fit Your Windows Perfectly
- How to Measure for Blinds: Accurate DIY Guide for Windows
- How to Install Blinds for a Perfect Window Fit
- How to measure windows for custom blinds that fit

Value Blinds®
Trusted window treatments provider
Value Blinds® is a trusted provider of Greenguard, OEKO-TEX, and FSC-certified window treatments based in Portland, Oregon. Specializing in sustainable, motorized, smart-controlled, and outdoor-ready blinds and shades, the company is built on a foundation of simplified shopping, premium eco-friendly materials, and transparent pricing without the inflated cost.