Blind Installation Substrates: Match Anchors Before You Drill
Common mounting substrates for window blinds include drywall or gypsum board, wood studs, metal studs, masonry like concrete or brick, plaster and lath, tile or stone, and stucco or other exterior cladding. The rule that matters most: anchor into solid backing whenever you can, and when you can’t, pick an anchor rated for that exact substrate with the right diameter and embedment depth. Get this match wrong and even a beautiful shade will sag, pull loose, or crack the wall around it.
TL;DR:
- Wood studs provide the strongest hold; use a #12 to #14 screw embedded at least 1 inch, and avoid board edges that can split.
- Heavy or motorized blinds need at least one stud fixing; wide headrails should spread their load across at least three fixing points.
- Metal studs need #12 to #14 self drilling screws or toggles; concrete and brick need masonry anchors, and installers should avoid cracked concrete.
- Exterior fasteners must pass through stucco into structural backing, then receive continuous sealant or approved foam to keep water out.
- Before drilling, confirm substrate and finish thickness with a stud finder, pilot hole, magnet, or trim edge; hire a professional if backing remains unclear.
Table of Contents
- Substrate types explained: what to expect when mounting blinds
- Anchor and fastener recommendations mapped to substrate
- How to assess your wall before you install
- Best practices for installing blinds on different substrates
- Our take on substrate-aware blind installation
- How we help you get the mount right
- FAQ
- Sources
Substrate types explained: what to expect when mounting blinds
Every wall tells you something different about how well it will hold a bracket, and knowing what you are working with before you drill saves you a patch job later.
Drywall and gypsum board come in single and double-layer configurations, and that thickness changes how much weight the wall alone can hold. For lightweight blinds, hollow-wall anchors can work in drywall by themselves, but for anything with real heft, like a wide cellular shade or a motorized headrail, you want to land at least one fixing into a stud.
Wood studs are the gold standard. A pilot hole and a quality wood screw into solid lumber will outperform almost any specialty anchor in drywall alone, which is why finding and using studs should be your first instinct, not your backup plan.
Metal studs are trickier. Thin-gauge steel framing does not grip a standard wood screw well, so self-drilling screws sized for steel, often in the #12-14 range, or toggle-style anchors that seat into the stud web are the better call, a detail echoed in technical installation documentation for window and door products.
Concrete, concrete block, and brick need masonry anchors rather than anything designed for wood or drywall. The same technical documentation lists 1/4 inch masonry anchors such as Tapcon as a common choice, along with a caution to avoid anchoring into cracked concrete and to confirm the material meets a minimum compressive strength before you commit to a fixing point.

Plaster and lath look solid but can be surprisingly brittle, especially older plaster that has started to separate from the lath behind it. Locate backing before loading any weight onto plain plaster, and treat it more like drywall than like solid wood.
Tile and stone demand a slower hand. A masonry bit, light pressure, and painter’s tape to stop the bit from wandering will reduce the risk of cracking, and in many cases a specialist anchor or an adhesive-mounted bracket avoids drilling altogether.
Stucco and other exterior claddings usually sit over a water-resistive barrier, so any fastener has to reach structural backing behind the finish and the penetration needs to be sealed afterward to keep moisture out.
Anchor and fastener recommendations mapped to substrate
Once you know your substrate, matching it to the right hardware becomes a quick lookup rather than a guessing game.
| Substrate | Recommended anchor | Typical diameter | Minimum embedment | Caution |
|---|---|---|---|---|
| Wood stud | Wood screw | #12 to #14 | 1 inch into solid wood | Avoid splitting near board edges |
| Drywall (no stud) | Toggle or hollow-wall anchor | Sized to anchor spec | Full wall thickness | Not for heavy or motorized units |
| Metal stud | Self-drilling screw or toggle | #12-14 | Full engagement with stud web | Thin-gauge steel strips easily if overdriven |
| Concrete or brick | Masonry anchor (e.g., Tapcon-style) | 1/4 inch | Per manufacturer embedment tables | Avoid cracked or spalled concrete |
| Plaster and lath | Wood screw into lath/stud or toggle | Match backing found | Reach solid backing | Brittle surface can crack under load |
| Stucco/exterior | Long screw through finish into structural backing | Per manufacturer spec | Beyond stucco thickness into framing | Seal penetration to prevent water entry |
The embedment column matters more than it looks. Manufacturer installation documentation is clear that anchors must extend beyond thin exterior finishes like stucco or wall dressing rather than stopping inside them, because a fastener that only grips the finish layer has nothing structural to hold onto. When a headrail is wide, spread the load across at least three fixing points instead of relying on two end brackets, and add a backing plate if the wall surface alone feels too thin to trust.
How to assess your wall before you install
A few minutes of testing up front tells you more than any guess ever will.
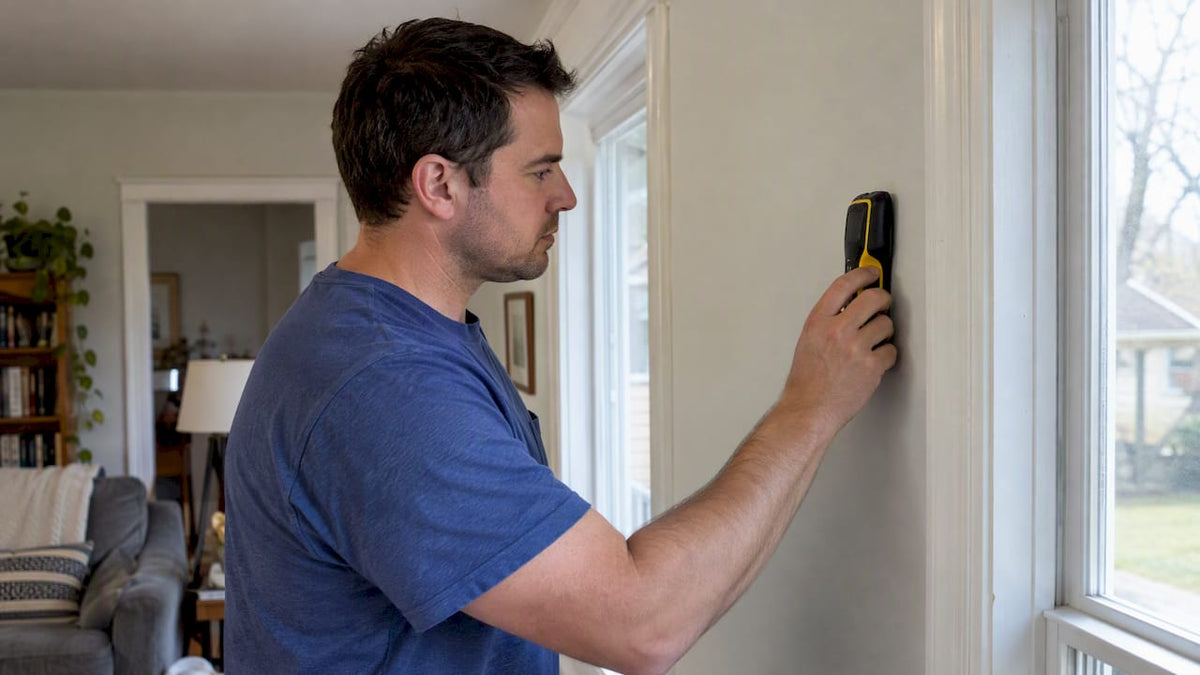
- Run a stud finder across the mounting area and mark every stud location before you touch the drill.
- Drill a small pilot hole in an inconspicuous spot to confirm the material: dust and resistance tell you drywall from plaster from masonry.
- Use a magnet near the surface to detect hidden screws or metal studs if the stud finder gives an unclear reading.
- Check a trim edge or outlet cover to measure finish thickness, especially on stucco or tiled walls where the surface layer can be deeper than expected.
- Inspect the window jambs and under any existing trim for signs of the original framing material.
- Write down what you find, substrate type, stud spacing, and finish thickness, before you order anchors or schedule installation.
If the wall turns out to be an unfamiliar composite, the backing is unclear, or the unit you are mounting is heavy or motorized, that is the moment to bring in a professional rather than push ahead on a guess. Our Pro Measure & Install service exists for exactly that kind of load-critical or uncertain-substrate situation.
Best practices for installing blinds on different substrates
Good habits here prevent the two most common complaints we hear: a bracket that pulls loose and a wall that ends up looking worse than before you started.
- Pre-drill every hole with a bit sized slightly smaller than the screw shank, and keep the drill at a moderate speed so you do not strip the hole before the anchor seats.
- Distribute weight across multiple fixings on wide headrails, and add a spanning bracket or backing plate when the substrate feels marginal.
- Match anchor embedment to the table above, and on stucco or similar claddings make sure the fastener reaches well past the finish layer into structural backing.
- On exterior mounts, follow the sequencing in ASTM E2112, which calls for the rough opening to be plumb, level, and square with the water-resistive barrier installed before the fixture goes in.
- Seal every exterior penetration with a continuous bead of sealant or approved foam, a practice detailed in AAMA and FMA installation guidance for keeping water out at the fastener site.
- For motorized or cordless units, plan for the extra dynamic load of the motor and route power or battery access before you commit to final fixing points.
Pro Tip: Keep a small notebook or phone note of every substrate and anchor you use per window. It makes reordering hardware or scheduling a repeat install painless months later.
If your project involves door frames or trim that share a wall with your blind mount, the substrate principles carry over directly, and practical guidance on working with framing during door installation covers similar ground from a different angle.
Our take on substrate-aware blind installation
We have watched enough installs go sideways to say this plainly: most blind failures are substrate failures, not product failures. A shade rated for years of daily use will still pull out of a wall if the anchor never reached solid backing in the first place. Our measurement guides and free swatches help you plan the visual side of a project, but the structural side deserves the same attention. When a wall looks uncertain, brittle plaster, unknown stucco depth, a metal stud you cannot confirm, that is worth a second look before you drill, not after.
— Sunny
How we help you get the mount right
Measurement guides and swatch programs help avoid guessing during blind installation. Browse our full range of blinds and shades to find a style that fits your room, then lean on our Pro Measure & Install service when your substrate looks tricky or your window calls for a motorized or heavier unit.

- Request a free swatch before you commit to a color or fabric.
- Use our measurement guides to record width, height, and depth before ordering.
- Consider professional measuring and installation when drywall, stucco, or masonry leaves you unsure about anchoring.
Ready to see what fits your window? Shop our full collection and get started today.
FAQ
What is the best substrate for mounting blinds?
Solid wood studs give the strongest, most reliable hold for any blind, heavy or light. When a stud is not available at your mounting point, choose an anchor rated for whatever substrate you actually have, whether that is drywall, metal stud, or masonry.
How do I know if my wall has metal or wood studs?
A stud finder set to metal detection will usually distinguish the two, and a magnet can confirm metal framing by picking up on screws or the stud itself. If results are unclear, a small pilot hole in an inconspicuous spot reveals the material directly.
Can I mount blinds on tile or stone without cracking it?
Yes, with a slower drilling technique: use a masonry bit, light steady pressure, and painter’s tape to keep the bit from slipping. Specialist anchors or adhesive-mounted brackets also avoid drilling into the tile altogether.
Do exterior blind or shade installations need special sealing?
Yes, any penetration through stucco or another exterior cladding should reach structural backing and then be sealed with a continuous bead of sealant or approved foam, as outlined in AAMA and FMA installation practices. This keeps water from tracking in around the fastener over time.
When should I use professional installation instead of doing it myself?
Professional installation makes sense when the substrate is uncertain, the unit is heavy or motorized, or the mount is on an exterior wall where sealing and structural backing both matter. Our Pro Measure & Install service is built for exactly those load-critical or ambiguous-substrate situations.
Sources
- ASTM E2112-23 standard practice for installation of exterior windows, doors and skylights
- AAMA/FMA installation practice excerpts (flashing, WRB, sealant)