Article: How to Install Window Blinds Without Drilling
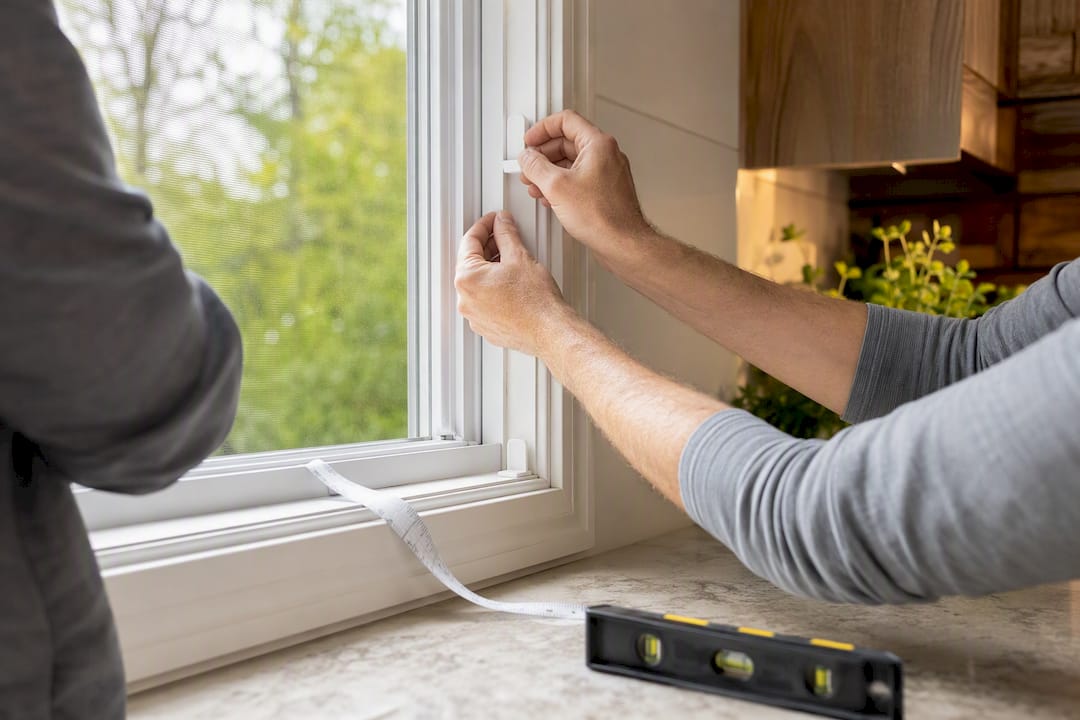
How to Install Window Blinds Without Drilling
You can install window blinds without drilling using tension mounts, twist-fit/no-drill brackets, adhesive brackets, or tension wire, and the right pick depends on your window type and the blind’s weight. If you’re a renter, start with tension mounts or Command-style adhesive brackets since both are fully reversible and won’t cost you your deposit.
- Tension mounts: best for square, snug inside recesses with lightweight to medium blinds.
- Twist-fit/no-drill brackets: ideal for roller and cellular shades with a compatible headrail.
- Adhesive brackets: the go-to when your surface is smooth (PVC, glass, painted trim that’s fully cured) and the blind is light.
- Tension wire/clamps: a good fit for lightweight shades or curtains on metal-frame or sash windows.
Adhesive brackets and tension mounts both skip the wall damage entirely, but the honest answer is that neither works for every window. Match the method to your frame and blind weight before you buy anything, and you’ll avoid the single biggest cause of no-drill failures: guessing.
Key Takeaways
The most reliable no-drill blind installation matches the mounting method to your recess depth, frame material, and the blind’s weight rather than relying on one universal technique.
| Point | Details |
|---|---|
| Match method to recess | Tension rods need 1.5 to 2 inches of square depth; adhesive needs a smooth, cured surface. |
| Prep beats product | Cleaning with isopropyl alcohol and full drying time explains most adhesive success or failure. |
| Cure time matters | Adhesive brackets need 24 to 72 hours before you hang any weight on them. |
| Heavy blinds need drilling | Wide or heavy wooden Venetians usually exceed no-drill weight limits and should be drilled. |
| Valueblindsdirect offers ready-fit options | Its cordless and no-drill collection and design studio help match blind weight to the correct mount. |
Table of Contents
- Tools and Materials You’ll Need Before You Start
- How Do Tension Rod Mounts Work for Blinds?
- What Are No-Drill Brackets and How Do They Fit Roller Shades?
- Are Adhesive Brackets Safe for Mounting Blinds?
- Can Tension Wire or Cable Systems Hold Blinds Without Drilling?
- Which No-Drill Method Works Best for Each Blind Type?
- How Do You Fix a No-Drill Blind That Keeps Falling?
- What’s the Right Way to Measure Before You Order Blinds?
- How Valueblindsdirect Supports Renter-Friendly No-Drill Installs
- Sources
Tools and Materials You’ll Need Before You Start
You don’t need a toolbox for this, but a few items make the difference between a blind that stays up and one that ends up on the floor.
- Tape measure (metal, not fabric, for accuracy)
- Isopropyl alcohol and a lint-free cloth for surface prep
- A small level
- Painter’s tape for marking bracket positions
- Spare adhesive pads or brackets in case of misalignment
For adhesive, high-bond VHB-style tape holds more weight but is harder to remove cleanly, while removable Command-style strips come off easier but carry lower weight ratings. Before you install anything, check your recess depth, frame material, and how old the paint job is. Fresh paint (under a few weeks) rarely bonds well with adhesive.
Pro Tip: Press a strip of your chosen adhesive to a hidden spot on the frame for 24 hours before committing. If it lifts paint or leaves residue, you just saved yourself a bigger repair.
How Do Tension Rod Mounts Work for Blinds?
Tension mounts work best for inside-mount installs in shallow-to-medium recesses with square jambs, which makes them one of the easiest no-drill methods to get right on the first try. Tension and spring-fit systems need a recess depth of roughly 1.5 to 2 inches, and they leave zero residue when you take them down.
Here’s how to fit one:
- Measure the recess width at the top, middle, and bottom, then use the smallest number.
- Extend the tension rod to match, leaving a small margin for compression.
- Compress the rod and position it inside the recess, pressing evenly on both ends.
- Check with a level to confirm it’s sitting straight, not angled.
- Test the tension by gently pulling down on the center of the rod. It shouldn’t shift.
Most tension rods handle lightweight to medium blinds, roughly up to the manufacturer’s stated width limit, but they struggle in recesses that are too wide or slightly out of square. Tension mounts perform well on snug fits but slip on openings that don’t hold consistent pressure across the full rod length.
A few things to keep in mind:
- Add foam rubber shims at the contact points if your jamb is vinyl. This spreads the pressure and prevents dents.
- Anti-slip tape on the rod ends adds extra grip without any adhesive residue.
- Never force a rod into a recess that’s too shallow. It will bow and eventually pop loose.
Pro Tip: If your window frame is painted wood, wrap the rod ends in a strip of felt before inserting. It protects the finish and quiets any rattle from drafts.
What Are No-Drill Brackets and How Do They Fit Roller Shades?
Twist-fit brackets snap directly into many inside-recess headrails, and they’re one of the most common no-drill options for roller and cellular shades. Clip-on supports that slide under the frame gasket are especially popular on PVC windows because the gasket gives the clip something to grip without adhesive or screws.
Before you buy, run through this compatibility check:
- Recess depth and profile: does your headrail shape match the bracket design?
- Blind weight: check the manufacturer’s stated limit before assuming twist-fit will hold.
- Frame material: PVC and vinyl work well; textured or uneven frames often don’t.
Installation is straightforward:
- Measure the recess at three points and confirm the headrail will fit with clearance.
- Align the brackets at each end of the recess, spacing them evenly.
- Snap the headrail into place, pressing until you hear or feel it lock.
- Check the blind hangs level across its full width.
- Raise and lower it a few times to confirm smooth, snag-free operation.
Manufacturer instructions vary more than you’d expect between brands, so follow the included guide rather than assuming one twist-fit system works like another. Some brackets are rated for cellular shades up to a specific width but not roller shades of the same size, since roller mechanisms carry more weight at the headrail. For more on inside-mount clearance requirements, our guide on measuring for inside mount blinds breaks down headrail depth in more detail.
Are Adhesive Brackets Safe for Mounting Blinds?

Adhesive brackets are the strongest no-drill option when you have a smooth, fully cured surface and a lightweight blind. They’re not the right call for every window, but when the surface cooperates, they’re fast, cheap, and completely reversible if you use the right product.
Here’s the installation sequence that actually holds:
- Clean the mounting surface thoroughly with isopropyl alcohol and let it dry completely.
- Mark your bracket positions with painter’s tape and a level.
- Peel the adhesive backing and press each bracket firmly for the time specified on the packaging, usually 30 seconds to a minute of solid pressure.
- Let the adhesive cure fully, 24 to 72 hours, before hanging any weight on it.
- Hang the blind and test gently before trusting it with a full open-close cycle.
Surface compatibility makes or breaks this method:
| Surface Type | Works With Adhesive? |
|---|---|
| Smooth PVC or vinyl | Yes |
| Glass | Yes |
| Painted metal | Yes |
| Textured or popcorn paint | No |
| Fresh paint (under 2 to 4 weeks) | No |
| Waxed, dusty, or oily surfaces | No |
Thorough cleaning with isopropyl alcohol and full drying time explain most of the difference between adhesive brackets that hold for years and ones that fail within a month. It’s rarely the product itself that fails. It’s the two minutes of prep skipped before installation.
Respect the stated load limit on the packaging, and avoid mounting adhesive brackets in direct sun exposure where surface temperatures climb, since heat softens most adhesives over time. For removal, warming the bond with a hair dryer before peeling slowly protects paint far better than yanking the bracket off cold.
Can Tension Wire or Cable Systems Hold Blinds Without Drilling?
Tension-wire systems work best for lightweight shades or curtains where a slim profile and low visibility matter more than heavy-duty holding power. They’re a smart pick for metal-frame or sash windows where a clamp can grip an existing lip without any adhesive at all.
- Identify two anchor points, typically the window’s existing sash channels or frame edges.
- Attach clamps or hooks to each anchor point without altering the frame.
- Run the wire or cable between them and tighten until taut.
Where this method falls short:
- Heavy blinds, especially wood or larger cellular shades, will sag or pull the wire loose over time.
- It depends entirely on having reliable anchor points. Weak or damaged sashes won’t hold tension.
- Expect some sag after a few months, which means periodic retightening.
Magnetic and clamp systems work particularly well here since they hook onto existing metal profiles without any adhesive step at all.
Which No-Drill Method Works Best for Each Blind Type?
Roller and cellular shades pair best with twist-fit brackets or adhesive mounts, Roman shades typically need tension rods, and heavy wooden Venetians usually call for drilling regardless of what any no-drill product claims.
| Blind Type | Best No-Drill Method | Weight Guidance |
|---|---|---|
| Roller shades | Twist-fit brackets or adhesive | Light to medium, check bracket rating |
| Cellular/honeycomb shades | Twist-fit brackets | Light, most common no-drill success story |
| Roman shades | Tension rods | Medium, needs a snug square recess |
| Mini blinds (aluminum) | Adhesive or twist-fit | Light, works well on smooth PVC frames |
| Venetian/wooden blinds | Tension wire for light versions only | Heavy versions generally need drilling |
A few red flags worth knowing before you order:
- Wide wooden Venetians almost always exceed adhesive and tension mount weight limits. No-drill methods work best for light and medium-weight blinds, and heavier wood styles are the clearest exception.
- If your recess is out of square by more than a small margin, skip tension rods and go with adhesive or clip-on instead.
- Motorized blinds add weight at the headrail, so double-check the bracket’s rated capacity even if the fabric itself is lightweight.
How Do You Fix a No-Drill Blind That Keeps Falling?
Most no-drill failures trace back to one of three causes: a dirty mounting surface, the wrong adhesive for the surface type, or a recess that’s slightly out of square.
- Adhesive won’t stick: the surface likely wasn’t cleaned with alcohol or wasn’t fully dry. Reclean and reapply.
- Bracket keeps slipping: the recess may be wider at one point than another. Remeasure at three heights.
- Blind sags on one side: weight isn’t distributed evenly across brackets. Add a third support point if your headrail allows it.
To reinforce a shaky install without drilling, add a secondary bracket at the center of the headrail to spread the load, or use a non-invasive strap looped around the frame for extra security on windier rooms.
Pro Tip: If a bracket keeps loosening in a high-traffic room, distribute the weight across one more contact point rather than relying on a single stronger adhesive pad. More contact area beats more grip.
When it’s time to move out, renter-safe removal is simple if you follow the right order:
- Warm the adhesive bond with a hair dryer on low heat for 20 to 30 seconds.
- Peel slowly at a low angle rather than pulling straight out.
- For stubborn spots, slide a length of fishing line behind the bracket to cut through the adhesive without lifting paint.
- Clean any residue with a small amount of isopropyl alcohol on a soft cloth.
What’s the Right Way to Measure Before You Order Blinds?
Measuring wrong is the number one reason no-drill installs fail before they even get a chance to prove themselves. Measure the inside recess at three points, top, middle, and bottom, and always order to the smallest width you find.
- Measure width at the top, middle, and bottom of the recess.
- Measure depth to confirm your recess can fit a tension mount (1.5 to 2 inches minimum) or a twist-fit headrail.
- Check for sash handles, locks, or trim that might obstruct the blind.
- If your recess is shallow or irregular, switch to an outside mount instead of forcing an inside fit.
Our full window measuring guide walks through templates for both mount types if you want a more detailed reference before ordering.
Pro Tip: Write down all three width measurements on the order form, not just the smallest one. If a bracket doesn’t sit right later, you’ll know exactly where the recess narrows.
How Valueblindsdirect Supports Renter-Friendly No-Drill Installs
Valueblindsdirect carries a dedicated line of cordless and no-drill products built specifically for the kind of damage-free installs covered above, including lightweight cellular and roller shades sized to fit tension mounts and twist-fit brackets without extra hardware.
- Cordless and no-drill product collections sized for light to medium installs
- Custom sizing built from your own three-point measurements
- Free fabric swatches so you can check color and texture before ordering
- Detailed measurement guides and a warranty on every custom order
A blind that’s cut to your exact recess width, down to the smallest of your three measurements, is far less likely to need a bracket adjustment two weeks after installation.
Our step-by-step no-drill installation guide covers bracket selection based on your recess type, and customer support is available if you’re unsure which mount matches your window before you order.
When No-Drill Makes Sense and When It Doesn’t
No-drill methods earn their keep on rentals and lightweight blinds, but heavy wood Venetians or wide window walls are where I’d stop pretending tension and adhesive can do a screw’s job. Pick no-drill for light-to-medium blinds on well-matched frames. Choose drilling when the blind is large, heavy, or holds up something you can’t afford to have fall.

Ready-Made No-Drill Blinds Without the Guesswork
Skip the trial-and-error of testing brackets on your own, and shop a collection already built around no-drill installs. Valueblindsdirect’s cordless and no-drill collection sizes lightweight roller and cellular shades specifically for tension and twist-fit mounts, so you’re not stuck guessing whether a product will hold in your recess.

If you’re not sure which mount fits your window, the Window Treatment Design Studio walks through your measurements with you and matches you to a product built for your exact recess depth and blind weight. Order a few free swatches first to check color and texture, then place your order once you’ve confirmed the fit.
Sources
For more specifics on adhesive ratings, removal methods, and measurement templates, these resources go deeper on individual steps:
- Install a Roller Blind Without Drilling: Complete | Ombre Interieur
- No-Drill Window Blinds: Complete Guide
- How to Install Window Blinds Without Drilling: Easy No-Tool Guide | Drill Villa