
Install No Drill Blinds for Windows Easily and Securely
Most American homeowners want a quick way to update windows without damaging their trim or drilling holes. Up to 60 percent say convenience and energy savings top their wish list when choosing window coverings. No drill blinds offer an attractive solution that improves home comfort and makes installation stress free. This guide shows how easy it is to measure, select, and install stylish blinds while protecting your investment and saving energy year round.
Table of Contents
- Step 1: Measure and Prepare Your Window Frame
- Step 2: Select Suitable No Drill Blinds for Windows
- Step 3: Attach Mounting Brackets Securely
- Step 4: Install Blinds into the Mounted Brackets
- Step 5: Test Operation and Adjust for Accuracy
Quick Summary
| Essential Insight | Detailed Explanation |
|---|---|
| 1. Measure Window Dimensions Precisely | Accurate measurements prevent fitting issues once blinds are selected and installed. Ensure you measure at three points for accuracy. |
| 2. Clean and Prepare the Window Frame | Thorough cleaning of the frame removes any obstructions that could weaken adhesive bonds, ensuring a secure mount for the blinds. |
| 3. Choose the Right Type of Blinds | Selecting blinds tailored to your needs balances aesthetics and functionality, enhancing your space and improving energy efficiency. |
| 4. Securely Attach Mounting Brackets | Properly installed mounting brackets provide stability and prevent damage to the window while ensuring blinds operate smoothly. |
| 5. Test Blind Operation Thoroughly | After installation, test the blinds multiple times to confirm smooth operation and make any adjustments needed for optimal performance. |
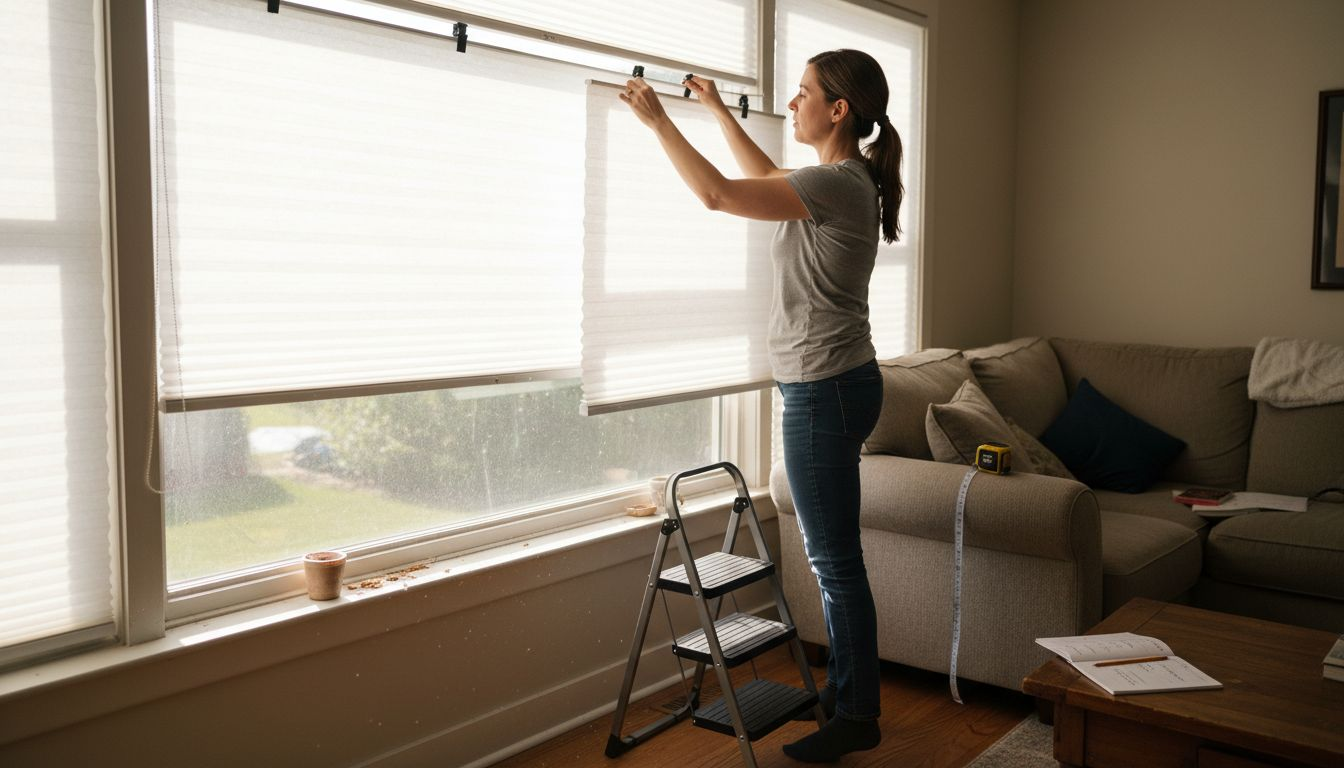
Step 1: Measure and Prepare Your Window Frame
Successfully installing no drill blinds starts with precise window frame measurements and thorough preparation. Your goal is to create a stable, secure mounting surface that will support your new window treatments without damaging the existing structure.
Begin by clearing the window area completely and gathering essential tools: a metal measuring tape, level, pencil, and notepad. Measure the window width at three points (top, middle, and bottom) to confirm consistency, as slight variations are common in older homes. Accurate window measurements are critical for ensuring your blinds will fit perfectly. Pay special attention to the inside width of the window frame, measuring from the inside edge to the inside edge horizontally and vertically.
Verify the window frame’s structural integrity by checking that it is square, plumb, and level. Use a carpenter’s level to confirm the frame is not warped or uneven, which could impact your blind installation. If you detect significant irregularities, you might need to make minor adjustments or consult a professional. Surface preparation also includes cleaning the window frame thoroughly, removing any dust, debris, or old mounting residue that could interfere with the installation.

Pro tip: Always measure twice and record your measurements immediately to prevent costly mistakes during blind selection and installation.
Below is a summary checklist to ensure correct window preparation before installing no drill blinds:
| Preparation Step | Why It’s Important | Common Mistake to Avoid |
|---|---|---|
| Measure width in three spots | Ensures accurate fitting | Using only a single measurement |
| Check for squareness | Prevents misaligned blinds | Ignoring uneven window frames |
| Clean the mounting surface | Maximizes adhesive strength | Leaving dust or old residue |
| Record measurements promptly | Minimizes costly errors | Forgetting or mixing up numbers |
Step 2: Select Suitable No Drill Blinds for Windows
Selecting the right no drill blinds transforms your windows from basic openings to stylish, functional design elements. Your goal is to find window treatments that perfectly balance aesthetics, energy efficiency, and practical installation requirements.
Start by analyzing your specific window needs through the lens of energy-efficient window coverings. Consider factors like room orientation, sunlight exposure, privacy requirements, and interior design style. Different blind types offer unique benefits: cellular shades provide exceptional insulation, roller shades create sleek minimalist looks, and venetian blinds offer precise light control. For rooms with intense sunlight, consider lighter colored materials that reflect heat and reduce solar gain. Custom measurements are crucial since windows vary significantly in size and shape.
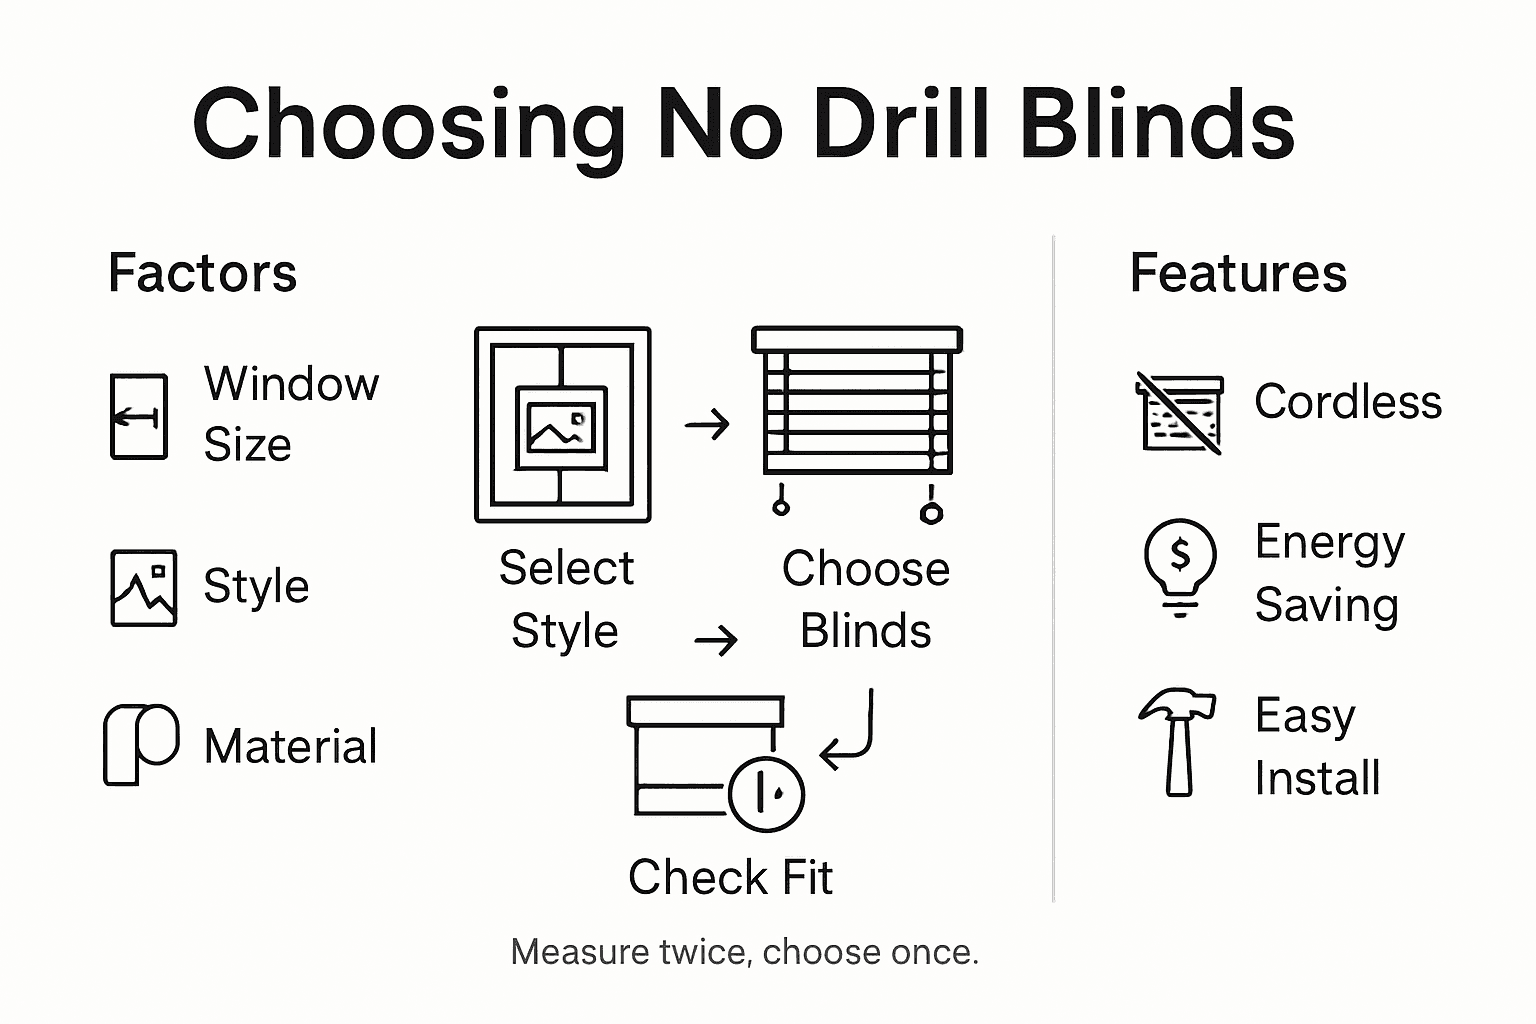
When evaluating no drill blind options, prioritize cordless designs for enhanced safety and a streamlined appearance. Look for materials that match your functional needs lightweight aluminum for modern spaces, bamboo for natural textures, or vinyl for moisture-resistant areas. Pay attention to mounting compatibility with your specific window frame type to ensure a secure, seamless installation that requires no drilling or permanent modifications.
Pro tip: Order free fabric swatches to test color and texture in your actual living space before making a final selection.
Here’s a quick comparison of popular no drill blind types and their ideal uses:
| Blind Type | Key Benefit | Best Use Case | Typical Material |
|---|---|---|---|
| Cellular Shades | Superior insulation | Bedrooms, living rooms | Fabric |
| Roller Shades | Sleek, minimalist look | Offices, kitchens | Vinyl or fabric |
| Venetian Blinds | Adjustable light control | Studies, common areas | Aluminum or wood |
| Bamboo Shades | Natural texture, eco-friendly | Sunrooms, eco spaces | Bamboo |
| Vinyl Blinds | Moisture resistance | Bathrooms, laundry | Vinyl |
Step 3: Attach Mounting Brackets Securely
Successfully installing no drill blinds requires precise and secure bracket attachment that protects your window frame and ensures long-lasting performance. Your objective is to create a stable mounting system without causing any permanent damage to the window structure.
Carefully review the mounting hardware and follow installation guidelines for secure attachment. Most no drill blind systems utilize strong adhesive mounting brackets or tension-based installation techniques. Clean the window frame surface thoroughly with rubbing alcohol to remove any dust or oils that might compromise the adhesive bond. Align the mounting brackets exactly according to the manufacturer’s specifications. Each bracket must be positioned symmetrically and at precisely the same height to prevent uneven blind placement. Press the brackets firmly against the surface and hold for the recommended duration to ensure maximum adhesion.
Pay special attention to the mounting surface material. Different surfaces like wood, vinyl, or metal may require specific adhesive types or mounting techniques. Test the bracket’s strength by gently tugging after installation to confirm a secure connection. Always distribute the weight evenly across multiple mounting points to prevent stress on any single attachment point. If you encounter any uncertainty about the mounting surface or bracket compatibility, consult the manufacturer’s instructions or seek professional advice.
Pro tip: Use a laser level to ensure perfectly straight and aligned bracket placement for professional looking results.
Step 4: Install Blinds into the Mounted Brackets
With your mounting brackets securely in place, you are now ready to transform your window by installing the no drill blinds. This final step requires precision and careful attention to ensure smooth operation and a professional appearance.
Refer to the installation guidelines for proper blind placement to ensure correct positioning. Most no drill blinds feature a simple snap or slide mechanism that allows them to connect seamlessly with the pre installed mounting brackets. Begin by holding the blind at a slight angle and gently hooking one side into the first bracket. Slowly rotate the blind towards the second bracket, applying even pressure to ensure a secure fit. Listen for a soft clicking sound that indicates the blind is locked into place. Carefully test the blind by gently pulling and adjusting to confirm it is level and moves smoothly within the brackets.
Check each end of the blind to verify it is completely seated in the mounting brackets. Some no drill blind systems include small locking tabs or tension mechanisms that provide additional stability. If your blinds include specific adjustment features, take time to fine tune their positioning to achieve the perfect alignment. Pay close attention to the operating mechanism ensuring it moves freely without catching or resistance. If you encounter any difficulties during installation, review the manufacturer instructions or contact their customer support for specific guidance.
Pro tip: Have a second person assist you during installation to help hold the blind steady and provide an extra set of eyes for precise alignment.
Step 5: Test Operation and Adjust for Accuracy
With your no drill blinds installed, the final crucial step is ensuring they function smoothly and precisely. Testing their operation will confirm your installation was successful and identify any necessary minor adjustments for optimal performance.
Carefully conduct a comprehensive operational assessment of window coverings by first opening and closing the blinds multiple times. Pay attention to how smoothly they move through their full range of motion. Check that each slat or panel aligns correctly without catching or binding. Verify the blinds extend and retract evenly on both sides. If you notice any resistance or uneven movement, gently readjust the mounting brackets or blind positioning. Most no drill systems allow for slight repositioning to achieve perfect alignment.
Evaluate the blinds from multiple angles to ensure they provide the desired light control and privacy. Test their functionality under different conditions such as fully open, partially closed, and completely shut. Confirm that the locking mechanisms work correctly and that the blinds remain stable when positioned at various heights. If your specific blind model includes tension adjustment features, make small incremental changes to achieve the smoothest possible operation. Remember that minor adjustments can significantly improve overall performance and longevity.
Pro tip: Perform a final check after 24 hours to ensure the adhesive mounting has fully settled and the blinds maintain their initial perfect positioning.
Discover Easy No Drill Blinds That Fit Your Style and Needs
Struggling with complicated blind installations or worrying about damaging your window frames is a common challenge. This article highlights simple, secure ways to install no drill blinds that save time and protect your windows. At Value Blinds, we understand your goal to achieve custom fits without the hassle or permanent changes. Our selection of cordless, energy-efficient, and beautifully designed blinds offers perfect solutions tailored to your home. Experience hassle-free installation combined with the style and function your space deserves.

Explore our New Arrivals for the latest in no drill blinds and cordless options that simplify setup and elevate your interiors. Need blinds with added safety or special features Choose from our Fire Retardant collection to enhance peace of mind along with style. Don’t wait to transform your windows with ease and confidence Visit Value Blinds now to customize your perfect fit and enjoy free swatches, expert support, and flexible shipping. Take the next step toward effortless elegance today!
Frequently Asked Questions
How do I measure my window frame for no drill blinds?
To measure your window frame accurately, take measurements at three points: the top, middle, and bottom. This ensures uniformity; record these measurements immediately to avoid mistakes during the selection and installation process.
What types of no drill blinds are best for energy efficiency?
Cellular shades are known for providing superior insulation, while lighter-colored roller shades can help reduce heat gain from sunlight. Consider the orientation of your windows and your specific energy needs to choose the most effective option for your space.
How can I securely attach the mounting brackets for no drill blinds?
Ensure a clean surface by wiping the window frame with rubbing alcohol before attaching the brackets. Follow the manufacturer’s guidelines for correct placement, pressing the brackets firmly against the frame for the recommended time to ensure maximum adhesion.
What should I check after installing my no drill blinds?
After installation, open and close the blinds a few times to test their operation and alignment. Look for any resistance or misalignment, and make minor adjustments to the brackets or blind positioning if necessary to ensure smooth performance.
How do I maintain my no drill blinds for long-lasting use?
Regularly clean your no drill blinds according to the material they are made from to keep them in good condition. Also, perform a quick operational assessment every few months to ensure they continue to function smoothly and adjust any mechanisms as needed.


