
Easy Install Blinds for Windows: Simple DIY Guide
Over 60 percent of American homeowners tackle home improvement projects each year, yet installing window blinds often feels more stressful than it needs to be. Choosing the right easy install blinds and having the right tools on hand can turn a tricky task into a fast and satisfying upgrade. You will discover what you need to gather, how to measure precisely, and the necessary steps for a flawless, confident blind installation.
Table of Contents
- Step 1: Gather Tools And Select Your Easy Install Blinds
- Step 2: Measure And Mark Window Frame Accurately
- Step 3: Install Mounting Brackets Securely
- Step 4: Attach And Adjust Blinds For Proper Fit
- Step 5: Test Operation And Ensure Safety
Quick Summary
| Main Insight | Detailed Explanation |
|---|---|
| 1. Gather the Right Tools | Collect essential tools like a measuring tape, drill, and level to ensure a smooth installation process for your blinds. |
| 2. Measure Accurately | Measure window dimensions at three points and always use the smallest measurement to guarantee a correct fit for your blinds. |
| 3. Install Mounting Brackets Securely | Position and level your brackets carefully to prevent misalignment and ensure smooth operation of the installed blinds. |
| 4. Test Blinds Functionality | After installation, thoroughly test the blinds’ movement and adjust as needed for optimal performance and alignment. |
| 5. Implement Safety Measures | Protect children and pets by managing cords properly and considering cordless or motorized blinds for added safety. |
Step 1: Gather Tools and Select Your Easy Install Blinds
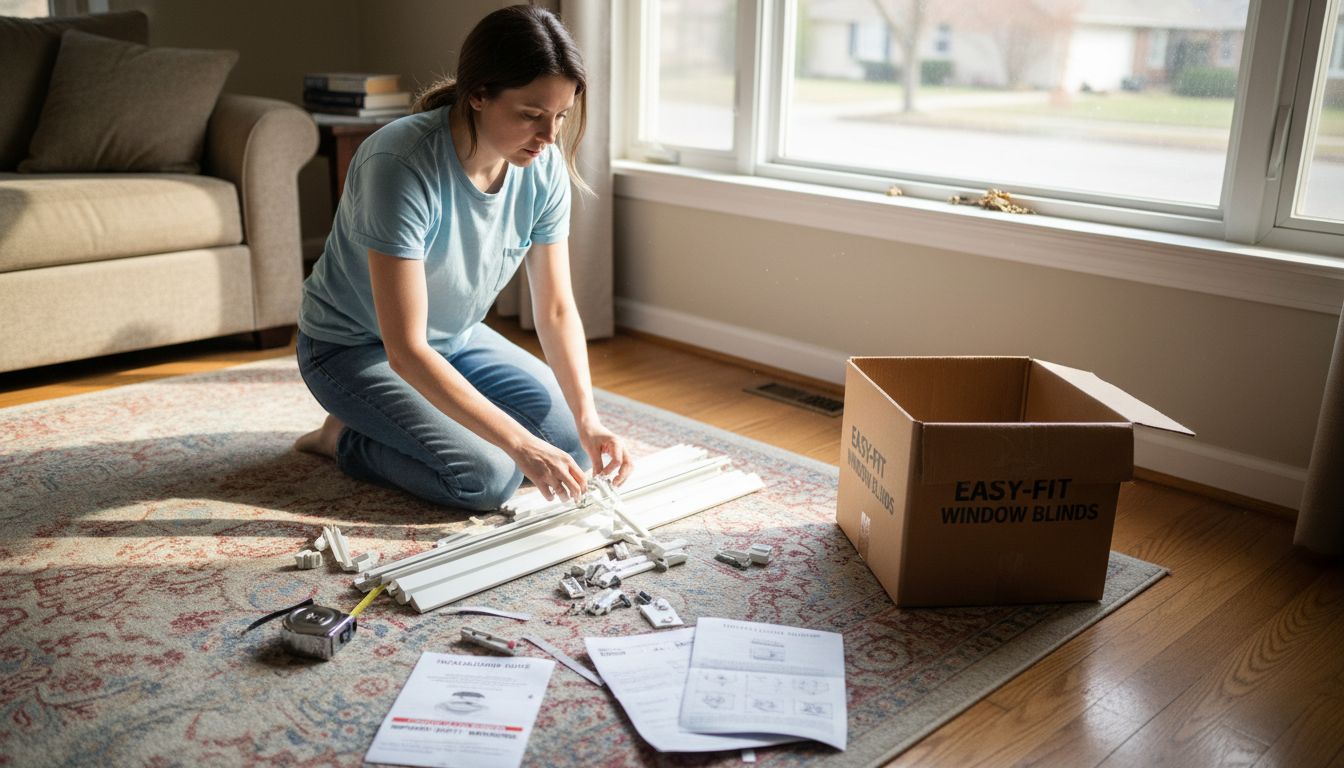
Preparing for your window blind installation requires gathering the right tools and selecting the perfect blinds for your space. With some simple preparation, you can transform your windows quickly and professionally.
Start by collecting essential tools: a measuring tape, pencil, level, drill (or mounting brackets), screwdriver, and stepladder. Precision matters. Accurate measurements ensure your blinds fit perfectly and look seamless. How to Choose Blinds can help you select the right style for your room.
When selecting easy install blinds, consider your window dimensions, interior design, and light control needs. Look for options with pre-installed mounting hardware or no drill requirements. Cordless and inside mount styles often provide the simplest installation process. Measure your window width at three points width top, middle, and bottom to ensure accuracy.
Pro tip: Always buy blinds slightly smaller than your exact window measurement to allow for smooth installation and prevent tight fitting that could damage your window frame.
With your tools ready and blinds selected, you are now prepared to move forward with a smooth and straightforward window treatment upgrade.
Step 2: Measure and Mark Window Frame Accurately
Accurate window measurements are critical for achieving a professional blind installation that looks seamless and functions perfectly. Taking precise measurements will help you avoid costly mistakes and ensure your window treatments fit like a glove.

To begin, you will need a metal measuring tape, pencil, and level. How to Measure Windows for Perfect Custom Treatments recommends measuring at three key points for the most accurate result. For inside mount blinds, measure the width at the top, middle, and bottom of the window recess. Always use the smallest measurement to ensure a proper fit. When measuring height, take measurements on the left, center, and right sides of the window frame.
If you are planning an outside mount installation, add approximately 2 to 3 inches to each side of your window width to prevent light gaps and create a more polished appearance. Use your level to mark straight horizontal and vertical lines where you will install mounting brackets. Double check all measurements before marking to prevent unnecessary holes or alignment issues.
Pro tip: Always measure twice and mark lightly with a pencil. This allows you to easily erase and adjust if needed before making permanent marks or drilling.
With your window frame accurately measured and marked, you are now ready to proceed to the next step of your blind installation process.
Step 3: Install Mounting Brackets Securely
Installing mounting brackets correctly is crucial for ensuring your window blinds will be stable, level, and function smoothly. A precise installation prevents future frustration and potential damage to your window frames.
Begin by gathering your tools: a power drill, drill bits, pencil, level, tape measure, and screwdriver. Easy to Install Blinds No Drilling recommends checking your mounting surface to ensure it can support the brackets. For drywall, use wall anchors to provide additional support. If mounting into wood trim or solid surfaces, select screws that penetrate at least half an inch into the mounting surface.
Position your brackets exactly where you marked during measurement. Use your level to confirm each bracket is perfectly horizontal. This step is critical prevent uneven blind installation that could cause misalignment or difficulty in operation. Drill pilot holes first to prevent wood splitting and ensure precise screw placement. Tighten screws firmly but carefully to avoid over tightening which could strip the mounting surface or damage the bracket.
Pro tip: If your window frame is not perfectly square, adjust bracket placement slightly to compensate for minor irregularities. A small adjustment during installation can prevent significant alignment issues later.
With mounting brackets securely in place, you are now ready to hang your new window blinds and enjoy a professional looking window treatment.
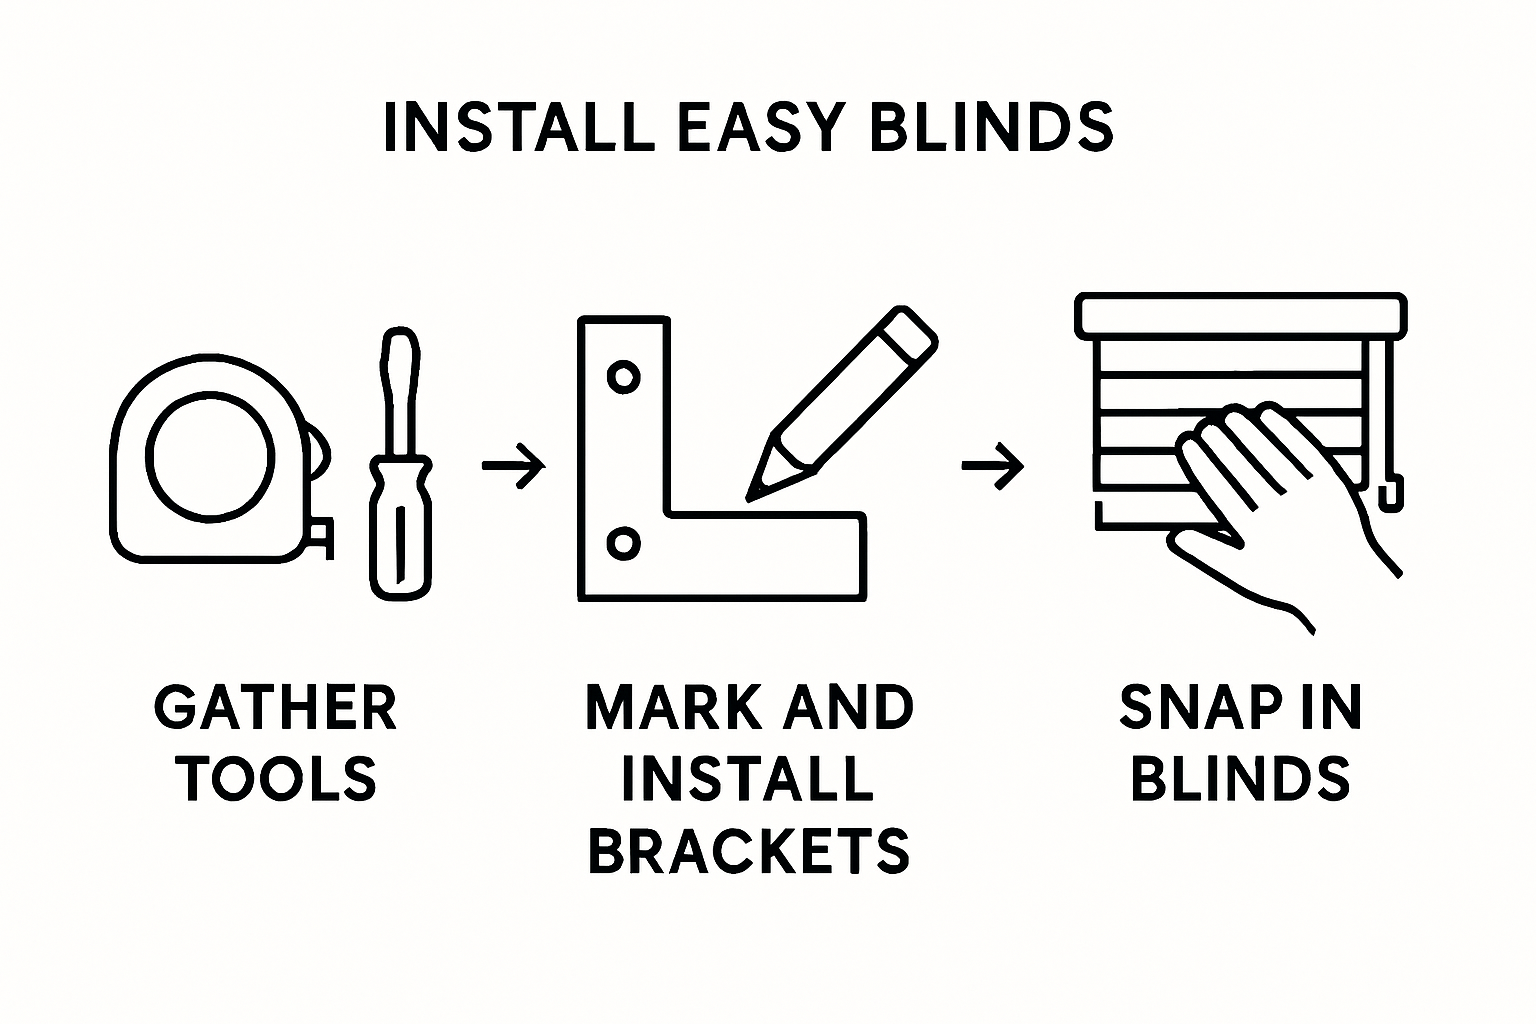
Step 4: Attach and Adjust Blinds for Proper Fit
With your mounting brackets securely installed, you are now ready to attach your new blinds and ensure they fit perfectly. This final step transforms your careful preparation into a beautifully finished window treatment.
Carefully lift your blinds and align them with the mounting brackets. How to Install Blinds for a Perfect Window Fit suggests gently sliding each end of the blind into the mounting brackets until you hear a soft click. Most modern blinds have a simple snap mechanism that secures them in place. Check that the blinds hang straight and move smoothly up and down without catching or jamming.
Once installed, test the full range of motion by raising and lowering the blinds several times. Look for any signs of uneven movement or misalignment. If the blinds appear slightly off center, most mounting brackets allow for minor adjustments. Carefully loosen the screws and shift the bracket slightly until the blind hangs perfectly straight. Pay close attention to how the blinds look when fully extended and fully raised.
Pro tip: If your blinds come with a cord lock or tension control, take a moment to adjust these mechanisms to ensure smooth operation. A slight tug should engage the lock, preventing unwanted movement.
With your blinds now perfectly installed and adjusted, you have successfully completed your window treatment upgrade with a professional looking result.
Step 5: Test Operation and Ensure Safety
Now that your blinds are installed, the final step involves thoroughly testing their functionality and implementing crucial safety measures. This ensures not just smooth operation but also protects your family from potential hazards.
How to Fix Crooked Blinds recommends performing a comprehensive operational test by repeatedly raising and lowering your blinds. Check for smooth movement without catching or jerking. Verify that the cord or operating mechanism moves freely and locks securely at different heights. Pay special attention to any resistance or unusual sounds that might indicate misalignment or installation issues.
Safety is paramount when installing window treatments. For households with children or pets, consider installing cord management devices that keep loose cords out of reach. Many modern blinds offer cordless or motorized options that eliminate hanging cord risks entirely. Ensure all mounting brackets are tightly secured and the blinds remain stable when fully extended or retracted.
Pro tip: If you have young children or pets, position furniture away from windows to prevent accidental entanglement with blind cords. Consider professional cord management solutions or upgrade to cordless designs for maximum safety.
With your blinds tested and safety measures in place, you have successfully completed a professional window treatment installation that combines style and security.
Transform Your Windows with Easy Install Blinds from Value Blinds
Struggling with fitting the perfect blinds for your windows can be frustrating especially when measurements and mounting feel complicated. This comprehensive guide simplifies those challenges by focusing on accurate measuring, secure bracket installation, and safe operation. If you want blinds that marry effortless DIY installation with style and durability explore the expertly crafted selections at Value Blinds. Our custom blinds include cordless and motorized options designed for easy install and smooth daily use.

Ready to upgrade your window treatments with confidence Choose from our New Arrivals for the latest innovations or browse our full range at Value Blinds where you can use helpful design tools and get free swatches. Protect your home with our quality products that prioritize safety and convenience. Don’t wait to create a polished look that fits perfectly Follow step-by-step instructions with products engineered for simplicity and start your window makeover today!
Frequently Asked Questions
What tools do I need to install easy install blinds?
You will need a measuring tape, pencil, level, drill, screwdriver, and a stepladder. Gather these tools before starting your project to ensure a smooth installation process.
How do I measure my windows for easy install blinds?
Measure the width at the top, middle, and bottom of the window and use the smallest measurement for accuracy. For height, measure on the left, center, and right sides of the window frame.
How do I ensure my mounting brackets are secure?
Position your brackets where you marked them and use a level to confirm they are straight. Drill pilot holes carefully, and tighten screws firmly but not overly tight to avoid damaging the mounting surface.
What should I do if my blinds are misaligned after installation?
Gently loosen the screws on the brackets and shift them slightly to adjust the position of the blinds. Ensure that they hang straight before retightening the screws.
How can I ensure my blinds operate safely in homes with children?
Consider installing cord management devices or opting for cordless blinds. Position furniture away from windows to prevent entanglement risks and review safety features during installation.
Recommended
- How to Install Blinds for a Perfect Window Fit
- Installing Cordless Blinds: A Step-by-Step Guide
- How to Choose Blinds: A Step-by-Step Guide for Your Home
- Easy to Install Blinds No Drilling: Step-by-Step Guide
- DIY Projector Screen Ideas: Transform Your Space Easily - Projector Display


