

Article: Exterior Shade Side Track Installation, Explained Step by Step
Exterior Shade Side Track Installation, Explained Step by Step
Side tracks are the two vertical channels that guide an exterior shade’s fabric up and down and hold its edges in place when the wind picks up. Installing them comes down to three things: mounting the headbox and tracks plumb, level and square, seating the fabric edge fully in each track, and testing the travel before you walk away. Get those right and the shade runs quietly for years. Get them wrong and you’ll hear it rub every time it moves. Ugh.
Below, we walk through how side tracks work, what you need on installation day, the steps in order, and the mistakes that cause most callbacks. 🛠️
TL;DR
- Side tracks keep the fabric edges sealed and stop the shade from blowing out of its guides, which is what makes an exterior shade useful on a windy patio or a sunny window.
- Mount the headbox first, then the tracks, and check plumb, level and square at every step. A small misalignment is the usual cause of noise and friction.
- Pre-drill, use fasteners rated for your wall material (wood, brick, stucco, aluminum), and keep any guides or cushions that come inside the track.
- Wide shades are awkward to hold alone. Plan on a helper, and hire a licensed electrician for any hardwired motor connection.
- Measure carefully before you order, because the tracks have to fit your opening or frame exactly.
Table of Contents
- What a side track does (and why it matters)
- Before installation day: measure, check, unpack
- Side track installation, step by step
- Perspective: why alignment beats everything else
- Common problems and quick fixes
- Side tracks versus other exterior options
- Safety and code notes
- Ready to order? Here’s where we come in
- FAQ
- Sources
What a side track does (and why it matters)
A basic exterior roller shade is just fabric on a tube. Without guides, the bottom bar swings and the fabric flaps. Side tracks fix that by capturing the fabric’s edges on both sides. Depending on the system, the fabric edge carries a zipper, a bead or a retainer that slides inside the channel.
There are two payoffs:
- Wind stability. The edge is held in the channel, so the fabric stays flat instead of billowing out.
- Sun control. Blocking the sun outside the glass is far more effective than blocking it inside. A peer-reviewed evaluation of exterior shading systems looked at slat systems, louvers, meshes and external roller shades, and found that geometry and material properties like solar reflectance shape energy performance. Side tracks also close the light gaps at the edges.
The numbers back this up. The California Energy Commission’s 2019 building envelope requirements recognize exterior shading devices, including roll-down blinds or slats with side tracks, with some systems reaching a solar heat gain coefficient (SHGC) of 0.13. A standard insect screen sits at 0.76. Lower is better when you’re fighting summer heat. That California code is a regional rule, but the physics applies anywhere the sun hits your glass.
A California utility-funded research report on residential exterior window shading describes the same idea: solar shade cloth on vertical side tracks that rolls up into a housing above the window and extends to shade the whole opening.
If you’re still deciding what to buy, our guide to motorized outdoor shades with side tracks covers how they work and what to weigh before ordering.
Before installation day: measure, check, unpack
Most installation trouble starts at the tape measure. A track system has very little forgiving room, so a measurement that’s off by a fraction can mean tracks that don’t line up with the headbox.
- Decide your mount. Outside the frame, inside the opening, onto a wall, or onto a pergola or porch beam. Each changes where the tracks land.
- Measure width and height in several places. Check the top, middle and bottom width, and the left, center and right height. Use the smallest figure if your opening is slightly out of square, and follow the order instructions for how to apply it. Our walkthrough on how to measure outdoor and exterior shades shows each step.
- Check the surface. Wood, aluminum, brick, concrete, stucco and vinyl siding all need different fasteners. Look for flat, solid backing where the brackets will sit.
- Check the power plan. If the shade is motorized, decide where the cable or the power source goes before you drill. Our motorized shade installation guide explains the options.
- Unpack and inspect. Open the cartons carefully and lay out every part. Check that you have the headbox, two tracks, the bottom bar, brackets, hardware and the control. Report damage before you start cutting or drilling.
Tools you’ll want on hand
- Power drill and drill bits (plus a masonry bit for brick or concrete)
- Level (a longer one beats a short one for the tracks)
- Tape measure and pencil
- Phillips screwdriver or a torque bit
- Stepladder, rated for your weight
- Diagonal pliers and a miter saw, only if your kit has tracks that need trimming to length
- Painter’s tape to mark positions without scratching the finish
Keep the protective film on the aluminum until the very end. It saves you from scuffs.
Side track installation, step by step
Exact parts differ from one product to the next, so always check the sheet in your box first. The sequence below is the one that works for most track-guided exterior roller shades.
Step 1: Mark and mount the brackets or headbox
Hold the headbox or brackets where they belong and mark the holes. Check level with the bubble, then check again. If the headbox is even a hair off, the fabric will walk to one side as it rolls.
Pre-drill every hole. Pre-drilling also helps prevent splitting wood and cracking siding. Drive the screws snug, not crushed.
Wide shades are where a second person earns their pizza. A big headbox is heavy and awkward on a ladder, and a helper keeps it steady while you drive the first screws. As a rule of thumb we recommend a second person for anything much wider than 4 feet.

Step 2: Position the first side track
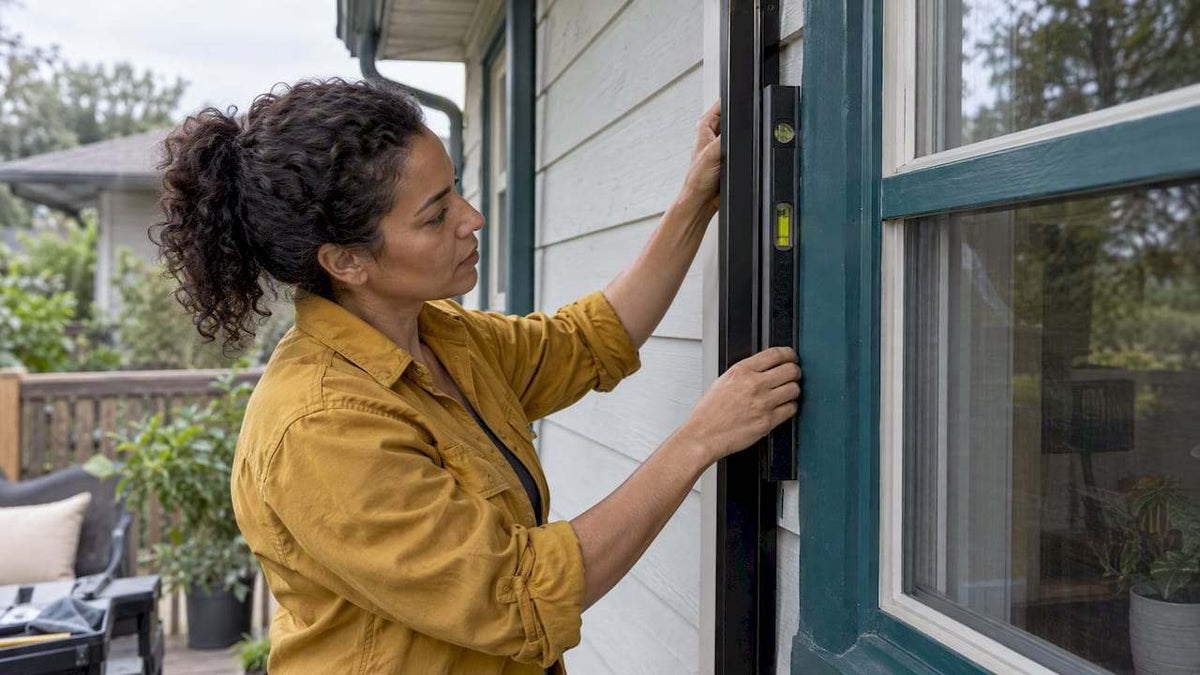
Hang a plumb line, or use your level, from the edge of the headbox down to where the track will end. The track must be vertical, not just straight. Remember, plumb means straight up and down, while level means flat from side to side.
Mark your screw positions along the track, spaced evenly from top to bottom. Pre-drill, then fasten. Don’t fully tighten until you’ve checked the track against the headbox opening.
Step 3: Position the second track and check the gap
Repeat on the other side. Then measure the distance between the two tracks at the top, the middle and the bottom. If those three numbers match, you’re parallel. If they don’t, adjust now, because after the fabric goes in it’s a much bigger job.

Also confirm that both tracks sit square to the headbox. Tracks that lean in or out will pinch the fabric edge.
Step 4: Trim only if your kit calls for it
Some systems ship with tracks that you cut to your window height. If yours does:
- Use a miter saw and leave the protective film on.
- After cutting, crimp the cut end with diagonal pliers so the fabric guide can’t slide out of the channel, which is a known cause of jams. Check your manufacturer’s sheet for the exact method.
- Smooth any burr so the zipper or bead doesn’t snag.
Pre-cut systems skip this step entirely, which is one reason many homeowners choose them for DIY.
Step 5: Feed the fabric edges into the tracks
This is the part people dread, and it’s easier than it looks. With the shade rolled up, lower the bottom bar slowly and guide the fabric edge into the channel entrance on each side.
- Check which way the retainer or zipper faces. Many have an angled leg that points toward the back of the track. If it won’t feed, it may simply be flipped.
- Don’t force it. Forcing bends the edge and creates a bump you’ll hear later.
- Leave in any neoprene cushions or internal guides. They help with wind resistance and smooth movement. If one comes loose, reattach it with double-sided tape before you close the cover.
The fabric retainer must be fully engaged in the track. That sealed fit is what keeps a shade from pulling out in a gust.
Step 6: Connect the control and set the limits
For a manual or crank system, attach the operator and test the movement. For a motor, connect power according to the instructions. Plug-in and solar-powered options are simpler. Hardwired connections should be done by a licensed electrician who follows local electrical codes.
Then set the upper and lower limits so the bottom bar stops just where the track ends and the headbox begins. A limit set too low will drive the bar into the sill. Set too high, it can jam the fabric into the box.
Step 7: Run it ten times
Cycle the shade up and down at least ten times. Watch the edges. Listen. A clean run is smooth and nearly silent. Then do a visual check: even gaps on both sides, no ripples, and a straight bottom bar. Fix small issues now.
Perspective: why alignment beats everything else
At Value Blinds, we see the same story again and again with exterior shades. When someone says their motor is noisy, we ask about the tracks first. Nine times out of ten (okay, it’s a feeling, not a statistic) it’s a slight misalignment, and the hem bar or fabric is rubbing on one side. Installers call the rule “plumb, level and square” for a reason.
We built our approach around making exterior shades something a careful homeowner can handle, with measuring guides, free swatches, and support from real people. We also offer professional measuring and installation for anyone who’d rather skip the ladder. If your project involves a tall opening, a second-floor window, a pergola, or hardwired power, we think that’s a smart call.
One more thing: pick the right fabric. Openness factor controls how much view you keep and how much heat you block, and it changes how the shade feels on a windy day. We cover it in our outdoor solar shade fabric and openness factor guide.
— Sunny
Common problems and quick fixes
| Problem | Likely cause | Fix |
|---|---|---|
| Fabric rubs or squeaks | Tracks not plumb or not parallel | Loosen screws, re-check with a level, remeasure the gap top to bottom |
| Shade drifts to one side when rolling | Headbox slightly out of level | Shim or re-set the brackets |
| Fabric edge pops out of the track | Retainer not fully engaged, or flipped | Remove, reorient, feed again slowly |
| Rattling in wind | Missing cushion or guide | Reattach with double-sided tape, tighten fasteners |
| Bottom bar stops short or hits the sill | Motor limits set wrong | Reset the upper and lower limits |
| Cut track end jams | Uncrimped end lets the guide slide | Crimp the cut end with diagonal pliers |
Notice how most items on that list are about alignment, not about the motor. That’s good news, since alignment is free to fix.
Side tracks versus other exterior options
Not every exterior solution needs tracks. Here’s how the main types compare.
- Cable-guided shades. Lighter and less visible, but with more fabric movement in wind.
- Side track (zip-style) shades. Best wind stability and the tightest light seal. Slightly more involved to install because of the track alignment.
- Fixed screens and louvers. Always on, so they can’t be adjusted. A multi-unit residential shading study looks at adjustable options, including sliding panels that attach to wall-mounted tracks.
The benefit of adjustability is real. It lets you invite in winter sun and shut out summer sun, which fixed shading can’t do. The building science behind that is covered in the exterior shading evaluation mentioned above.
As a rule, the more exposed your location, the more a track system makes sense.
Safety and code notes
- Use a stable ladder and don’t overreach. Have someone spot you on anything above one story.
- If you’re drilling near siding, check for wiring and plumbing behind the wall.
- Hardwired motors belong to a licensed electrician. Plug-in or solar options avoid that need.
- Check your HOA rules or local permit requirements for exterior changes. They vary by city and community.
- California’s code language about exterior shading devices being permanently attached applies to energy compliance credit in that state. Elsewhere, check your own local rules.
Ready to order? Here’s where we come in
If you want a shade that comes with measuring help and installation support, take a look at our Hybrid Outdoor Solar Shade with manual and motorized control. It’s made to order for your openings, and you can pair it with free swatches to check the fabric in your own light. Prefer an overview first? Browse everything on the Value Blinds homepage, or read how to select outdoor shades for style and efficiency. Need hands on the job? Ask about our professional measuring and installation service. ☀️
If you’re also upgrading indoors, our roller shade installation guide and roller shade measuring guide use many of the same habits: level first, check twice, test often.
FAQ
Can I install exterior shade side tracks myself?
Yes, if you’re comfortable with a drill, a level and a ladder, and the shade is a manageable size. Plan on a helper for wide units, and bring in a professional for hardwired power or high openings. When in doubt, hire out.
How long does installation take?
A single window is often a few hours for a first-timer, including measuring and testing. Larger openings or several shades take longer. Allow extra time for pre-drilling and for checking alignment.
Why won’t my shade fabric go into the track?
The fabric retainer is probably flipped or the edge is bent. Many have an angled leg that must face the back of the track. Reorient it, make sure no internal guide has come loose, and feed it in slowly without forcing it.
Do I need to trim the side tracks?
Only if your kit ships with tracks that are cut to size on site. If it does, cut with the protective film on and crimp the cut end so the fabric guide stays put. Made-to-order systems usually arrive at the right length.
Why is my motorized exterior shade noisy?
Before blaming the motor, check the tracks. If they aren’t plumb or parallel, the fabric or bottom bar rubs and creates friction. Re-align the tracks and test again.
Sources
- Exterior shading systems evaluation, Energy and Buildings (2015)
- California Energy Commission, 2019 Building Envelope Requirements
- Residential Exterior Window Shading Research Report (CalMac)
- Study of Adjustable Exterior Solar Shading Options for Multi-Unit Residential Projects