
Three Point Photo Checklist for Inside Recess Blinds for Homeowners
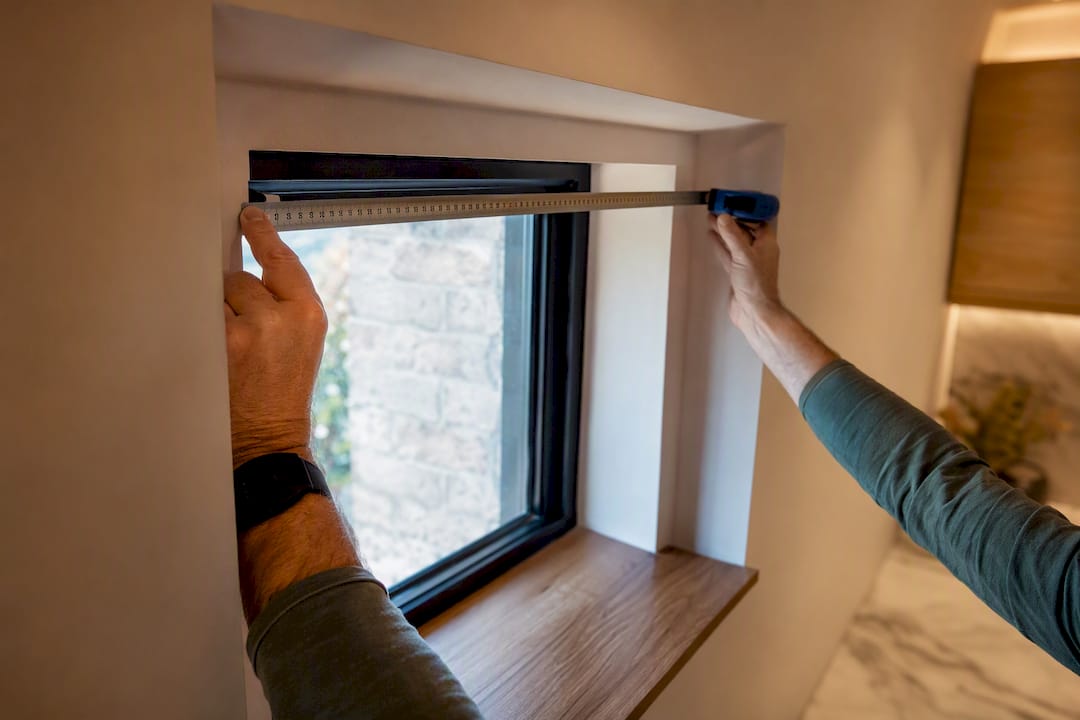
Measure width at three points (top, middle, bottom) and use the narrowest number so your blind won’t bind. Measure the drop at three points (left, center, right) and use the smallest for a clean inside fit. Check the recess depth against your bracket’s required clearance before you order anything, and for practical mounting and clearance advice see Redefine Your Open Space: Create a Private Office Without Losing the Open Feel, then always round to the nearest ⅛ inch.
TL;DR:
- Measure width at three points and use the narrowest value to ensure the blind clears properly at all heights.
- Measure the drop at three points and select the smallest measurement for a precise fit against the sill.
- Always check recess depth against the blind’s bracket requirements before ordering, and include obstructions like handles in your calculations.
- Use a steel tape measure accurate to the nearest ⅛ inch and round measurements appropriately to avoid fitting issues.
- Consider outside mounts if recess depth is insufficient or if measurements vary significantly, and always verify with clear photos and notes before placing your order.
Table of Contents
- What Tools Do You Need Before Measuring?
- How Do You Measure Width and Drop for an Inside Mount?
- Does Your Recess Have Enough Depth for an Inside Mount?
- When Should You Choose an Outside Mount Instead?
- What Units and Rounding Rules Keep Your Order Accurate?
- What Resources Help You Measure With Confidence?
- A Quick Note From Sunny
- Ready to Order Your Custom Inside-Recess Blinds?
- Sources
What Tools Do You Need Before Measuring?
Grab a steel tape measure, not a fabric one. Fabric tapes stretch, and even a sixteenth of an inch off can leave you with a blind that jams or gaps at the sill. A steel tape measured to the nearest ⅛ inch is the standard for a reason: it holds a straight line across a recess where a soft tape sags in the middle and throws off your number.
Here’s what to set aside before you start:
- A steel or metal tape measure (not fabric)
- A pencil and notepad, or your phone’s notes app
- Your phone or camera for reference photos
- A ladder or step stool for tall windows
- A level or rigid straightedge to confirm the recess sits square
Clear the windowsill first. If there’s a shutter, handle, or lever nearby, open it fully so you can see exactly how far it swings into the recess. For anything above head height, have someone hold the ladder. Nobody needs a trip to urgent care over a set of window blinds. 😅
Pro Tip: A rigid straightedge does double duty. Hold it flat across the recess opening and you’ll spot an uneven or bowed frame instantly, before you ever pick up the tape.
How Do You Measure Width and Drop for an Inside Mount?
This is where accuracy either gets built in or gets lost. Most window recesses look square from across the room and are anything but up close, which is exactly why a single measurement isn’t enough.
Step 1: Measure the width at three points.
Place your tape inside the recess and measure straight across at the top, the middle, and the bottom of the opening. Write each one down as you go, don’t try to remember them.
- Width top: measure just below where the headrail will sit
- Width middle: measure at the vertical center of the recess
- Width bottom: measure just above the sill
For an inside mount, you use the narrowest of three width measurements because that’s the one guaranteed to clear at every height. Recesses are rarely built perfectly square, so a blind cut to your widest reading will jam somewhere along its track.
Step 2: Measure the drop at three points.
Now measure vertically from the top of the recess down to wherever you want the blind to finish, at the left edge, the center, and the right edge.
- Drop left: top of recess to sill (or your chosen finish point)
- Drop center: same line, measured at the middle
- Drop right: same line, measured at the right edge
Use the smallest of the three for an inside-mounted blind that finishes at the sill. That keeps the bottom rail from hitting the sill on one side while leaving a gap on the other. Retailer measuring guides consistently repeat this three-point rule for good reason: it’s the single biggest predictor of whether a blind operates smoothly once installed.
Step 3: Mark, label, and photograph everything.
Write your notation in a clear, consistent format including all width and drop measurements and then take a phone photo of the recess with sticky notes marking each measurement point. Photographing and labeling each reading as you take it catches transcription errors before they turn into a blind that’s the wrong size.
For your final order, submit the smallest width and smallest drop, clearly labeled with units: 35½" W x 59⅞" H, plus a note like “finish point: sill” or “obstruction: window handle projects 1¼ inch.” That one extra note about obstructions can save you an entire reorder.
Quick reference: what to record
| Measurement | Points to check | Value to use |
|---|---|---|
| Width | Top, middle, bottom | Narrowest |
| Drop | Left, center, right | Smallest (for sill finish) |
| Depth | Top of recess where bracket sits | Minimum reading |
Some suppliers ask for your raw recess size and apply their own adjustment; others want the exact finished size you want the blind to be. Always check the product page before you decide which number to submit, because sending the wrong one is one of the most common ordering mistakes homeowners make.
Does Your Recess Have Enough Depth for an Inside Mount?
Depth is the measurement most people skip, and it’s the one that causes the most returns. Measure front to back at the top of the recess, right where the bracket will actually sit, not just wherever feels convenient.
- Measure the depth at both sides and the middle of the recess top
- Record the shallowest reading as your usable depth
- Compare that number against the bracket or headrail depth listed on the product page
If your recess depth comes in under what the product’s bracket requires, an inside mount simply won’t sit flush, and forcing it usually means a blind that tilts forward or won’t close all the way.
Obstructions matter here too. Window handles, hinges, and trickle vents all project into the recess space, and any of them can catch a cord, chain, or fabric edge if you don’t measure their reach. Measure how far each one projects from the frame and note it alongside your other numbers.
Pro Tip: Cut a strip of cardboard to your blind’s approximate width and lower it past the handle by hand. If it catches or drags, your real blind will too, and it’s a five-minute test that beats a costly reinstall.
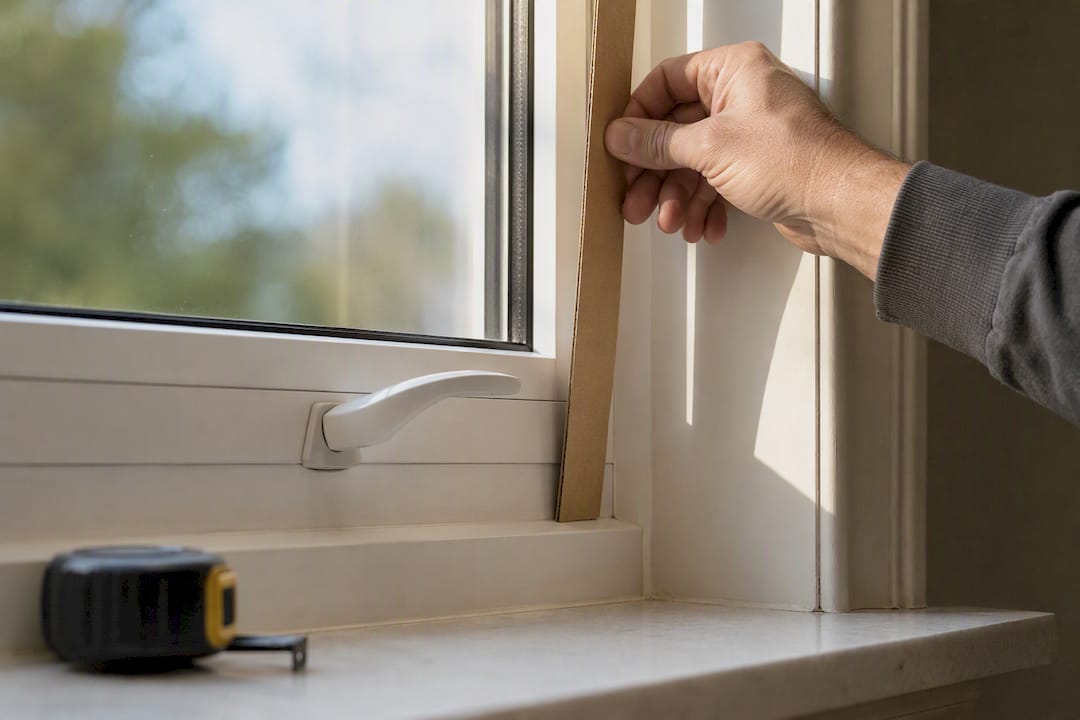
When an obstruction is unavoidable, spacer blocks, projection brackets, or a shorter drop can often solve it without abandoning the inside mount altogether.
When Should You Choose an Outside Mount Instead?
Sometimes the recess just isn’t the right home for an inside-fitted blind, and that’s fine. An outside mount solves problems an inside fit can’t.
Reach for an outside mount when:
- The recess depth falls short of the bracket depth your chosen blind requires
- Your three width or drop readings vary by more than roughly a half inch
- Handles, vents, or hinges eat up too much usable space
- You want the blind to visually cover the whole window frame, obstruction or not
Diagonal or width readings that differ significantly between top and bottom are a strong sign the recess is out of square, and an outside mount sidesteps that problem entirely rather than fighting it.
Here’s the part that trips people up: with an outside mount, what you measure is what gets made, full stop. There’s no narrowest-of-three rule and no factory deduction. You measure the exact width and height you want covered, add your own overlap for light control, and that’s your order size. Some blind types, like rollers, also carry a small built-in deduction on inside fits to keep the mechanism from binding, so check the specific product instructions either way before you finalize numbers.
What Units and Rounding Rules Keep Your Order Accurate?
Pick one unit system, inches or millimeters, and stick with it on every measurement you record. Mixing them mid-order is how a 35.5-inch width accidentally becomes a 35.5-millimeter order.
- Round to the nearest ⅛ inch (or nearest millimeter) on every reading
- Label every number clearly as W x H, never just two loose figures
- Round down for an inside width, since a fraction too wide won’t fit
- Round up for an outside cover measurement, since a fraction too narrow leaves a gap
- Re-measure and photograph before you submit, especially if it’s been more than a few days since your first pass
Two of the most common mistakes homeowners make: measuring to the trim instead of the actual recess opening, and assuming every window in the same room is identical. It rarely is, even in newer construction, which is exactly why multiple-point measuring accounts for that construction variance instead of guessing at a single number. If you send raw recess dimensions to a manufacturer, note clearly that you haven’t pre-deducted anything. Most suppliers apply their own adjustment and don’t expect you to do it twice.
What Resources Help You Measure With Confidence?
You don’t have to get this perfect on the first try alone. Valueblindsdirect keeps dedicated guidance for the trickiest measuring scenarios, including a dedicated inside mount measuring guide that walks through bracket depth requirements product by product.
A few resources worth bookmarking before you order:
- Product pages that list exact bracket and headrail depth specs, so you can check your recess depth against the real number
- The Design Studio, where you can visualize how a finished headrail sits inside your recess before committing
- Free fabric swatches to check color and texture against your actual window light
- Guides for specific blind types, like this vertical blinds measuring guide, if you’re measuring a patio door or a taller opening
Pro Tip: When you reach out for help, attach your labeled photo along with your W-top/mid/bot and D-left/center/right numbers. It cuts back-and-forth emails down to almost nothing.
If you’d rather skip the ladder altogether, optional professional measuring and installation support is there for exactly that reason.
A Quick Note From Sunny
The mistake I see more than any other? Someone measures once, at the widest, most convenient spot, and skips depth entirely. Then the blind arrives, the bracket won’t seat flush because a vent cover eats up the clearance, and now it’s a return.
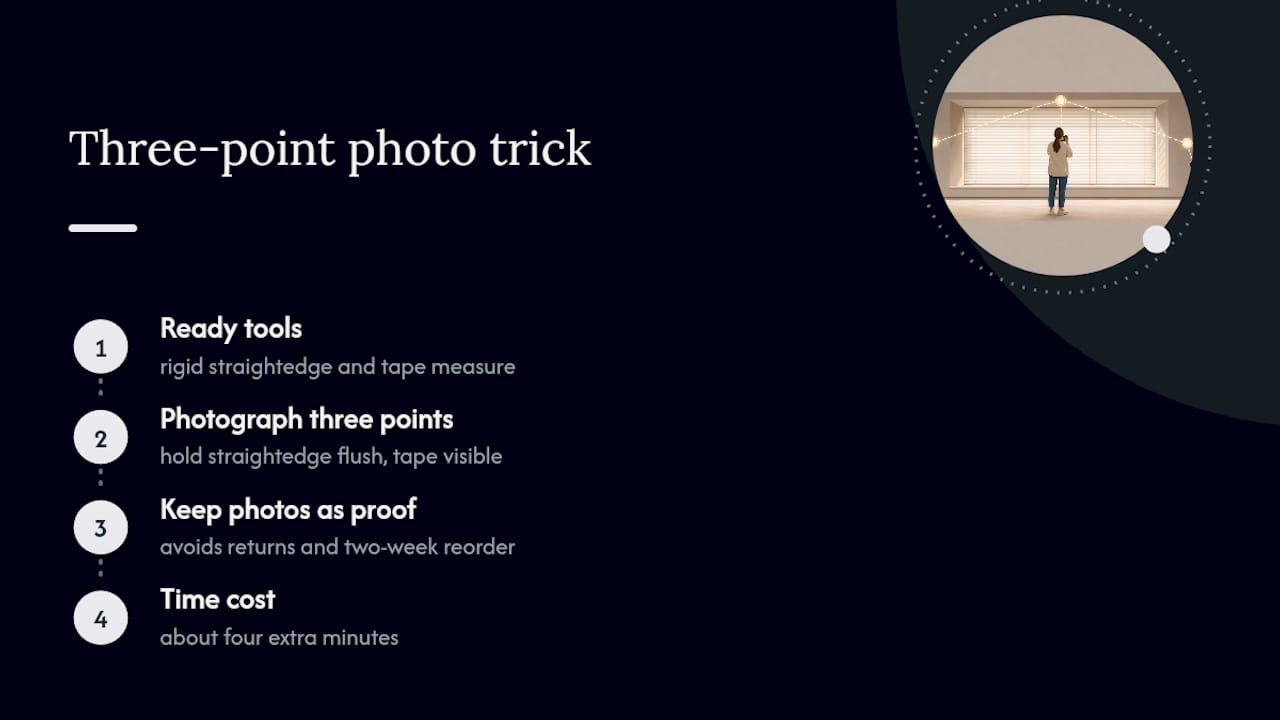
My honest trick: use a rigid straightedge, hold it flush across the recess, and take one photo with your tape still in place at each of the three points. That photo becomes your proof if something ever needs adjusting later, and it forces you to actually stop and check depth instead of assuming it’ll work out. It takes maybe four extra minutes. Compare that to a two-week reorder wait, and it’s not a close call.
— Sunny
Ready to Order Your Custom Inside-Recess Blinds?
Once your numbers are locked in, the measurements go into production for a blind built to your exact recess, not a generic stock size squeezed into place. That’s the real advantage of ordering custom over grabbing something off a shelf: your width, drop, and depth measurements go straight into production instead of getting approximated.
Head to the Design Studio to visualize your finish, or browse the full blinds collection to start your order. When you check out, have these ready: width at top, middle, and bottom; drop at left, center, and right; your recess depth; and any obstruction notes like handle projection. Want a no-drill option for a shallow recess? The cordless and no-drill collection is worth a look. And if you’re unsure about color before committing, order free swatches first, they ship fast and save a return down the line.
Sources
- How To Measure for Blinds and Shades - The Home Depot
- How to Measure and Install Blinds - Lowe’s
- How To Measure For Window Blinds - Dunelm
Recommended
- How to Measure for Inside Mount Blinds for Perfect Fit
- How to Measure Perfect Fit Blinds for a Flawless Installation
- How to Measure for Vertical Blinds: A Homeowner’s Guide
- How to Measure and Install Blinds for a Flawless Fit

Value Blinds®
Trusted window treatments provider
Value Blinds® is a trusted provider of Greenguard, OEKO-TEX, and FSC-certified window treatments based in Portland, Oregon. Specializing in sustainable, motorized, smart-controlled, and outdoor-ready blinds and shades, the company is built on a foundation of simplified shopping, premium eco-friendly materials, and transparent pricing without the inflated cost.