

How to Measure and Install Blinds for a Flawless Fit
TL;DR:
- Precise measuring with a steel tape to the nearest 1/8 inch is essential for perfect blinds.
- Measure each window individually, using multiple points for accuracy, especially in uneven frames.
- Proper installation involves leveling brackets, using anchors if needed, and testing for smooth operation.
The perfect blinds can transform a room, but a single measuring mistake leaves gaps, crooked lines, and wasted money. Most people assume measuring a window is simple. It is not. The wrong number by even a quarter inch can mean a blind that rattles in its frame or jams against the trim. This guide walks you through the full process from preparation to final installation, so you get it right the first time. Whether you are working with a standard window or a tricky bay frame, the steps ahead give you the accuracy and confidence to do this like a pro.
Table of Contents
- What you need before you start
- Step-by-step: How to measure your windows for blinds
- How to install blinds: The essential steps
- Troubleshooting and expert tips for tricky windows
- Pro perspective: What most guides get wrong about blinds installation
- Ready to upgrade your windows? Shop and design with ease
- Frequently asked questions
Key Takeaways
| Point | Details |
|---|---|
| Measure each window individually | Accurate measurement is key to a flawless blind fit, avoiding gaps and uneven lines. |
| Choose the right mount style | Inside or outside mount impacts coverage, aesthetics, and privacy—decide before measuring. |
| Install brackets level and secure | Level, anchored brackets and full safety checks prevent common errors and hazards. |
| Address edge cases | Tough windows require special solutions—don’t ignore depth, obstructions, or shapes. |
| Upgrade boosts savings | Modern blinds, especially honeycomb styles, can dramatically improve energy efficiency. |
What you need before you start
To avoid frustration, start with the right preparation. Rushing into a measuring job without the right tools is the fastest way to make an expensive mistake. Before you touch a window, gather everything you need and make a few key decisions.
Your measuring and installation toolkit:
- Steel tape measure (not a fabric one)
- Pencil and notepad for recording measurements
- Level (a small torpedo level works great)
- Power drill with appropriate bits
- Mounting brackets and screws (usually included with your blinds)
- Wall anchors for drywall or plaster
- Safety devices for corded blinds
When you measure blinds for perfect fit, one rule stands above all others: measure every window on its own. No two windows in a home are exactly the same, even if they look identical. Wall settling, construction variation, and past repairs mean dimensions shift. Skipping individual measurements is one of the most common and costly shortcuts homeowners take.
Here is something that surprises most first-timers: use a steel tape measure to the nearest 1/8 inch, measure each window individually, and never make your own deductions. The factory handling your custom order will subtract the clearance needed for smooth operation. If you subtract on your end too, you end up with a blind that is too narrow or too short.
You also need to decide between inside mount and outside mount before you take a single measurement. An inside mount sits inside the window frame for a clean, built-in look. An outside mount covers the frame entirely and is mounted on the wall or trim above. Each requires a completely different approach to measuring.
| Mounting type | Where measured | Notes |
|---|---|---|
| Inside mount | Inside of frame | Factory adds deductions |
| Outside mount | Wall/trim surface | You add overlap inches |
Pro Tip: When recording your measurements, always round down to the nearest 1/8 inch. It is far better to have a slight gap than a blind that cannot close properly inside the frame.
Step-by-step: How to measure your windows for blinds
Once equipped, measuring with precision is the critical next step. The sequence matters as much as the numbers themselves.
For inside mount blinds:
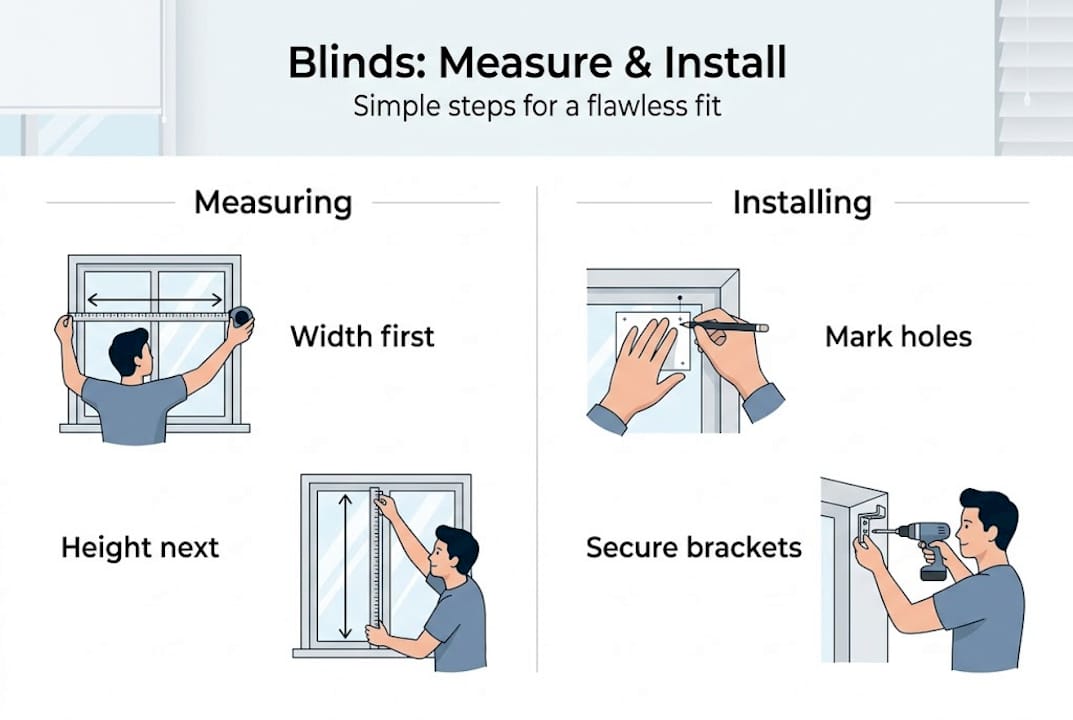
- Measure the width at three points: top, middle, and bottom of the opening.
- Use the narrowest measurement from those three points as your width. Record the height at the left, center, and right sides, then use the shortest number.
- Do not add or subtract anything from these numbers. Submit them as-is to the manufacturer.
- Confirm the window has at least 1.5 inches of depth to mount the hardware inside the frame.
For outside mount blinds:
- Decide how high above the window opening you want the blind to hang. Typically 2 to 3 inches above the frame works well.
- Add extra inches for full coverage and light block: 1.5 to 3 inches on each side of the width, and 2 to 3 inches at top and bottom.
- Measure from where the bracket will mount to the sill or floor, depending on the style.
For your inside mount measuring guide, always check that the frame is square. An uneven or out-of-square frame means your widths and heights will differ at each point, which is normal but important to record accurately. Bay windows need each individual section measured separately. Arched windows typically require an outside mount unless they have a flat sill at the base.
Important: The single biggest cause of DIY failure is measuring only once per window. Always take three measurements for both width and height before writing down any number.
| Feature | Inside mount | Outside mount |
|---|---|---|
| Look | Sleek and recessed | Bold, decorative |
| Light control | Some light gaps at edges | Full blockage possible |
| Ideal for | Deep window sills | Shallow frames or small windows |
| Measuring style | Use narrowest/shortest | Add overlap on all sides |
This step-by-step window measuring approach eliminates guesswork and gives you consistent, reliable numbers every time.
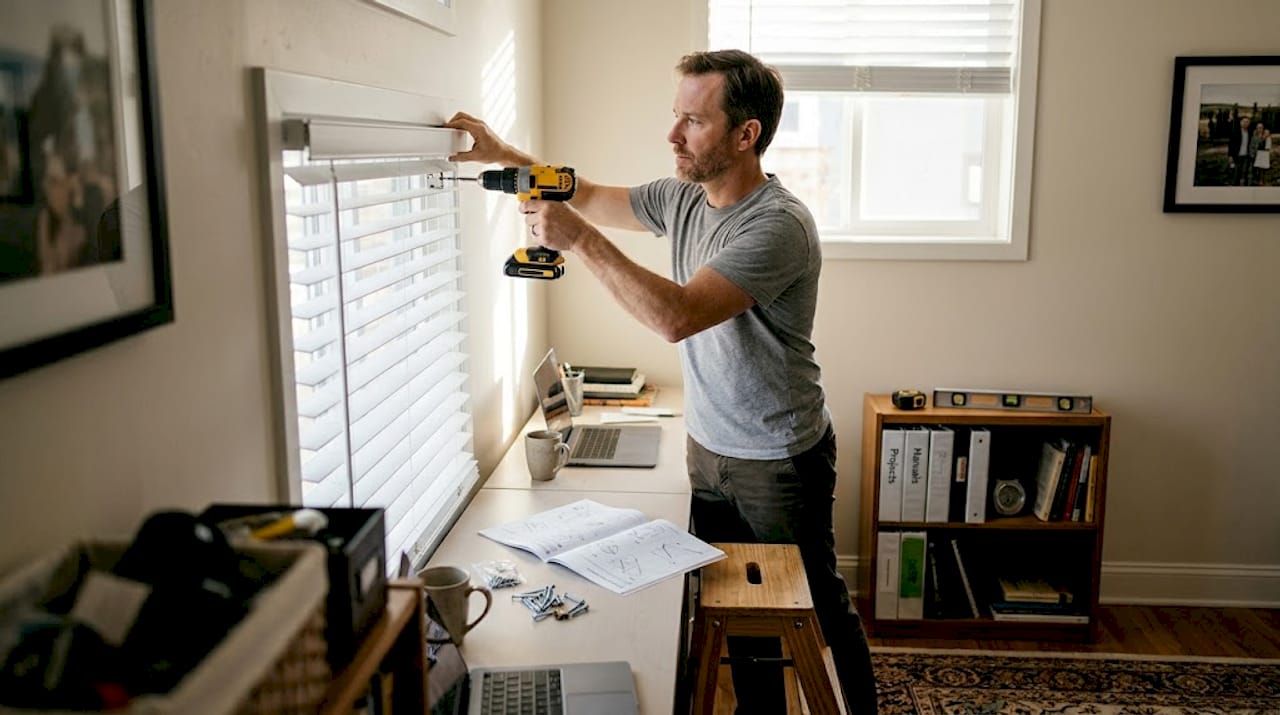
How to install blinds: The essential steps
With your measurements ready, you are set for hands-on installation. The process is straightforward when you follow a clear sequence and avoid common shortcuts.
Installation steps:
- Mark the bracket positions on the wall or inside the frame using a pencil.
- Use a level to confirm both bracket marks are perfectly even. Uneven brackets are the number one reason blinds hang crooked.
- Drill pilot holes at each mark. Skipping this step risks splitting wood trim or cracking plaster.
- If you are mounting into drywall without a stud, insert wall anchors before driving the screws.
- Secure the brackets firmly. Give each one a gentle tug to confirm it is solid.
- Snap the headrail (the top bar of the blind) into the brackets.
- Attach the valance if one is included, which covers the hardware for a finished look.
- Install all safety devices, especially for corded blinds.
- Test the blind by raising, lowering, and tilting the slats to confirm smooth operation.
Following solid DIY blinds installation tips makes the difference between a clean result and a frustrating redo. The installation steps above follow best practices used by professional installers.
Safety first: Corded blinds pose a strangulation risk to young children and pets. Always secure cords with the included safety devices, or consider upgrading to cordless or motorized options for any room accessible to children.
For window shades installation, the process is nearly identical, but shades typically use a continuous roller bracket instead of a headrail clip system. Always read the specific instructions included with your product before starting.
Pro Tip: Before drilling any holes, hold the headrail up in position and check the look in real life. What seems right on paper can look off against actual walls and trim.
Troubleshooting and expert tips for tricky windows
Some installations come with unique challenges. Here is how to solve them.
Over 60% of DIY blind installation failures trace directly back to inaccurate measuring, so prevention beats repair every time. Common problem windows include those with uneven frames, obstructions, and shallow depth, as well as bay and arched windows, each requiring a tailored approach.
Common issues and quick fixes:
- Uneven frame: Use shims behind brackets to level them out. Do not force the headrail to compensate.
- Shallow depth: Switch to an outside mount if the frame is less than 1.5 inches deep for inside mount hardware.
- Window crank obstructions: Choose a blind with a slim headrail profile, or use an outside mount to clear the handle entirely.
- Bay windows: Treat each panel as its own window. Measure and order separately.
- Arched windows: Use a decorative fixed panel or an outside mount that covers the arch visually.
For accurate blinds measuring in tricky spaces, patience is more valuable than speed. Spending an extra ten minutes re-checking your numbers saves hours of frustration later.
Upgrading to energy-efficient styles is worth considering at this stage. Double-cell honeycomb blinds reduce heat loss by up to 78.7%, but only when installed with minimal gaps. A tight, accurate fit is not just about looks. It directly affects how much energy your home uses.
| Window problem | Best solution |
|---|---|
| Uneven frame | Shim brackets to level |
| Shallow sill depth | Switch to outside mount |
| Crank handle obstruction | Use slim profile or outside mount |
| Bay window sections | Measure and order each panel separately |
| Arched top frame | Outside mount with decorative valance |
Using a comprehensive step-by-step install guide alongside these problem-solving tips covers nearly every situation you will encounter. Common installing mistakes include skipping the level check and using incorrect anchor types for the wall material.
Pro Tip: Always test your drill bit on a scrap piece of trim before drilling into your actual window frame. Different wood species and ages require different pressure and bit speeds.
Pro perspective: What most guides get wrong about blinds installation
Advice is everywhere, but here is the hard-earned truth most how-to articles skip entirely.
The overwhelming majority of guides tell you to measure carefully and use a level. That is good advice. What they rarely say is that the tolerance for error is almost zero when aesthetics and energy efficiency both depend on the fit. A gap of even a centimeter at the edge of an installed blind is not just a cosmetic issue. Tight install gaps greatly boost energy efficiency, and even 1 cm gaps hurt performance significantly.
Most guides also treat measuring as a one-size process. It is not. A 100-year-old craftsman home with hand-built window frames behaves completely differently from a modern tract house. The advice to measure at three points exists precisely because old frames bow, shift, and settle in ways that newer construction does not.
The real skill is knowing what to do when the numbers you measure do not match the shape you can see. That takes judgment, not just a tape measure. This is why professional installers who have worked on hundreds of windows still check every measurement twice. Experience teaches you that confidence comes after verification, not before it. Treat your measurements like they are the final answer, not a starting estimate.
Ready to upgrade your windows? Shop and design with ease
Now that you know how, make your space shine with the right blinds. Getting your measurements right is only half the story. The other half is choosing blinds that fit your style, light needs, and budget perfectly.

At Value Blinds, you can shop premium blinds across dozens of styles, from blackout roller shades to energy-saving honeycomb options, all custom-made to the exact dimensions you just carefully measured. Not sure which style fits your space best? The design studio lets you visualize treatments in your actual room before you order. Free swatches, expert support, and a satisfaction guarantee mean you shop with full confidence. Your perfectly measured windows deserve perfectly fitted blinds.
Frequently asked questions
What is the most accurate way to measure blinds for inside mount?
Measure the width at the top, middle, and bottom of the opening and use the narrowest of those three numbers. Never subtract clearance yourself since the factory handles all deductions.
How much overlap do I add for outside mount blinds?
Add 1.5 to 3 inches on each side for width and 2 to 3 inches at the top and bottom for height. This overlap for outside mount ensures complete light coverage and a clean, finished look.
What is the number one DIY measuring mistake?
Measuring only once per window is the biggest DIY error installers see. Always measure at three points for both width and height, and record each window separately.
How do blinds improve a home’s energy efficiency?
Double-cell honeycomb blinds can reduce heat loss by up to 78.7%, especially when installed with minimal edge gaps to prevent air movement.
When should I hire a professional to measure and install blinds?
Consider a professional for multiple windows, unusual frames, or motorized systems, since pro install ensures proper alignment and match across complex or large-scale jobs.


