
How Window Measurement Deductions Work (and Why You Shouldn't Take Them)
A measurement deduction is a small amount, usually a fraction of an inch, that gets subtracted from your window size so the finished product fits inside the opening without scraping. For made-to-order blinds and shades, the maker typically applies it for you. Your job is to record the exact opening size, nothing more. 🎉
That last part trips up a lot of people. You see “deduct 1/4 inch” in one guide and “take no deductions” in another, and suddenly a simple tape-measure job feels like a math exam. Ugh. This guide clears it up: what a deduction is, who applies it, why it changes from product to product, and exactly how to write your numbers down.
TL;DR
- A deduction is a tiny trim (often 1/8 to 1/2 inch in total width, depending on the product) that gives a blind or shade running clearance inside a window opening.
- With custom blinds and shades, the maker usually applies the deduction. Record the true opening size unless the order page tells you otherwise.
- Measure width and height in three places each. Use the narrowest width for an inside mount, and follow the product’s own instructions for height.
- Outside mounts work differently: you measure the area to cover, and no deduction applies because the product sits on the wall or trim.
- Write down width x height x depth, to the nearest 1/8 inch, and label which number is which.
Table of Contents
- What a measurement deduction actually is
- Who applies the deduction: you or the maker?
- Why deductions vary by product
- Inside mount vs. outside mount: where deductions apply
- How to measure an inside mount window, step by step
- A worked example
- How to write your measurements down
- Product-by-product measuring notes
- Ready to order? Here’s how we can help
- FAQ
- Sources
What a measurement deduction actually is
Picture sliding a book into a bookshelf slot that is exactly the book’s width. Tight, right? Now picture that book also needs to move up and down smoothly, every day, for years. You’d want a little breathing room.
That is all a deduction is. Window openings are never perfectly cut, and blinds and shades have moving parts (headrails, brackets, slats, fabric edges). A deduction shaves a small amount off the finished size so the product slips in, operates freely, and doesn’t rub the frame.
The idea is not unique to blinds. Window makers do it too: one replacement-window guide explains that the manufacturer deducts 1/4 inch from the width and cuts to the nearest 1/8 inch increment. Different product, same logic: your measurement describes the hole, and the maker’s production size describes the thing that goes in the hole.

Opening size vs. production size
Two numbers are in play, and mixing them up is the number one cause of bad fits:
| Term | What it means | Who sets it |
|---|---|---|
| Opening size | The real measurement of your window opening | You |
| Production (or finished) size | The size the blind or shade is actually made | The maker, after the deduction |
If you subtract a deduction yourself and the maker subtracts it again, your blind ends up too small. Gaps on each side let in light and look sloppy. That is called a double deduction, and it is completely avoidable.
Who applies the deduction: you or the maker?
For most custom window coverings sold online, the answer is the maker. Industry calculators describe the same pattern: most manufacturers ask for the exact opening size and apply the deduction themselves, commonly 1/4 inch or 3/8 inch off the total width. The same source lists a typical width deduction of 1/4 to 1/2 inch and a height deduction of 0 to 1/4 inch for an inside mount. Treat those as ballpark figures, since each product has its own.
So the safe default is simple:
- Read the measuring instructions on the product page or order form.
- If it asks for the opening size, give the opening size, with no deduction.
- Only subtract something if the instructions explicitly say to.
When instructions say “exact size,” they mean it. Trust the process and let the factory do the trimming. 😊
Why deductions vary by product
This is the part that explains all those conflicting guides. Clearance depends on how the product is built and how it moves.
- Roller shades: the tube, end caps and clutch or motor take up space at the sides, so the fabric is cut narrower than the opening.
- Cellular and zebra shades: the headrail and fabric edges need side clearance to raise and lower without catching.
- Wood, faux wood and aluminum blinds: slats tilt and the headrail has brackets, so these need room too, often more than a simple fabric shade.
- Vertical blinds: vanes hang and rotate, so height clearance at the bottom matters as much as width.
- Motorized versions: the motor and its housing can change what fits where, so follow the instructions on the specific product page.
One retailer’s guide puts the range at 1/8 up to 1/2 inch depending on the product, but we won’t pretend there’s one magic number. Our advice: ignore anyone’s universal rule and follow the instructions for the exact product you’re ordering.
The “it’s always 1/4 inch” myth
You’ll see 1/4 inch quoted constantly, and it is a common figure, especially for width. But height may take 0 deduction, and some products take more. A rule of thumb is a decent sanity check, never a substitute for the product’s measuring page.
Inside mount vs. outside mount: where deductions apply
Your mount type decides whether deductions even enter the picture.
Inside mount
The product sits within the window frame (the recess). It is the clean, tailored look many people love, and it is the only mount where deductions matter, because the product has to fit between the frame sides.
For inside mounts you measure the opening itself. Our walkthrough on measuring for inside mount blinds covers the full process.
Outside mount
The product mounts on the wall, trim or ceiling above the window, so it covers the opening and overlaps it. There is no frame to squeeze into, so no running-clearance deduction applies. Instead, you decide how much overlap you want on each side and above, which helps with light control and privacy. Here is our guide to measuring outside mount blinds.
Not sure which mount suits you? A quick check: if your frame is deep enough and reasonably square, inside mount gives the neatest look. If the frame is shallow, has obstructions like handles or cranks, or you want to hide an ugly frame, outside mount is the easier call.

How to measure an inside mount window, step by step
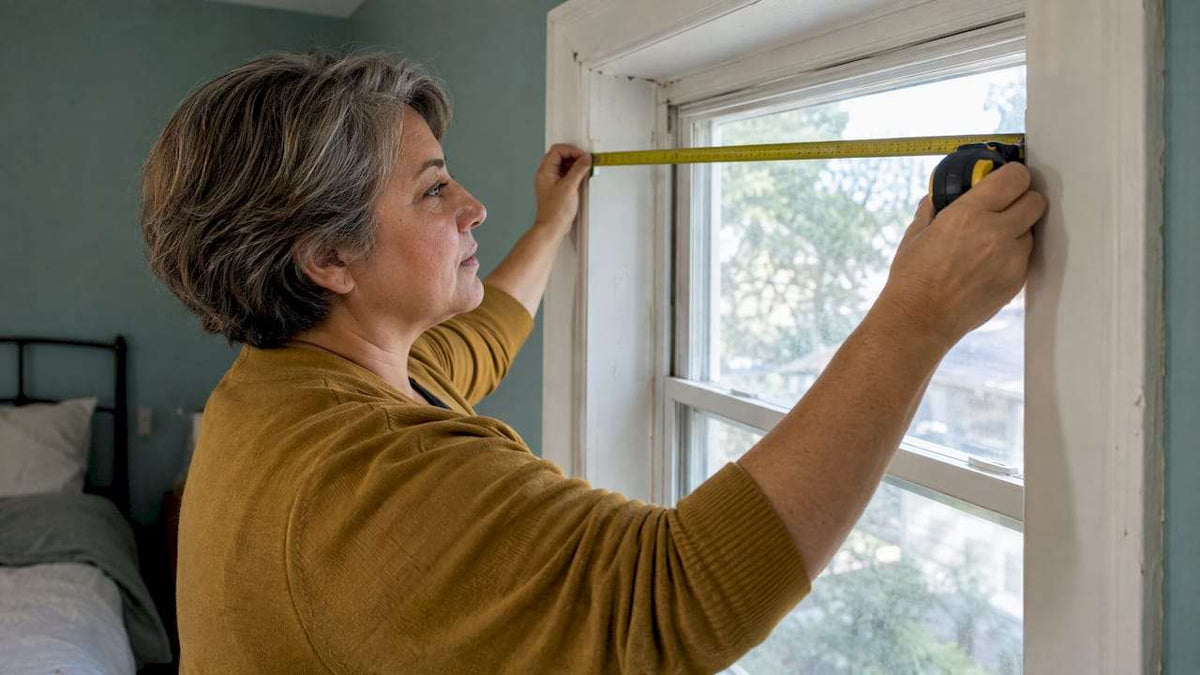
Grab a steel tape measure (cloth tapes stretch and fabric tapes sag), a pencil and paper. Then:
- Measure the width in three places: top, middle and bottom of the opening, from one side of the frame to the other.
- Pick the narrowest. The product has to pass the tightest point, so the smallest width is the one that counts. This matches how window makers instruct it too: JELD-WEN’s guide has you measure the narrowest part of the frame in three places.
- Measure the height in three places: left, center and right, from the top of the opening to the sill.
- Record height as the product instructions direct. Many blind guides ask for the longest height for products that hang or roll up and want a little cover at the sill, but check the instructions for your product.
- Measure the depth. From the glass (or any obstruction) to the front edge of the frame. Depth tells you whether the product can sit fully inside.
- Round to the nearest 1/8 inch and write it down immediately.
If your three width readings differ by a little, that is normal. Older homes shift, and walls settle. Use the narrowest number and let the deduction handle the rest. If they differ by a lot, mention it to us before ordering so we can help you pick the right approach.
Check for square, too
A quick diagonal check helps. Measure corner to corner both ways. If the two numbers are close, your window is close to square. Large differences hint at an out-of-square opening, and that can affect how a snug inside mount looks.
A worked example
Say you’re measuring a bedroom window for a roller shade, inside mount:
| Reading | Top | Middle | Bottom |
|---|---|---|---|
| Width | 35 1/2" | 35 3/8" | 35 1/2" |
| Reading | Left | Center | Right |
|---|---|---|---|
| Height | 47 1/4" | 47 1/8" | 47 1/4" |
Depth: 2 1/2".
The narrowest width is 35 3/8". That is the number you record. You don’t subtract anything. If the maker’s deduction on that product is, say, 3/8 inch, the shade is produced at 35" wide, and it slides in with a little breathing room on each side.
Now the mistake version: you subtract 3/8 yourself (35"), then submit it, and the maker subtracts again. You’d get a shade near 34 5/8". That’s a gap of roughly 3/16 inch each side. It doesn’t sound like much, but it’s very noticeable with a blackout fabric, where light leaks around the edges.
How to write your measurements down
A good record prevents costly mix-ups. Here is the format we like:
- Always write width first, then height, then depth (W x H x D).
- Label each window (“Kitchen sink,” “Bedroom left”) and mark which is which on a quick sketch.
- Note the mount type for each window: inside or outside.
- Write the measurement in inches and fractions to the nearest 1/8 inch, like 35 3/8", not 35.4".
- Say whether your number is raw or adjusted. Ideally everything is raw, meaning no deduction taken.
- Note obstructions: window cranks, handles, trim, or a vent that could get in the way.
For more on recording numbers like a pro, see our guide to measuring blinds like an installer.
Common mistakes (and quick fixes)
- Measuring once. Windows are rarely perfect. Always measure three times per direction.
- Using the widest number for an inside mount. The narrowest is the safe one.
- Deducting twice. Only subtract when the instructions say so.
- Rounding up. Round to the nearest 1/8 inch, and don’t pad numbers “just in case.”
- Forgetting depth. A product that needs 2 inches won’t sit flush in a 1 1/2 inch recess.
- Mixing up orientation. Width is side to side, height is top to bottom. Seems obvious, but it happens at 11 p.m. with a flashlight.
Product-by-product measuring notes
We have step-by-step guides for each product family, since details differ:
Before you order, always check the measuring instructions on the specific product page. They tell you what to record for that product.
Our take on deductions
We built our ordering process around one idea: you shouldn’t need to be a carpenter to get a good fit. That’s why, for our custom blinds and shades, we ask you to focus on what you can see and measure, the true size of your opening, and we take care of the clearance side in production.
Why do we think that’s the right way? Because people are great at measuring and bad at remembering which product needs which fraction. A cellular shade, a faux wood blind and a vertical blind all move differently. Keeping the deduction on the maker’s side means one less thing for you to get wrong.
Our range covers roller, zebra, cellular, Roman, solar and natural woven shades, plus wood, faux wood, bamboo, aluminum and vertical blinds, with motorized and cordless options. If you’d rather skip the tape measure altogether, our Pro Measure & Install service is there for exactly that. Measure with confidence, or let us do it. Either way, you get a better fit.
Sunny
Ready to order? Here’s how we can help
Once your numbers are written down, the fun part begins: choosing the look. Browse our full range of blinds and shades, from light-filtering cellular shades to sleek zebra shades. We offer free swatches so you can see fabrics in your own light, measurement guides, warranties and nationwide professional measuring and installation if you want a hand.
If measuring still feels daunting, our professional measuring and installation service means someone experienced takes the numbers for you. Details are on our homepage.
FAQ
Should I subtract anything from my measurements before ordering custom blinds?
Usually no. Most custom makers ask for the exact opening size and apply their own deduction during production. Subtracting it yourself risks a double deduction and a blind that is too small. Only take a deduction if the product’s measuring instructions tell you to.
Which measurement do I use if my window isn’t perfectly square?
For an inside mount, record the narrowest of your three width readings. Window makers follow the same logic of measuring the narrowest part of the frame in three places. For height, follow the instructions for your specific product.
Do outside mounts have deductions?
No clearance deduction applies, because the product mounts on the wall or trim instead of fitting between frame sides. You measure the area you want to cover and add overlap on each side and above. Aim for enough overlap to improve light control and privacy.
How precise do I need to be?
Measure to the nearest 1/8 inch and write fractions rather than decimals. Take each measurement three times in different places. Tiny differences are normal, and the maker’s production allowance is designed to handle them.
What if I’m not confident measuring myself?
That’s what professional measuring is for. Our Pro Measure & Install service sends someone to take the numbers and install the product, so you don’t have to think about deductions at all. 👍
Sources
- Measure For Replacement Windows (Window World of Southern Nevada)
- Window Blind Size Calculator (CalculatorLib)
- Measurement Guide for New Construction and Replacement Windows (JELD-WEN)