
How to Measure Outside Mount Blinds for a Perfect Fit
TL;DR:
- Accurate measurement is essential for outside mount blinds to ensure full coverage and proper fit.
- Key steps include measuring beyond the window frame, confirming levels, and recording the largest dimensions from multiple points.
Getting outside mount blinds to look clean and polished starts long before you pick a color or material. One wrong number, and you end up with a gap that lets light leak through on both sides or blinds that hang unevenly and throw off the whole room. The good news is that measuring outside mount blinds is a straightforward process once you know exactly where to measure, what to account for, and how to record everything properly. This guide walks you through every step so you can order with confidence and install with zero surprises.
Table of Contents
- What you need before you start
- Step-by-step: How to measure for outside mount blinds
- Common mistakes and troubleshooting
- Verifying your measurements and preparing to order
- Beyond basics: Why precision is worth it (and what most guides miss)
- Find your perfect blinds, custom-sized and ready to install
- Frequently asked questions
Key Takeaways
| Point | Details |
|---|---|
| Gather your tools | Use a steel tape measure, level, and notepad to guarantee accurate results. |
| Measure with overlap | Always add 2-3 inches beyond your window frame on each side for best function. |
| Double-check all entries | Verifying all measurements before ordering prevents costly mistakes. |
| Use the largest dimension | For non-square windows, select the largest width and height recorded. |
| Order with confidence | Accurate measurements ensure a perfect, professional-looking finish. |
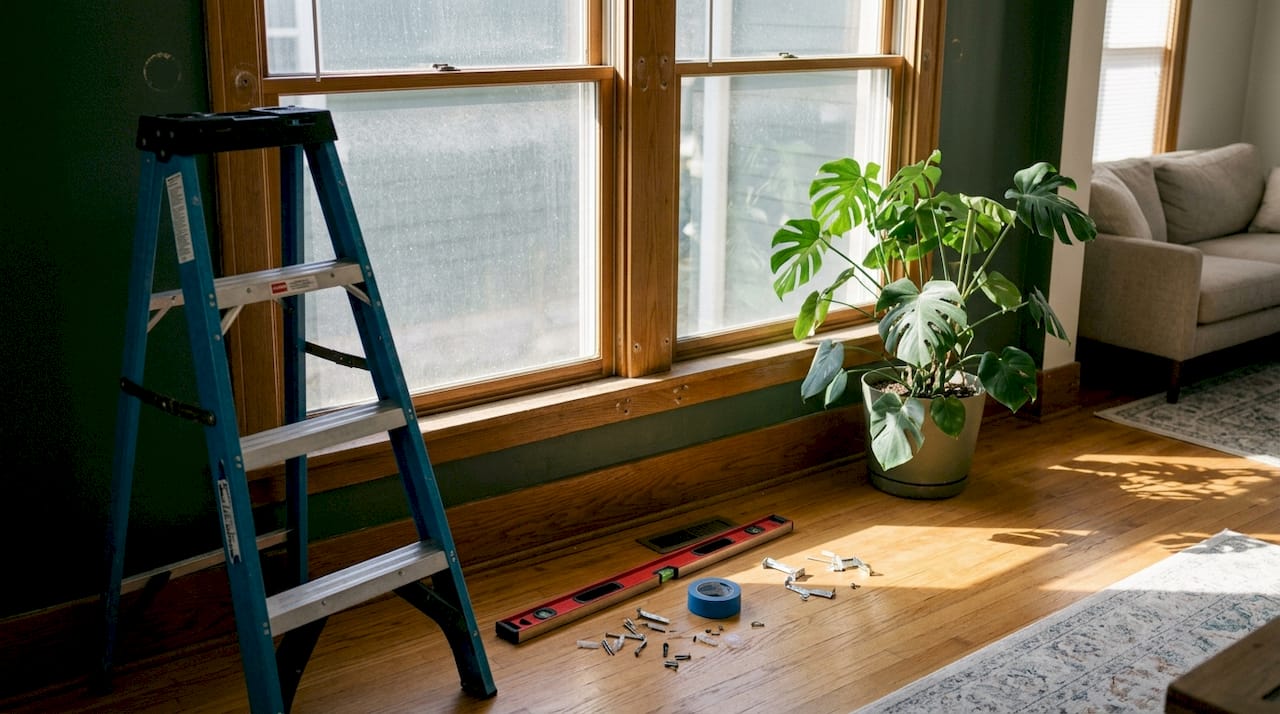
What you need before you start
Now that you understand why accuracy matters, let’s look at exactly what you’ll need and how to get set up for success.
Before you pull out a tape measure, take a few minutes to gather the right tools and clear the space around your window. Rushing this prep step is where most DIY installs go sideways. Working with the wrong tools or a cluttered window area leads to inaccurate readings and frustrating results.
Tools you’ll need:
- Steel tape measure (not a fabric or cloth measuring tape, which can stretch and give false readings)
- Sharp pencil and notepad dedicated to recording measurements
- Step ladder if your windows are tall or high on the wall
- Level to confirm horizontal and vertical alignment
- A helper if you’re measuring large or bay windows
The steel tape measure is non-negotiable. Fabric tape measures are designed for sewing and can sag or flex mid-measurement, throwing off your numbers by a quarter inch or more. On a custom order, that small variance adds up fast. For a solid perfect fit measurement guide, your tools are your foundation.
Before you start recording any numbers, clear the windowsill and remove any existing window treatments. Check the wall surface above and around the window frame for outlets, switches, molding, or protruding trim that might interfere with your bracket placement. Uneven or textured walls can affect how flat your blinds sit, so note those areas too.
A comparison of patio shading tools shows how closely tool selection ties to installation accuracy across different mounting styles. The same principle applies indoors. A full complete list of tools and preparation information can help you confirm you haven’t missed anything before you start.
Minimum recommended overlap for outside mount blinds:
| Coverage goal | Overlap per side | Total added to window width |
|---|---|---|
| Basic light control | 1.5 inches | 3 inches |
| Standard privacy | 2 to 3 inches | 4 to 6 inches |
| Full blackout coverage | 3 to 4 inches | 6 to 8 inches |
Understanding the overlap you need before you measure helps you plan the total blind width accurately from the start rather than guessing during the ordering process. For guidance specific to shades, the DIY measuring windows for shades resource walks through the nuances for different fabric and opacity levels.
Pro Tip: Always measure twice, once to check and once to confirm. Write down both readings and compare. If they match, you’re good. If they don’t, measure a third time.
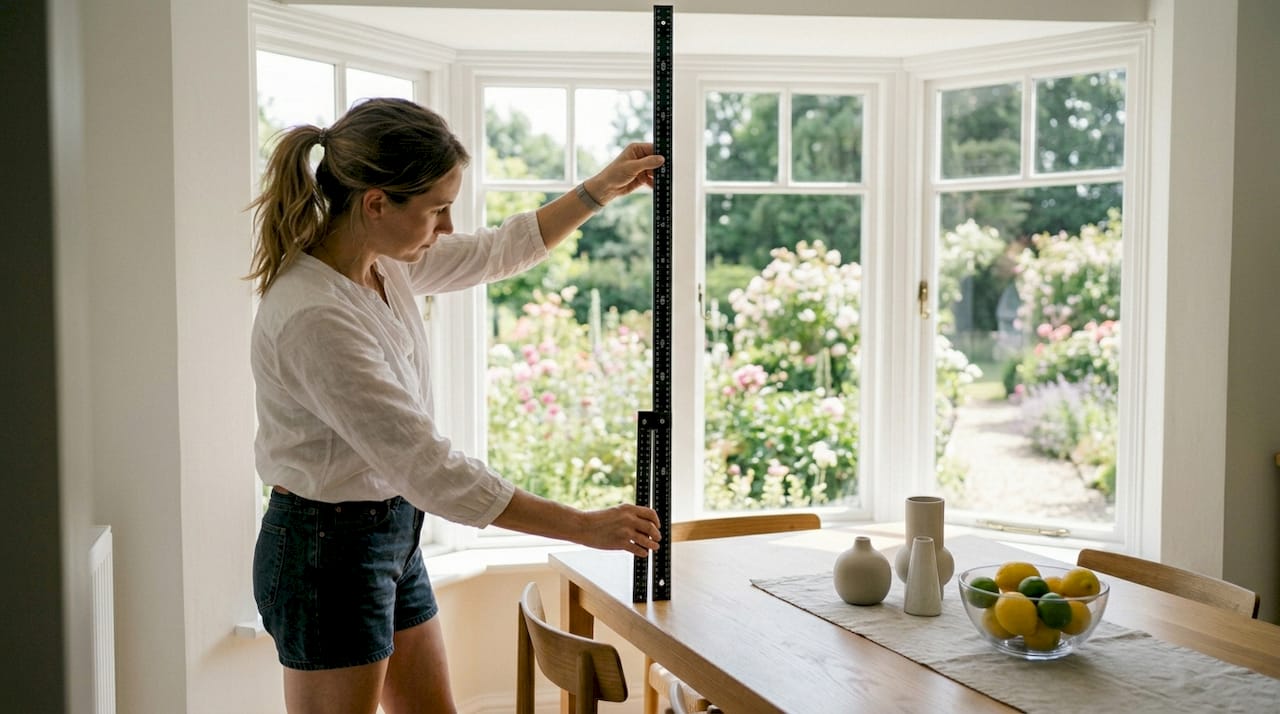
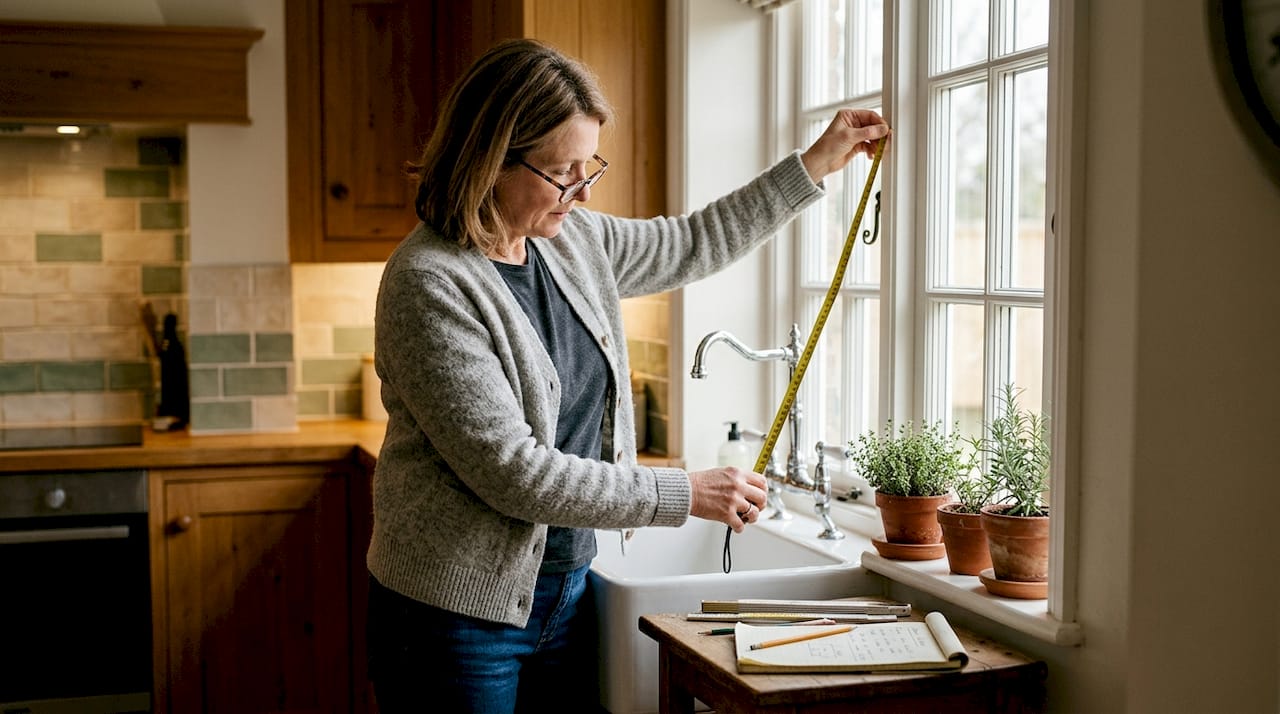
Step-by-step: How to measure for outside mount blinds
With your tools assembled, you’re ready to dive into the measurements themselves.
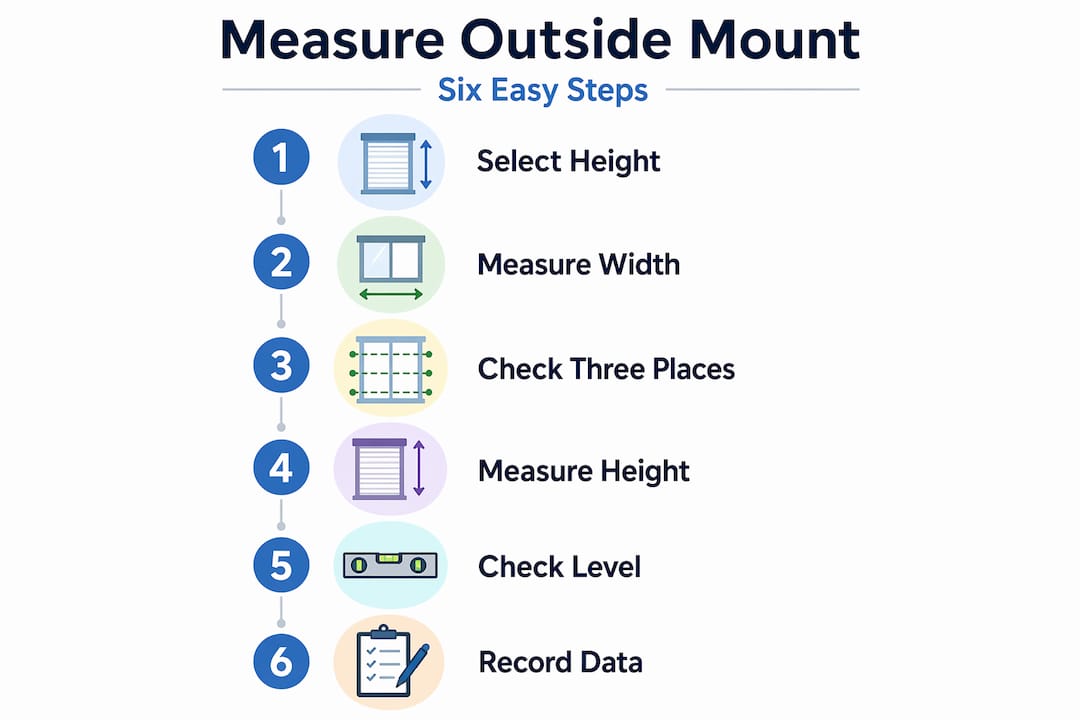
Outside mount blinds attach to the wall or ceiling above the window frame rather than inside the window recess. This gives you much more control over the size and placement of your blinds, which is especially useful for windows with shallow depth or for achieving a more dramatic, floor-to-ceiling look. The sequential process for measuring outside mount blinds is clear once you break it into logical steps.
Step 1: Decide how high above the frame your blinds will start. Many homeowners mount blinds 3 to 4 inches above the window frame for a standard look, or closer to the ceiling for a taller, more elegant appearance. Mark that point on the wall with a light pencil mark.
Step 2: Measure the total width. Start from your desired left edge (including overlap) to your desired right edge. For a window that measures 36 inches wide at the frame, a 2.5-inch overlap on each side means your blind should be ordered at 41 inches wide. Use your level to confirm both marks are at the same height so your blind hangs straight.
Step 3: Measure width in three places. Even though outside mount blinds attach to the wall or ceiling above the frame, wall surfaces can be slightly uneven. Measure at the top, middle, and bottom of your planned mount zone, and use the largest measurement when placing your order. This ensures complete coverage.
Step 4: Measure the total height. Run your tape from the top mounting point down to where you want the blind to end. This might be the windowsill, a few inches below it, or even the floor if you’re going for a dramatic drape effect. Measure left, center, and right, then use the largest of the three.
Step 5: Check for level. Use your level on both the left and right side marks to confirm everything lines up horizontally. A blind that starts even one degree off will be visually noticeable from across the room, especially with a straight horizontal bottom rail.
Step 6: Record everything in a summary table. Don’t rely on memory or scattered notes.
| Measurement point | Width reading | Height reading |
|---|---|---|
| Left / Top | 41.25 in | 54.5 in |
| Center / Middle | 41.25 in | 54.75 in |
| Right / Bottom | 41.5 in | 54.5 in |
| Use for order | 41.5 in | 54.75 in |
This method of taking multiple readings and selecting the largest is also used in professional installs because walls and frames are almost never perfectly uniform. For windows where inside mounting is also a possibility, the guide on inside mount blinds measuring gives a useful comparison.
For context, outside mounting measurement standards follow a similar logic of measuring beyond the structural opening to achieve clean coverage, a method consistent across different shade and awning products. For a more detailed breakdown, fitting blinds correctly covers the nuances of exact entry into custom order forms.
Pro Tip: Always round up to the nearest 1/8 inch when entering your measurements. For example, if your reading is 41 and 3/16 inches, round to 41.25 inches. Ordering slightly larger ensures full coverage without visible gaps.
Common mistakes and troubleshooting
Once measurements are noted, it’s critical to confirm them and dodge the most common pitfalls.
Even experienced DIYers make these errors. Knowing what to look for ahead of time means you can catch a problem before it becomes a costly reorder. The top mistakes made when measuring outside mount blinds fall into a few predictable categories.
The most frequent measuring mistakes include:
- Measuring only the window frame width and forgetting to add overlap on both sides, resulting in a blind that covers the glass but leaves noticeable light gaps along the edges
- Skipping the level check, which leads to a noticeably crooked installation that no amount of adjustment will fully correct once the brackets are fixed to the wall
- Assuming the window is square when it isn’t. Most residential windows have at least a small discrepancy between the top and bottom or left and right. That’s why measuring in multiple places matters so much.
- Transposing width and height when entering your order online. This is an easy mix-up, especially when you’re toggling between notes and an order form. Always double-check which field is labeled which.
- Using old measurements from a previous blind or from when the house was built. Windows settle, frames shift, and older measurements may be off by enough to cause a poor fit.
“The biggest mistake homeowners make is treating measurement as an afterthought. Get this step right, and everything else falls into place.” This reflects the core philosophy behind every well-fitted window installation.
Quick fixes when you catch an error before ordering are simple. Cross out wrong numbers entirely and rewrite them. Never cross a number out in a way that leaves it readable, as it’s too easy to accidentally submit the wrong figure. Review every measurement against your summary table before hitting submit.
Shading installation tips confirm that even in professional outdoor installs, verification steps are treated as a required phase, not optional. The same mindset serves you well with custom blinds. If you want to avoid measurement errors before they happen, a final walkthrough of your numbers against this list is worth every minute.
Pro Tip: Before submitting your order, confirm which measurement is your width and which is your height. Saying them out loud as you enter each one (“this is the width at 41.5 inches”) sounds simple, but it actively prevents the brain from going on autopilot and swapping the two.
Verifying your measurements and preparing to order
To wrap up your measurement process, let’s ensure you’ve got everything set for a hassle-free order.
Verification is its own phase, not just a quick glance at your notes. Treat it that way and you’ll avoid the most expensive mistakes. Knowing how to translate measurements into custom blinds orders means understanding that the numbers you submit are exactly what the manufacturer will cut to.
Comparison table: Sample window vs. ordering size for outside mount blinds
| Measurement | Actual window frame | Overlap added | Final order size |
|---|---|---|---|
| Width | 36 inches | 5 inches (2.5 per side) | 41 inches |
| Height | 50 inches | 4 inches (from frame to mount) | 54 inches |
Before finalizing your order, verify these items:
- Width is listed first, then height (most order forms use W x H format)
- You’ve confirmed measurements with at least two separate readings
- Overlap has been added on all relevant sides
- You’ve saved a copy of final measurements in a notebook or spreadsheet for future reference (for re-ordering or replacing a damaged blind)
- The mounting point marked on your wall is level and free from obstructions
Once installed, a correctly measured outside mount blind should sit flat against the wall with no visible daylight gaps along either side edge. The bottom rail should be parallel to the floor. If it hangs noticeably lower on one side, the mounting bracket on that side likely needs to shift up a small amount. That’s a bracket adjustment, not a measurement error, so don’t panic.
Common post-order adjustments homeowners may need include bracket repositioning if the wall surface turned out to be less flat than expected, or a slight tilt correction if the header rail has a minor slant. These are minor tweaks that don’t require reordering. For a detailed reference on the full ordering process, step-by-step blinds measuring covers what to expect at each stage. A broader look at outdoor shading accuracy tips reinforces how consistent the verification phase is across shading products of all types.
Beyond basics: Why precision is worth it (and what most guides miss)
Most measuring guides treat this process as a purely numerical exercise. Get the right number, enter it correctly, done. But that framing misses something important.
The decision of where to mount your blinds and how much overlap to add isn’t just a technical question. It’s a lifestyle question. A blind mounted higher creates the visual impression of taller ceilings. A blind with generous overlap at the sides dramatically reduces afternoon glare without requiring blackout fabric. A blind sized to reach the floor adds a layer of insulation that a properly measured cellular shade makes even more effective.
We’ve seen countless rushed installs where homeowners measured the window frame accurately but never stopped to think about what experience they actually wanted from the room. They got blinds that technically fit but didn’t serve the function they needed. The result was dissatisfaction that had nothing to do with product quality and everything to do with skipping a 10-minute planning conversation with themselves.
Precise measuring also has real impact on home resale value. Buyers and appraisers notice window treatments that look custom, fitted, and intentional. A blind that aligns with the ceiling or a shade that spans exactly from trim edge to trim edge signals quality and care. It’s a small detail that shapes overall impressions.
The guides that focus purely on numbers also don’t mention this: your measurement decisions should factor in how much natural light you want in the morning, whether you need privacy from street level or from a second-story neighbor, and whether the room runs hot in summer. These factors influence ideal blind width, height, and fabric density just as much as the window frame itself.
Taking 30 extra minutes to think through function and lifestyle before you finalize your order is the single best investment you can make in your window treatment project. Accurate DIY blinds measuring gives you the technical foundation. What you do with it is entirely your call.
Find your perfect blinds, custom-sized and ready to install
With your measurements in hand, you’re just one step away from upgrading your space and ensuring a flawless finish.
At Value Blinds, every product in our custom-sized blinds collection is cut precisely to the dimensions you submit, so the work you’ve done measuring pays off immediately. You’re not adjusting a standard size to fit. You’re ordering something made for your exact window.

We offer free swatches so you can confirm color and fabric before you commit, and our expert support team is available to walk you through any questions about your measurements or product choices. If you’re after a clean, cord-free look, our cordless blinds options are a popular choice for both safety and style. And if you want to visualize exactly how your selections will look in your space before ordering, the design studio for window treatments makes the whole process intuitive and satisfying.
Frequently asked questions
How much overlap should outside mount blinds have?
A minimum of 2-3 inches of overlap on each side is recommended for full coverage and privacy, with more overlap needed for blackout applications.
How do I measure if my window isn’t square?
Take three measurements for both width and height at different points, then use the largest measurement for your order to ensure a proper fit regardless of the irregularity.
Should I round up or down when entering measurements?
Always round up to the nearest 1/8 inch so your blinds provide full coverage without leaving gaps along the edges.
What are common mistakes when measuring outside mount blinds?
The most common mistakes are failing to include overlap, mixing up width and height when entering the order, and skipping the level check before marking your mounting points.


