
Article: The Role of Mounting Brackets in Blind Stability
The Role of Mounting Brackets in Blind Stability
Mounting brackets are the only thing connecting your blind to your home. They carry its full weight, hold the headrail level, and take the tug every time you raise, lower or tilt it. If the brackets are the right type, spaced well and fastened into something solid, the blind stays put for years. If not, you get sagging, rattling, crooked slats, or a blind on the floor. 😬
Here is how brackets work, what the different types do, and how to install them so your blind stays rock steady.
TL;DR
- Brackets support the blind’s weight and keep the headrail level. Everything else (smooth lifting, straight slats, quiet operation) depends on them.
- Fasteners must match the surface behind the bracket. Drywall needs anchors, and a stud or solid framing is better for heavy blinds.
- Wider and heavier blinds need more brackets, including a center support, so the headrail does not bow.
- Hold-down brackets pin the bottom rail in place on doors and other spots where a blind swings.
- Most “my blind fell” stories come down to skipped steps: loose screws, a headrail not fully seated, or a wrong surface.
Table of Contents
- What mounting brackets actually do
- How blind installation brackets work
- Inside mount vs. outside mount: where the brackets go
- Types of brackets you will run into
- Material, spacing and fit: what affects support
- What you are screwing into matters most
- Step by step: installing brackets so they hold
- Why blinds loosen, sag or fall
- Quick safety notes
- Our perspective
- Ready for a blind that stays put?
- FAQ
- Sources
What mounting brackets actually do
Think of brackets as the foundation under a house. You rarely look at them, but they decide whether everything above them behaves.
A bracket does four jobs:
- Carries the load. The blind’s weight, plus the pull of your hand on the cord, wand or bottom rail, travels through the headrail into the brackets and then into the wall, frame or ceiling.
- Sets the position. Brackets decide how far the blind sits from the glass, how high it hangs, and whether it clears the window handle or crank.
- Keeps it level. If one bracket sits even a little higher than its neighbor, the headrail tilts. That tilt shows up as a roller shade that drifts to one side, or slats that look uneven. (If that sounds familiar, our guide to fixing crooked blinds walks through the repair.)
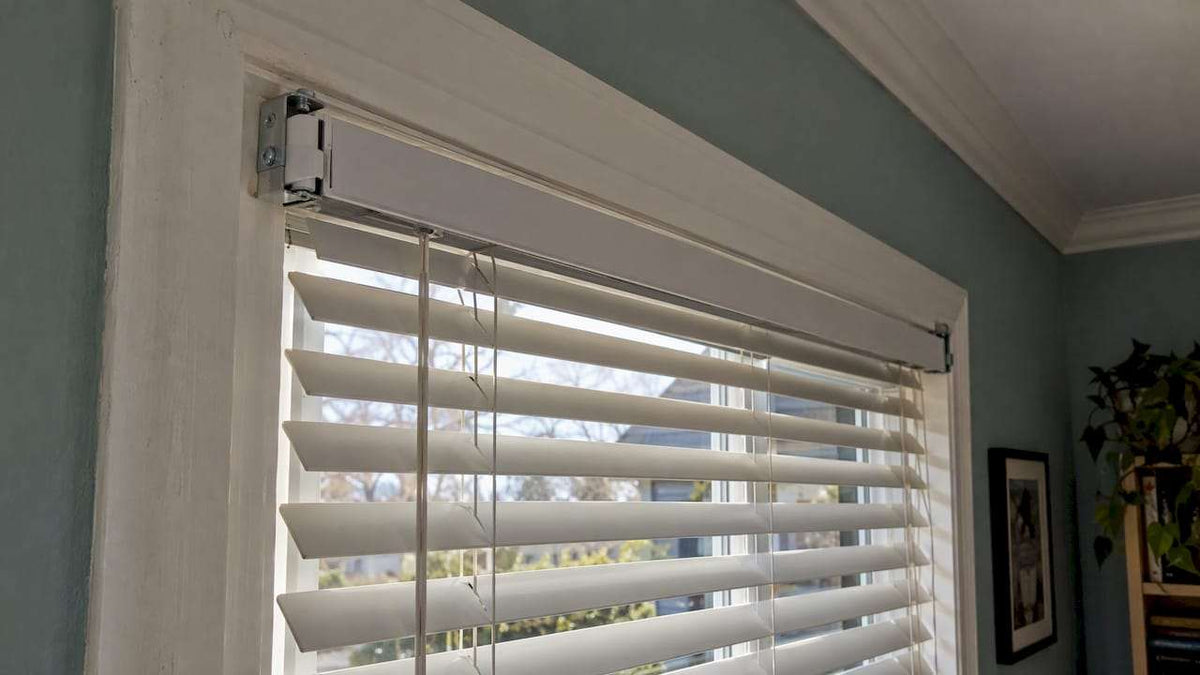
- Holds the headrail securely. Most brackets have a clip, slot or hinged cover that locks the headrail in. That lock is what keeps the blind from popping loose when someone bumps it or yanks the cord.
How blind installation brackets work
The basic sequence is the same for almost every blind, from a basic aluminum mini blind to a motorized zebra shade:
- The brackets are screwed to the window frame, wall or ceiling.
- The headrail (the top box or tube of the blind) slides, snaps or clips into the brackets.
- A latch, cover or retaining tab closes to lock it in.
Because the blind is held at the brackets alone, a small mistake there gets magnified along the whole width of the window. A bracket that’s a quarter inch off at one end is a visibly crooked blind at the other.
Most manufacturers state this plainly in their instructions. One installation guide for aluminum blinds says to secure brackets with fasteners suited to the surface (drywall anchors for drywall), and notes that a blind can fall if the bracket and headrail are not properly secured or if more than one spacer block is used. The same guide stresses leveling and aligning all brackets, and says shims can correct an uneven mounting surface.
Inside mount vs. outside mount: where the brackets go
Your mounting position changes where the brackets sit, and that changes what they can grip.
Inside mount
Brackets attach inside the window recess, either on the top of the frame (the “ceiling” of the opening) or on its sides. This gives a clean, built-in look. The catch: the opening needs enough depth for the brackets and headrail, and it needs to be reasonably square. Frame material matters too. Solid wood or a well-built jamb holds screws nicely, while thin vinyl or aluminum frames may not.
Outside mount
Brackets attach to the wall or trim above and around the window, or to the ceiling. Outside mounts are the problem-solver for shallow windows, out-of-square openings, or when you want to make a window look taller or wider. They also give you more freedom to hit a stud or header, which means a stronger hold.
Ceiling mount
Brackets screw upward into the ceiling, usually into a joist or solid blocking. Ceiling mounts suit floor-to-ceiling glass and tall drapery-style shade layouts. Since the load pulls straight down on the screws, picking the right anchor and hitting solid material really matters here.
Want the full walkthrough of measuring and placing each type? See our guide on how to install blinds for a perfect window fit.
Types of brackets you will run into
Not all brackets are created equal. Here are the common ones and what each is for.
| Bracket type | What it does | Where you see it |
|---|---|---|
| Standard mounting bracket | Holds each end of the headrail | Nearly every blind and shade |
| Center support bracket | Adds a middle anchor so a wide headrail does not sag | Wide blinds and shades |
| Extension or spacer bracket | Pushes the blind forward to clear a handle, trim or deep sill | Windows with obstructions |
| Hold-down bracket | Pins the bottom rail so the blind does not swing | Doors, RVs, drafty spots |
| Wall or ceiling flush bracket | Mounts in a different orientation | Outside and ceiling mounts |
| Motor-ready or heavy-duty bracket | Handles a bigger headrail with a motor inside | Motorized shades |
Extension brackets
If you’ve ever wondered why some shades sit away from the wall on little arms, that’s an extension bracket. It creates clearance so the shade rolls past a window crank, deep trim or a protruding handle. It adds depth, so check that whatever it is screwed into is solid, because the projecting arm gives the load more leverage.

Hold-down brackets
Hold-down brackets secure the bottom of the blind. They’re typically used on doors, where the blind would otherwise swing or slap each time the door opens, and they prevent unwanted movement and rattling. They are not a replacement for top brackets. They only steady the bottom rail. Pair them with properly installed headrail brackets.
Material, spacing and fit: what affects support
Bracket material
Brackets come in metal and plastic, and the right one depends on the blind. Metal tends to be the better pick for heavier products like solid wood blinds or larger roman shades, because it resists flexing under load. Plastic is fine for lighter products where the manufacturer designed it that way. The simple rule: use the brackets that came with your blind or that the maker specifies. Swapping to random hardware-store brackets can cause a poor fit in the headrail clip.

Spacing
More width means more weight and more potential for the headrail to bow. A useful habit: follow the bracket count in your blind’s instructions and add the center support whenever one is included. Never skip it to save a few minutes. A middle bracket is exactly what keeps a wide shade from sagging in the center.
Fit
A headrail that wiggles in its brackets is a warning sign. Check that:
- The headrail is fully seated, with the clip or latch closed.
- Brackets are aligned in a straight line, not one forward of the others.
- Screws are snug and fully into solid material, not spinning in a hole.
- You are using one spacer block at most, if spacers are called for.
What you are screwing into matters most
The strongest bracket in the world is only as good as what is behind it. Match the fastener to the surface:
- Wood stud, header or solid wood frame: Best holding power. Pilot-drill first to prevent splitting, then drive the supplied screws.
- Drywall only: Use drywall anchors rated for the load. Plain screws into drywall alone can pull out over time, especially with a blind you operate daily.
- Plaster, brick, concrete, tile: These need the right bit and the right anchor. Rushing it can crack the surface.
- Metal or vinyl frames: Follow your blind maker’s instructions, as thin material may not hold a typical wood screw.
We put together a full walkthrough on matching anchors to your wall type before you drill. It’s worth a read if you’re not sure what’s behind your wall.
Not able or not allowed to drill, say in a rental? There are options for that too. Check how to install blinds without drilling, and keep in mind that no-drill hardware is typically meant for lighter products, so follow the weight guidance for your specific blind.
Step by step: installing brackets so they hold
Here is a reliable routine for most blinds and shades. Always defer to the instructions that came with your product.
- Read the instructions first. Brackets vary, and the order of steps changes by blind type.
- Hold the blind up to check the fit. Confirm inside or outside mounting and that the blind clears handles and trim.
- Mark bracket positions. Use a pencil and a level. Mark the end brackets first, then any center supports, keeping them in a line.
- Check what is behind the marks. Find studs or solid framing where you can. If you cannot, pick anchors for that surface.
- Drill pilot holes. Use the right bit size. This keeps wood from splitting and screws from wandering.
- Fasten the brackets. Tighten until snug and firm. Do not overtighten into soft material, which can strip the hole.
- Re-check level. Lay the level across the tops of the brackets. Use a shim behind a bracket if the surface is uneven.
- Seat the headrail. Slide or clip it in and close the latch or cover until it locks.
- Test it. Raise, lower, and tilt a few times. Give the headrail a gentle tug upward. If anything shifts, fix it now, not after the first kid or cat finds it. 🐱
For motorized shades, which have a heavier headrail with a motor inside, take extra care with bracket placement and anchoring. Our motorized blinds installation guide covers it step by step.
Why blinds loosen, sag or fall
When a blind comes down, it is almost never a mystery. The usual suspects:
- Screws in drywall without anchors. They slowly work loose with daily use.
- A headrail not fully locked in. It looks seated but pops out with a bump or a hard pull.
- Stacked spacers. Using more than one spacer block is called out by manufacturers as a cause of falls.
- Too few brackets for the width. The headrail bows and one end slips.
- Uneven brackets. One end carries more load, and the blind tilts and strains.
- Wrong hardware. Mismatched brackets that do not grip the headrail properly.
- Overloading. Adding a heavier valance or swapping to a much heavier product on old brackets.
If your blind has started to wobble, do not wait for it to fall. Take it down, check the screw holes, reseat or replace anchors, and tighten. If a hole is stripped, move to solid material, or use a larger anchor.
Quick safety notes
- Keep cords out of children’s and pets’ reach. Cordless and motorized options remove the loose cords entirely, and that is one reason many families go that route.
- Use a stable ladder and have a helper hold the other end of a wide blind while you seat it.
- Wear eye protection when drilling into ceilings or masonry.
Our perspective
At Value Blinds we see the same thing again and again: people spend ages choosing the perfect fabric and color, then treat the brackets as an afterthought. We think that is backwards. The bracket is what makes your blind feel solid every single day.
That is why we design our made-to-order blinds and shades with installation in mind. Our blinds are built to your measurements, and our measuring guides help you choose the right mounting position before you order, so the brackets land where they should. If you would rather not do it yourself, our professional measuring and installation service takes bracket placement, leveling and anchoring off your plate.
Our advice is simple. Match your anchors to your wall, use every bracket in the box (yes, the center one too), and check level before you load the headrail. Do that, and a well-made blind should work smoothly for years.
Sunny
Ready for a blind that stays put?
If you are shopping for new window treatments, we make custom blinds and shades built to your measurements, from roller shades and cellular shades to wood blinds and motorized options. You can order free swatches to see the fabric in your light, use our measuring guides, and add professional measuring and installation if you want bracket work handled for you. Browse our full range on the Value Blinds home page or jump straight to our blinds collection.

Looking for something specific? Our zebra shades and cellular shades are popular picks, and both are available with motorization.
FAQ
Do all blinds need brackets?
Nearly all blinds and shades that hang from a headrail use brackets of some kind. Some lightweight, tension-fit or no-drill products use different hardware, but the job is the same: hold the blind securely and in the right position. Always follow your blind’s own instructions for the hardware it needs.
How many brackets does my blind need?
The count depends on the blind’s width and weight, and your product instructions give the exact number. Wider blinds typically need a center support in addition to the two end brackets. If your blind came with an extra bracket, use it, because it is there to stop the headrail from sagging.
What are hold-down brackets for blinds?
Hold-down brackets secure the bottom rail of a blind to a door or a wall so it does not swing or rattle. They are most useful on doors and in places where the blind can be disturbed by movement or drafts. They work alongside the top brackets and do not replace them.
Can I mount brackets into drywall?
Yes, but use drywall anchors designed for the load, since plain screws in drywall can loosen over time. Where you can, screw into a stud or solid framing instead. Manufacturer instructions specifically call for anchors when mounting into drywall.
Why is my blind crooked even though it is installed?
Usually one bracket sits slightly higher or further forward than the others, or the headrail is not fully seated. Check with a level across the bracket tops and use a shim behind a bracket if the surface is uneven. Our guide on fixing crooked blinds has the full steps.