Article: Measure Blinds Like an Installer: Record W x H x Depth to 1/8 Inch
Measure Blinds Like an Installer: Record W x H x Depth to 1/8 Inch
Measure width in three places and record the narrowest number. Measure height in three places and record the longest for an inside mount. Decide inside or outside mount before you pick up the tape, always check window depth, and write every number to the nearest 1/8 inch using a steel tape measure, not a cloth one.
TL;DR:
- Using a steel tape measure and measuring three points for width and height ensures accurate sizing and prevents blinds from jamming or fitting too loosely.
- Inside mounts require precise depth measurements at multiple points to confirm the hardware will fit, while outside mounts depend on wall space with added overlap for light control and privacy.
- Rounding measurements to the nearest eighth inch is essential because factory deductions depend on exact data, reducing the risk of sizing errors.
- Specialized window shapes like bay, arched, or specialty windows often need professional measurement or templates to avoid gaps or improper fit.
- Confirming depth and clearance before ordering ensures the selected product’s hardware fits, especially for motorized or thick fabric shades, to avoid costly reorders.
Table of Contents
- Before You Measure for Custom Blinds: What to Gather First
- How to Measure an Inside Mount Window
- How to Measure an Outside Mount Window
- Measuring Special Windows: Roller, Vertical, Bay, and More
- Quick Tips and Mistakes to Avoid When Measuring Blinds
- What to Check Before You Place Your Order
- How to Measure Width for Blinds: The Three-Point Rule
- Why Window Depth Matters for Inside Mounts
- Should You Round Your Measurements to the Nearest 1/8 Inch?
- Tools to Use When Measuring for Custom Blinds
- Special Instructions for Roller, Vertical, Bay, and Specialty Shapes
- Quick Measuring Tips and Common Mistakes to Avoid
- How to Record and Organize Your Blind Measurements
- What to Check Before You Place the Order
- How Light Control and Privacy Needs Shape Your Measurements
- Does Fabric Thickness Affect Your Measurements?
- Measuring Windows With Uneven Trim or Casing
- Measuring for Motorized and Smart Home Blinds
- Where Homeowners Get Tripped Up, and How to Avoid It
- Ready to Turn Your Measurements Into the Right Blinds
- Sources
- FAQ
Before You Measure for Custom Blinds: What to Gather First
Grab your tools before you touch the window. Rushing this step is where most measuring mistakes start, and a mistake here means a reorder later. 😩
Your first real decision is inside mount vs. outside mount, and it changes everything about how you measure. An inside mount sits inside the window frame for a clean, built-in look, but it requires enough depth to hold the headrail and brackets. An outside mount hangs on the wall or trim surrounding the window, which is more forgiving if your frame is shallow, uneven, or you want extra light blockage at the edges.
Here’s what to have on hand:
- A steel tape measure (never cloth or fabric, they stretch and throw off your numbers)
- A pencil and paper, or a printed measuring worksheet
- A ladder or step stool for tall windows
- A small level, to check if your frame is square
- A helper, if you’re measuring anything wider than a standard window
Check for obstructions too. Cranks, handles, interior shutters, or thick trim can all eat into your usable depth. Measure that depth now, because product pages list a required minimum mounting depth, and that number needs to match reality before you fall in love with a headrail style.
Pro Tip: Take a photo of each window before you measure. When you’re staring at five sets of numbers later, you’ll be glad you can match them to the right room.
How to Measure an Inside Mount Window
An inside mount is the classic look most homeowners want, blinds tucked neatly into the frame with no hardware showing. Getting it right depends entirely on measuring in the right spots, not just once.
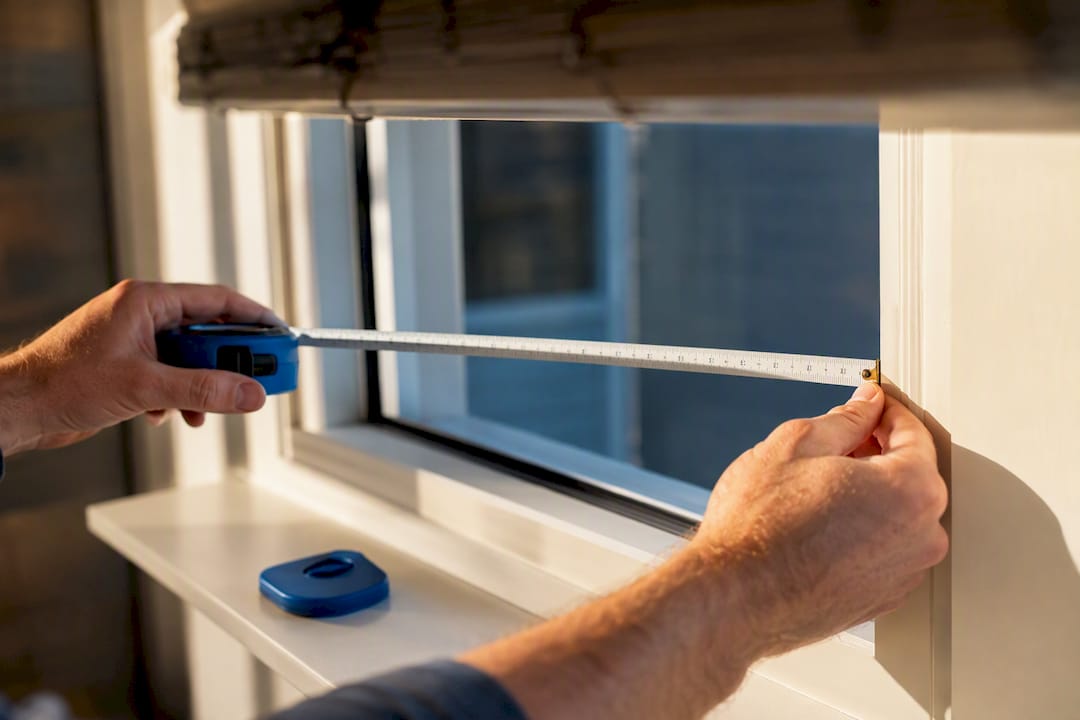
- Measure width at the top, middle, and bottom of the window opening. Record all three numbers, then use the narrowest measurement as your final width. Window frames settle and shift over years, so the top rarely matches the bottom exactly.
- Measure height at the left, middle, and right sides of the opening. This time, record the longest measurement as your final height. For inside mounts, you want the blind to reach the sill even if one side of the frame has drifted slightly.
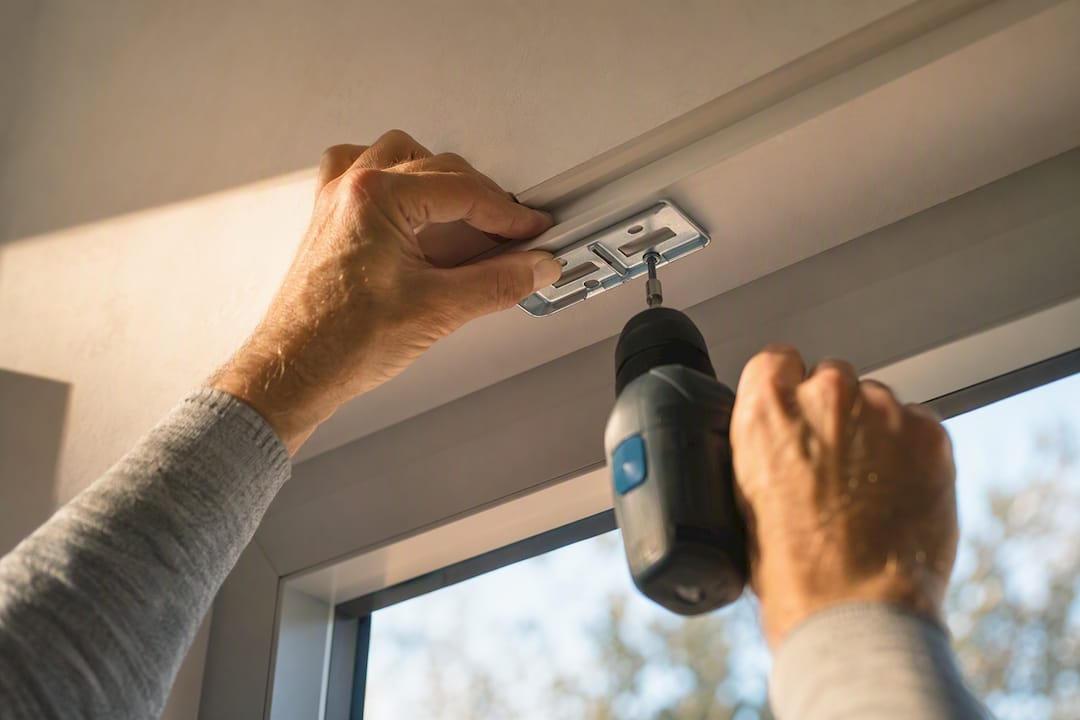
- Measure depth at several points where brackets will sit, and compare that number against the mounting depth listed on the product page.
- Write your final notation as W x H x depth, and always note mount type and control side (left or right) right next to it.
- Round to the nearest 1/8 inch. Never round up or down to the nearest whole inch.
Many home windows aren’t perfectly square, even in newer construction, which is exactly why measuring in three spots for both width and height catches the kind of variance a single tape pull would miss.
Here’s a detail most first-time measurers don’t expect: you should give the factory your exact, unrounded numbers rather than trying to “helpfully” round them yourself. Factories typically make small built-in deductions for inside-mount clearance, and they’re calibrated to work off your real measurement, not a number you’ve already adjusted. For a deeper walkthrough with photos, our guide on how to measure for inside mount blinds covers bracket placement in more detail.
How to Measure an Outside Mount Window
Outside mount is the move when your frame is too shallow for an inside mount, when you want to visually make a small window look bigger, or when you just want more privacy coverage at the edges. Here, you’re not measuring the opening, you’re measuring the wall space where the blind will actually hang.
Start by measuring the full area you want covered, and mark where your brackets will physically attach above and beside the window.
- Add extra overlap on each side of the window frame for better light control and privacy, usually a few inches.
- Add extra space above the frame so the headrail clears the opening and blocks light from sneaking in over the top, commonly a few inches.
- If your window faces a bedroom or bathroom where privacy matters more, lean toward the higher end of that overlap range.
- Factor in any decorative trim or molding that projects outward. It can affect how far your brackets need to sit from the wall.
For blackout needs in particular, these wider margins genuinely matter, since even a half-inch gap at the top of a headrail can let in a surprising sliver of morning light.
Record your final numbers as W x H, and jot down whether you measured for edge-to-edge coverage or added the extra overlap. That note matters later. If you forget why you added those extra inches, you might second-guess the number when you’re filling out the order form. Our detailed walkthrough on measuring outside mount blinds breaks down bracket spacing for different frame depths.
Pro Tip: If you’re on the fence between inside and outside mount, measure for both. It costs you five extra minutes and gives you options if your depth measurement comes back too shallow for the headrail you wanted.
Measuring Special Windows: Roller, Vertical, Bay, and More
Standard rectangular windows follow the rules above pretty cleanly. Specialty shapes need their own approach.
- Roller and solar shades: Measure the top width carefully, since that’s where the headrail sits. Some roller products have their own worksheet that overrides the general three-point rule, so check the roller blind measuring guide before finalizing.
- Vertical blinds: Measure the top track width rather than the opening itself, and note which direction you want the stack (left, right, or split) to sit when open. Our vertical blinds measuring guide walks through stack allowance in more detail.
- Bay and bow windows: Measure each panel separately, never as one continuous span. Number your panels left to right and note the angle between them, since some setups call for joined blinds while others need three independent units. The bay window measuring guide covers panel sequencing step by step.
- Arched or rounded windows: These genuinely aren’t a great DIY measuring job. Factory templates or a professional measure are worth the cost here, since a curve that’s off by a quarter inch can leave a visible gap.
- Sliding glass doors: Measure for full coverage of the opening plus enough clearance so the panel or shade doesn’t drag on the track when the door slides open.
Quick Tips and Mistakes to Avoid When Measuring Blinds
A few small habits separate a smooth order from a frustrating reorder.
- Use a steel tape, always. Cloth or fabric tapes stretch slightly over time and with use, which throws your numbers off just enough to matter.
- Measure three places, every time, even if the window looks perfectly square. Label each number so you don’t mix up which reading came from where.
- Skip the whole-inch rounding habit. Recording to the nearest 1/8 inch instead of rounding to the nearest inch is the single easiest way to avoid a blind that’s slightly too tight or too loose.
- Triple-check your notation before submitting an order: mount type, control side, and whether the number is width or height first. A transposed W and H is one of the most common (and most avoidable) ordering errors.
Pro Tip: Say your measurements out loud as you write them down. “Width, thirty-one and three-eighths” catches transposition errors your eyes might skim right past.
What to Check Before You Place Your Order
You’ve got your numbers. Before you click “add to cart,” run through this list one more time.
- Confirm mounting depth against headrail clearance. Your depth measurement needs to meet or exceed the minimum listed on the specific product page you’re ordering from, not a general assumption about blinds in general.
- Check the factory’s rounding policy. Some manufacturers deduct a small amount automatically for inside mounts to guarantee clearance, so your submitted number and the finished product size won’t be identical, and that’s expected.
- Decide on control side and lift style. Cordless, corded, or motorized each have different clearance needs, and motorized headrails in particular tend to be slightly bulkier.
- When in doubt, submit both measurements. If you’re not fully sure whether inside or outside mount will work, give the vendor’s support team your inside depth and your outside wall space, and let them help you choose.
Getting this part right the first time is the difference between installing your blinds once and installing them twice.
How to Measure Width for Blinds: The Three-Point Rule
Width is the measurement most people assume is simple, take the tape from one side to the other and you’re done. It isn’t quite that easy, and skipping the extra two readings is one of the most common reasons blinds arrive too wide to fit an opening.
Measure the width at the top of the window opening, then again at the middle, then once more at the bottom. Write all three down before you do anything else. Homes settle, frames get painted over multiple times, and construction tolerances are rarely as tight as they look, so it’s common for these three numbers to differ by anywhere from a sixteenth of an inch to half an inch or more.
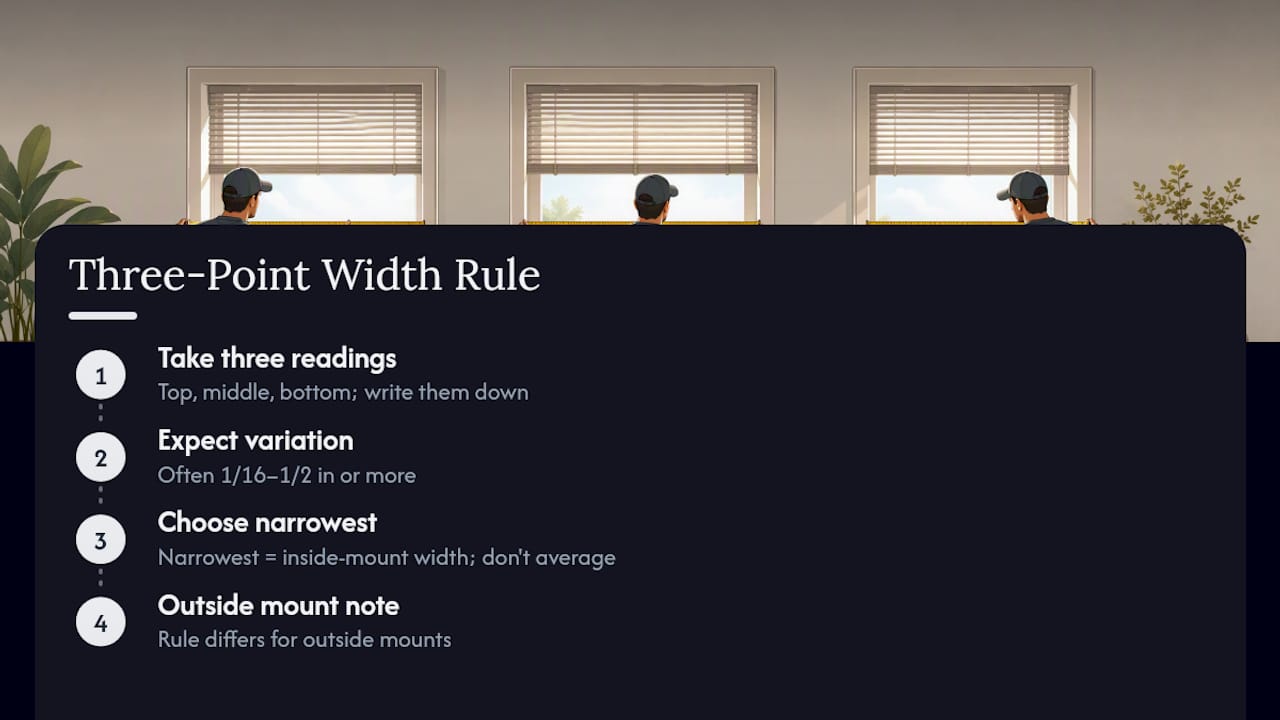
Once you have all three, take the narrowest of the three numbers as your final width for an inside mount. This isn’t a case where you average them or split the difference. The narrowest point is the tightest constraint your blind has to fit through, so it governs the whole order. If you used the widest reading instead, the blind could jam against the frame at its tightest point and never install properly.
For outside mounts, width works differently since you’re measuring wall space rather than an opening, so the narrowest-point rule doesn’t apply the same way. Our guide on measuring windows for blinds breaks down that distinction with visuals if you want a side-by-side comparison.
Why Window Depth Matters for Inside Mounts
Depth is the measurement homeowners skip most often, and it’s the one that causes the most painful surprises. It’s the distance from the front of your window frame back to the glass or a clean stopping point, and it determines whether an inside mount is even possible.
Measure depth at multiple points along the frame, not just the center, since trim and hardware can eat into that space unevenly. Cranks, security hardware, or interior shutters near the edges of the frame often reduce usable depth exactly where a bracket needs to sit.
Once you have your number, compare it against the mounting depth listed on the specific product page you’re considering, not a general rule of thumb. Requirements vary by product line: a basic aluminum blind might need very little depth, while a cellular shade with a larger headrail or a motorized system needs more room to house the motor and battery pack.
If your depth measurement comes up short, you have two solid options. Choose a slimmer profile product, or switch to an outside mount and skip the depth requirement altogether. Neither is a downgrade, they’re just different looks with different hardware needs, and knowing your depth number upfront means you’re choosing intentionally instead of discovering the mismatch after your order ships.
Should You Round Your Measurements to the Nearest 1/8 Inch?
Yes, and this is one of the most misunderstood rules in the entire measuring process. Many first-time buyers assume rounding to the nearest half-inch or whole inch is “close enough.” It isn’t, and here’s the reasoning behind why manufacturers are strict about it.
Recording to the nearest 1/8 inch, rather than rounding to a whole number, gives the factory the precise data it needs to build your blind with the correct clearances. Factories often apply their own small, calculated deductions for inside mounts to guarantee the blind slides in without binding against the frame. That deduction formula is built around receiving your true, unrounded measurement, not one you’ve already adjusted.
Think of it this way: if you round your width up from 30 and 3/8ths to 30 and a half, and the factory then applies its own quarter-inch deduction on top of your already-rounded number, you could end up with a blind that’s noticeably looser or tighter than intended. Small errors compound.
The takeaway is straightforward. Take your reading, write down exactly what the steel tape shows to the nearest eighth of an inch, and let the manufacturer’s own deduction process handle the rest. Don’t do their math for them.
Tools to Use When Measuring for Custom Blinds
The right tools take maybe an extra $15 and five minutes to gather, and they eliminate most of the errors that lead to a reorder.
A steel tape measure is non-negotiable. Fabric or cloth tapes flex and stretch slightly with handling, and that tiny bit of give is enough to throw off a measurement that needs to be accurate within an eighth of an inch. A standard 25-foot retractable steel tape from any hardware store works fine for nearly every residential window.
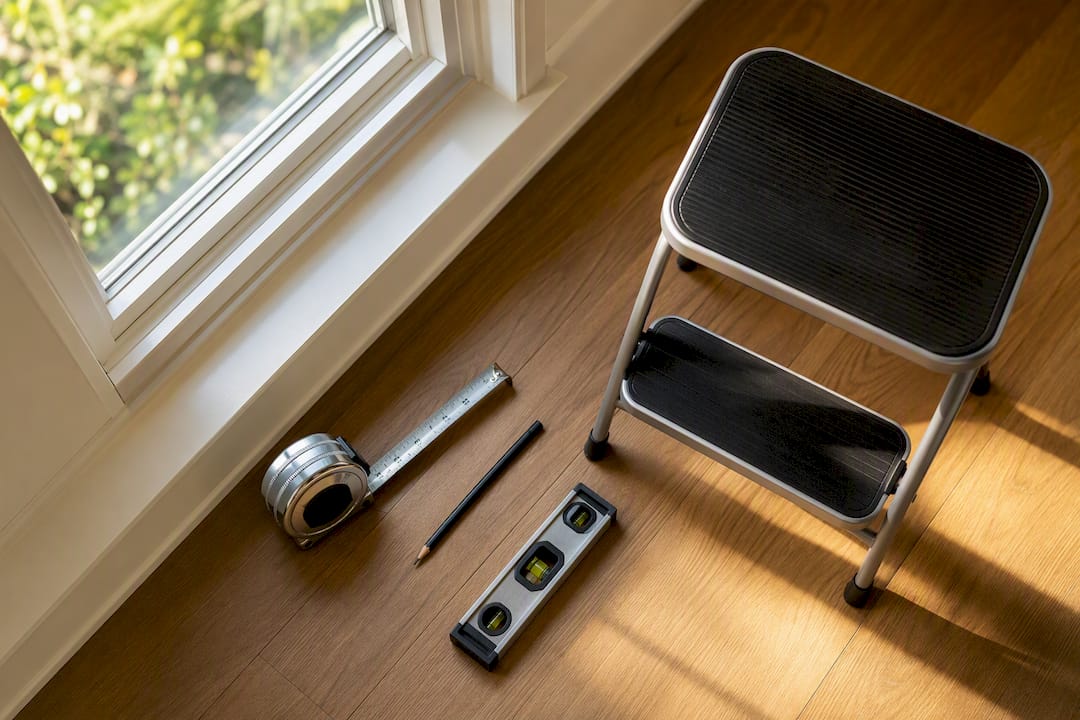
Keep a pencil and paper or a printed worksheet close by, and write numbers down the moment you take them. Trying to hold six numbers in your head while you climb down a ladder is how transposition errors happen.
For tall windows, a step stool or small ladder is worth the setup time. Reaching a window at an awkward angle from the floor tends to produce a slightly off-angle measurement, especially for the top width reading.
A basic level helps you spot whether a frame is visibly out of square before you even start measuring, which can save you a surprise later. And for anything wider than about four feet, having a second person hold one end of the tape steady makes a noticeable difference in accuracy, especially at height.
Special Instructions for Roller, Vertical, Bay, and Specialty Shapes
Not every window plays by the same rulebook, and treating a bay window or a roller shade like a standard rectangle is where a lot of DIY measuring goes sideways.
Roller and solar shades hang from a headrail that sits differently than a standard blind’s mounting brackets, so the top width measurement carries extra weight. Some roller shade product lines include their own specific worksheet that takes priority over the general three-point rule, so it’s worth checking the roller shade measuring instructions for your exact product before finalizing numbers.
Vertical blinds measure from the top track rather than the window opening itself, and you’ll also need to decide your stack direction, meaning which side the vanes gather when fully opened. That decision affects how much clear glass you’ll actually see day to day.
Bay and bow windows genuinely trip people up because they look like one window but function as several. Measure and label each angled panel independently, left to right, and decide upfront whether you want three separate blinds or a connected system.
Arched and specialty shapes are the one category where DIY measuring reaches its limit. A factory template or a professional measure protects you from a curve mismatch that’s nearly impossible to correct after the fact.
Quick Measuring Tips and Common Mistakes to Avoid
A handful of small habits separate an accurate order from a frustrating one.
Measure everything three times minimum, and label each reading immediately so you’re never guessing which number came from where later. Skipping this step is the single most common source of returns.
Avoid the temptation to eyeball a window as “probably standard size.” Even mass-produced homes have windows that vary by a quarter inch or more from one room to the next, and sometimes even within the same room.
Double check your notation format before submitting an order. Width and height look similar on paper, and a swapped W and H produces a blind that’s rotated 90 degrees from what you need, an expensive and entirely avoidable mistake.
Finally, resist rounding for “neatness.” A measurement of 47 and 5/8ths inches isn’t meant to become 48 inches just because it looks tidier on the order form.
How to Record and Organize Your Blind Measurements
Once you’ve got accurate numbers, the next failure point is disorganization, especially if you’re ordering for more than one or two windows.
Create a simple system before you start measuring, not after. A basic column layout works: room name, window label, mount type, width, height, depth, control side, and any notes about obstructions or overlap. Printable worksheets exist specifically to prevent the classic mistake of transposing two windows’ numbers when you sit down to place the order days later.
Physically label each window as you go, whether that’s a sticky note in the corner of the glass or a strip of painter’s tape with the room and window number written on it. Snap a photo of that labeled window alongside your written measurement. When you’re filling out an order form for five bedrooms at once, that photo is the fastest way to double check you’ve got the right numbers matched to the right room.
Keep a digital copy too, whether that’s a phone note or a simple spreadsheet. Paper worksheets get lost or smudged, and a digital backup means you’re never starting over from scratch.
What to Check Before You Place the Order
Before you finalize anything, run through mounting compatibility one more time. Your measured depth needs to clear the headrail of the specific product you’ve chosen, and that number is listed on the product page, not in a general buying guide.
Check bracket space too. Brackets need a flat, sturdy mounting surface, and if your frame has decorative trim or an uneven edge, that can affect exactly where the bracket sits and whether your depth measurement still holds true at that spot.
Look for obstructions one final time: window cranks, security hardware, or interior shutters that might interfere with either the headrail or the bottom rail once the blind is installed and operating. Something that seemed like a minor bump during measuring can become a real problem once the blind is cycling open and closed daily.
If any of these checks raise a question mark, it’s worth reaching out to a vendor’s support team before you finalize the order rather than after.
How Light Control and Privacy Needs Shape Your Measurements
Your measuring approach should shift slightly depending on what you actually want the blind to do, not just what size the window happens to be.
If privacy or blackout is the priority, bedrooms and bathrooms especially, an outside mount with generous overlap (leaning toward that 3-inch range on each side and top) closes the light gaps an inside mount simply can’t. Inside mounts, by design, leave a small reveal at the edges where light can sneak through, which is fine for a living room but less ideal for a nursery.
If you want maximum natural light and an unobstructed view, an inside mount with a slim headrail keeps more glass visible and creates a cleaner architectural look, since the blind essentially disappears into the frame when raised.
Match your mount choice and your overlap allowance to the room’s actual function, not just its dimensions.
Does Fabric Thickness Affect Your Measurements?
Yes, and it’s a detail most first-time buyers never think to ask about. Thicker fabrics and materials like blackout-lined cellular shades or heavier woven woods take up more room in the headrail and stack height than a lightweight roller fabric does.
That matters most for two things: your depth measurement and your stack height at the top of the window. A bulkier fabric rolled or folded into a headrail needs a slightly larger housing, so if your inside-mount depth is right at the minimum threshold for a slim shade, it might not be enough for a thicker blackout version of that same product line.
Check the specific product’s mounting requirements before assuming a “standard” measurement automatically works across every fabric option.
Measuring Windows With Uneven Trim or Casing
Older homes especially tend to have trim that’s been painted over multiple times, warped slightly, or was never perfectly square to begin with. This is exactly why the three-point measuring rule for both width and height matters so much.
If your trim is visibly uneven, measure at more than just the standard three points if needed, and always err toward the more conservative reading (narrowest for width, longest for height on an inside mount). Note any warping or unevenness directly on your worksheet too, since it’s useful information if you end up calling vendor support for guidance.
For casings with decorative molding or a rounded profile, factor that projection into your depth reading, since it can reduce your usable inside-mount space more than a flat trim style would.
Measuring for Motorized and Smart Home Blinds
Motorized systems add one extra layer to your measuring process: power and housing space. The motor itself typically sits inside a slightly larger headrail than a manual system needs, so your depth measurement has less margin for error.
Measure your depth carefully and compare it against the motorized product’s specific mounting requirements, not the manual version of the same style. Also check whether the motor requires a hardwired connection or a battery pack, since a battery-powered headrail is often bulkier still.
For smart home integration, confirm your window has reasonable access to Wi-Fi or a hub connection nearby, and double check control side preferences, since some motorized systems have limited flexibility for switching sides after installation compared to a manual cord or wand.
Where Homeowners Get Tripped Up, and How to Avoid It
Most measuring mistakes aren’t about a lack of care, they’re about not knowing which number matters most in a given moment. We see the same handful of errors again and again: someone measures once instead of three times, someone rounds a measurement “to make it cleaner,” or someone mixes up which reading was width and which was height after measuring five windows in a row.
The good news is that every one of these mistakes is preventable with the steps in this guide. If you want more detail on a specific product type, our inside mount measuring guide and our broader custom blinds measuring resource both walk through the process with photos and product-specific notes. We also offer free fabric swatches and a design studio if you want a second set of eyes before you commit to an order.
[Author credentials and relevant case studies to be added by the in-house editorial team.]
— Sunny
Ready to Turn Your Measurements Into the Right Blinds
You’ve got the numbers, now it’s time to actually pick the product. There are services online that help you turn W x H x depth measurements into an order without guessing which style fits your depth constraints or light control needs.

Start in the Window Treatment Design Studio, where you can plug in your measurements and see options that actually match your mounting depth, whether that’s a slim roller shade or a bulkier motorized cellular shade. Browsing the full blinds collection is the next step once you know your mount type, and if child safety or cord management is a concern, the cordless and no-drill options solve that without sacrificing style. Every order comes backed by a warranty and real customer support, so if a number turns out to be off, you’re not stuck. Have your worksheet ready and start your quote today.
FAQ
What’s the Correct Way to Measure Width for Blinds?
Measure the width at the top, middle, and bottom of the window opening, then use the narrowest of the three numbers for an inside mount order.
How Do I Measure Height for an Inside Mount Blind?
Measure height at the left, middle, and right sides of the frame, and record the longest of the three measurements so the blind reaches the sill.
Why Should I Measure to the Nearest 1/8 Inch Instead of Rounding?
Factories often apply their own small deductions for inside-mount clearance, and that calculation depends on receiving your exact, unrounded measurement.
Does Valueblindsdirect Offer Measuring Support if I’m Not Sure?
Yes, Valueblindsdirect’s measuring guides and design studio provide free swatches and support to help confirm measurements before you order.
When Should I Hire a Professional Instead of Measuring Myself?
Arched windows, very tall openings, complex bay configurations, and motorized systems are the situations where a professional measure is worth the added cost, since they check substrate strength and trim clearance that DIYers often miss.
What’s the Difference Between Inside and Outside Mount Measurements?
Inside mount measures the window opening itself and requires enough depth for the headrail, while outside mount measures the wall space around the window and typically adds 2 to 3 inches of overlap for better privacy.