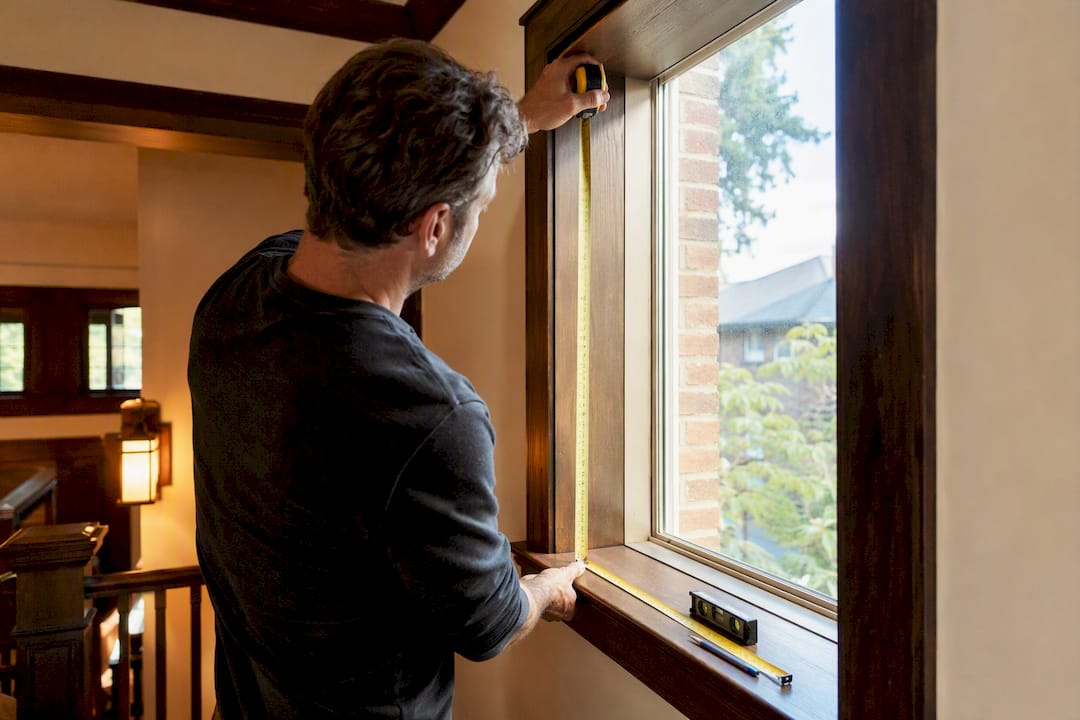
Article: Measure, Pair, Done: Smart Blinds Installation Checklist for Homeowners
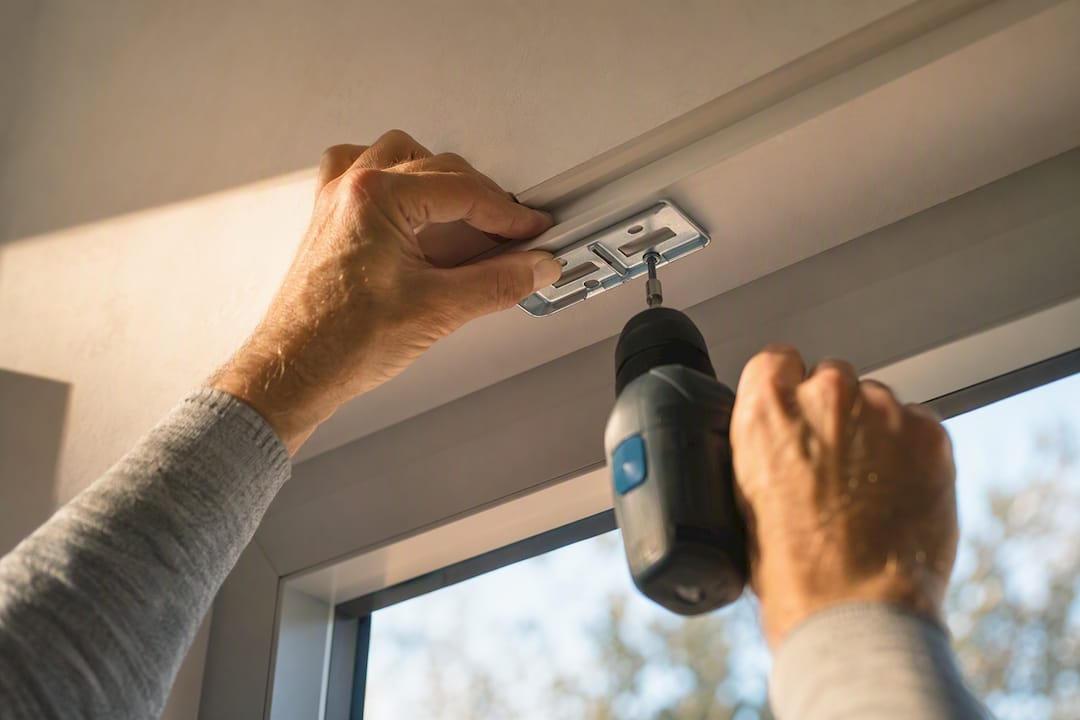
Measure, Pair, Done: Smart Blinds Installation Checklist for Homeowners
Yes, you can absolutely install smart blinds yourself. Most motorized shades usually take a short time to install per window, need only a drill, level, and screwdriver, and require zero electrician calls. Success looks like this: the shade sits mechanically secure on the wall or window frame, the upper and lower travel limits are set so it stops exactly where you want, and it’s paired with your app or voice assistant. That’s it. That’s the whole finish line.
TL;DR:
- Most smart blinds are easy to install with basic tools, but precise measuring is crucial to ensure a proper fit and avoid a crooked appearance.
- Inside, outside, or ceiling mounts depend on window style and space, with measuring errors being the leading cause of setup issues.
- Power options include rechargeable batteries, replaceable batteries, or plug-in cords, each affecting maintenance frequency and aesthetic preferences.
- Pairing with apps and voice assistants is straightforward, but controlling multiple shades or adding hubs improves automation and scene creation.
- DIY installation suits most homeowners, but complex windows or high ceilings might require professional measurement and setup to ensure safety and proper operation.
Table of Contents
- Tools, Parts, and Your Pre Installation Checklist
- Measuring for a Perfect Fit: Inside, Outside, or Ceiling Mount
- Step-by-Step Smart Blinds Installation: Mark, Drill, Mount, and Set Limits
- Battery, Rechargeable, or Plug-In: Choosing Your Power Setup
- Pairing Your Smart Blinds With Apps and Voice Assistants
- Common Smart Blinds Problems and Quick Fixes
- Value Blinds Resources and When to Call a Pro
- Software, App Controls, and Keeping Everything Updated
- Are Smart Blinds a Security or Privacy Risk?
- What Does Smart Blinds Installation Actually Cost?
- My Take on DIY Smart Blinds Installation
- Get Custom Motorized Shades Without the Installation Guesswork
- Sources
- FAQ
Tools, Parts, and Your Pre Installation Checklist
Before you touch a drill, spread everything out on the floor and take inventory. Nothing kills installation momentum faster than realizing halfway through that you’re missing a screw. 😅
Essential tools:
- Drill/driver with the correct bit size
- Level (a torpedo level works great for headrails)
- Tape measure and pencil
- Stud finder (even if you plan to use anchors)
Optional extras that make life easier: U shims for uneven walls, cord covers for a cleaner look, and painter’s tape for marking bracket spots without damaging paint.
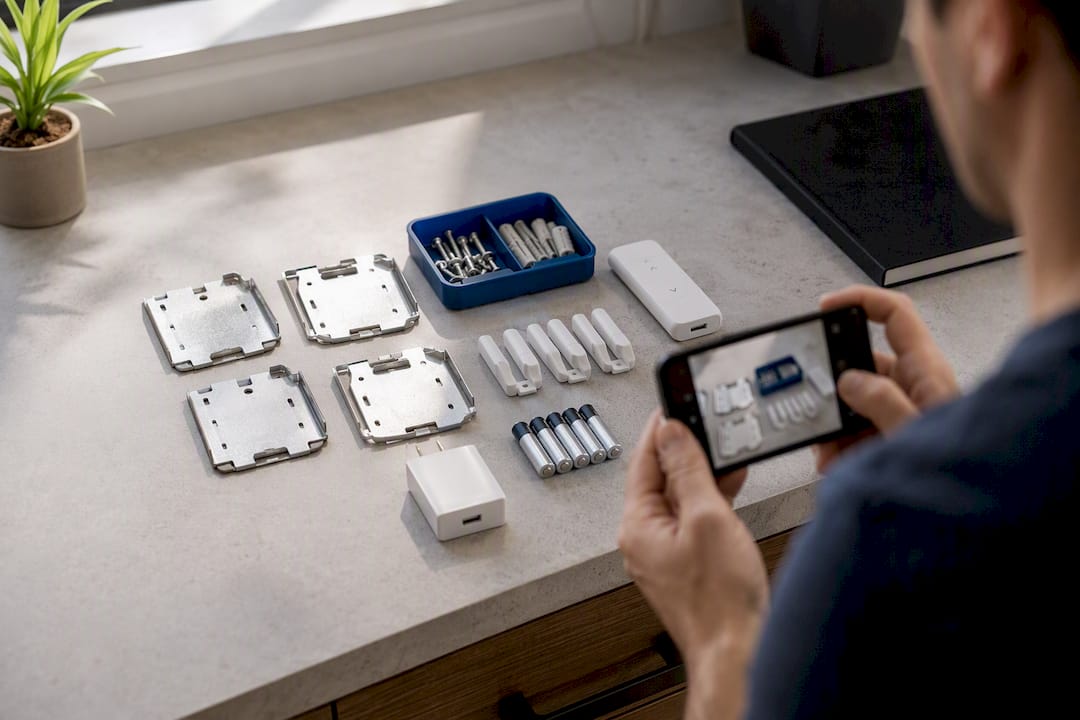
Open the box and confirm you’ve got mounting plates, safety locks, a charger or batteries, and the remote. Manufacturer manuals from brands like SmartWings list every included part on page one, so check that first.
Pro Tip: Photograph the parts laid out before installing. If something doesn’t fit right later, you’ll know exactly what you started with.
Measuring for a Perfect Fit: Inside, Outside, or Ceiling Mount
Measuring wrong is the single most common reason a DIY smart shades setup goes sideways. Get this part right and everything downstream gets easier.
- Measure width at the top, middle, and bottom of the window opening. Record the smallest number if you’re going inside mount, since that’s your tightest clearance point.
- Measure height at the left, middle, and right sides, and use the largest measurement so the shade covers the full window even if the frame is slightly uneven.
- Add clearance for the headrail and bracket depth. Inside mount needs at least 2.5 inches of frame depth; anything shallower pushes you toward outside mount.
- Choose your mount type: inside mount gives you that clean, built-in look, outside mount offers better light-blocking coverage and hides an uneven frame, and ceiling mount works well for deep-set or oddly shaped windows.
The most common mistake? Measuring only once, or measuring the glass instead of the frame. Value Blinds’ measuring guide includes printable templates that make this almost foolproof, and our breakdown of outside mount blinds walks through exactly when that option beats inside mount.
Step-by-Step Smart Blinds Installation: Mark, Drill, Mount, and Set Limits
Here’s where the actual smart blinds installation happens, and honestly, it’s a lot less intimidating than it sounds.
- Mark your centerline and bracket locations. Use a level and painter’s tape to mark exactly where each bracket needs to sit. Don’t eyeball this part. A shade that’s off by even a quarter inch will look crooked once it’s hanging.
- Drill pilot holes. If you hit a stud (that’s what the stud finder was for), you can often hand screw brackets directly in for extra strength. No stud? Use the wall anchors included in the box. GE’s installation guide specifically calls out anchor use whenever a stud isn’t available, and skipping this step is how shades end up sagging six months later.
- Mount the plates. Check level again before you tighten anything fully. Once both brackets are secure, slide the shade’s headrail into place and listen (or feel) for the click of engagement.
- Engage the safety locks. This is not optional. These locks keep the shade from popping loose if it’s bumped, and every manufacturer manual treats this as a non-negotiable step.
- Set your travel limits. Using the remote or the buttons on the motor itself, set your upper stop point and lower stop point. Run the shade up and down a few times to confirm it stops exactly where you want, every single time.
Manufacturer manuals consistently push one point home: test the full range of motion immediately after mounting, before you walk away. It’s a small habit that prevents motor strain down the road and saves you from having to remount the shade if something’s off.
If you’re working with a cassette headrail (the enclosed, boxier style), there’s usually a bit more clearance needed above the window for the housing to sit flush. Open roll headrails mount flatter and work well in tighter spaces. Ceiling installs need slightly longer anchors since you’re drilling into the horizontal surface rather than a vertical wall, so double-check your anchor length before you start.
One more thing worth knowing: many DIYers report the mechanical mounting itself feels just like installing a regular blind. The part that actually eats up time is the smart setup afterward, not the drilling and mounting.
Battery, Rechargeable, or Plug-In: Choosing Your Power Setup
Your power choice affects both maintenance and looks, so weigh this before you order.
- Rechargeable magnetic battery packs are the most popular option. SmartWings recommends an initial charge of six or more hours before first use, and depending on how often you’re raising and lowering the shade, you’ll typically go months between charges.
- Replaceable AA or AAA batteries work fine for low-use rooms but mean occasional battery swaps.
- Plug-in power is your best bet for shades you operate constantly, like a kitchen window, since it removes recharging from the equation entirely. Route the cord along the window frame with cord covers so it disappears visually.
Pairing Your Smart Blinds With Apps and Voice Assistants
Once the shade is mounted, the smart part of “smart blinds installation” kicks in. This is usually the fastest part, and honestly, kind of the fun part. 🎉
Pairing generally follows the same rhythm across brands:
- Wake the motor with a button press or remote tap.
- Enter pairing mode, often by holding a button for a few seconds until you see a light blink.
- Open your smart assistant app (Apple Home, Amazon Alexa, or Google Home) and follow the in-app scan or add-device prompt.
- Confirm the connection once the app detects the shade.
IKEA’s own support documentation confirms that pairing usually just requires keeping the remote close and following the app’s prompts, with no electrician needed for battery-powered models.
If you’re running several shades or want Matter or Thread compatibility, you’ll likely need a hub or gateway like a Lutron Caséta bridge or a Matter-enabled router. Wirecutter’s testing notes that a single gateway often controls multiple shades, but placement and mesh range matter more than people expect.
Once everything’s connected, group your shades into rooms and create “scenes” (like a Morning scene that opens everything at 7 AM).
Pro Tip: If you’re planning five or more shades, map out your hub’s expected range and central placement before you install a single bracket. Retrofitting hub placement later is a headache you can avoid.
Common Smart Blinds Problems and Quick Fixes
Most issues fall into one of four buckets, and none of them require a service call.
- Shade hangs unevenly: Recheck bracket alignment with your level, add a U shim if the wall itself is uneven, then retest.
- Shade slips or drops: Confirm the safety locks actually clicked into place. If they did and it’s still slipping, you probably need a stud mount or heavier duty anchors.
- Pairing won’t complete: Bring the remote within a few feet of the motor, reset the motor per your manual, check your hub’s firmware is current, and try again.
- Battery draining too fast: Verify you gave it that full initial charge (skipping this is the number one cause). If it’s still draining fast, consider switching that window to plug-in power.
Value Blinds Resources and When to Call a Pro
Not every install is a solo weekend project, and that’s fine. Oversized windows, exterior installs, and anything requiring a ladder above eight feet are exactly when professional measuring and installation earns its cost. Value Blinds backs every order with motorized installation guides, free fabric swatches, printable measurement templates, and warranty support if something isn’t sitting right after install. Our guide on easy install blinds is a good next read if this is your first rodeo with window treatments of any kind.
Software, App Controls, and Keeping Everything Updated
Your shade’s firmware and app are just as important as the hardware, maybe more so long term. Most smart blinds apps handle four core jobs: setting schedules, creating scenes, grouping devices by room, and pushing firmware updates.
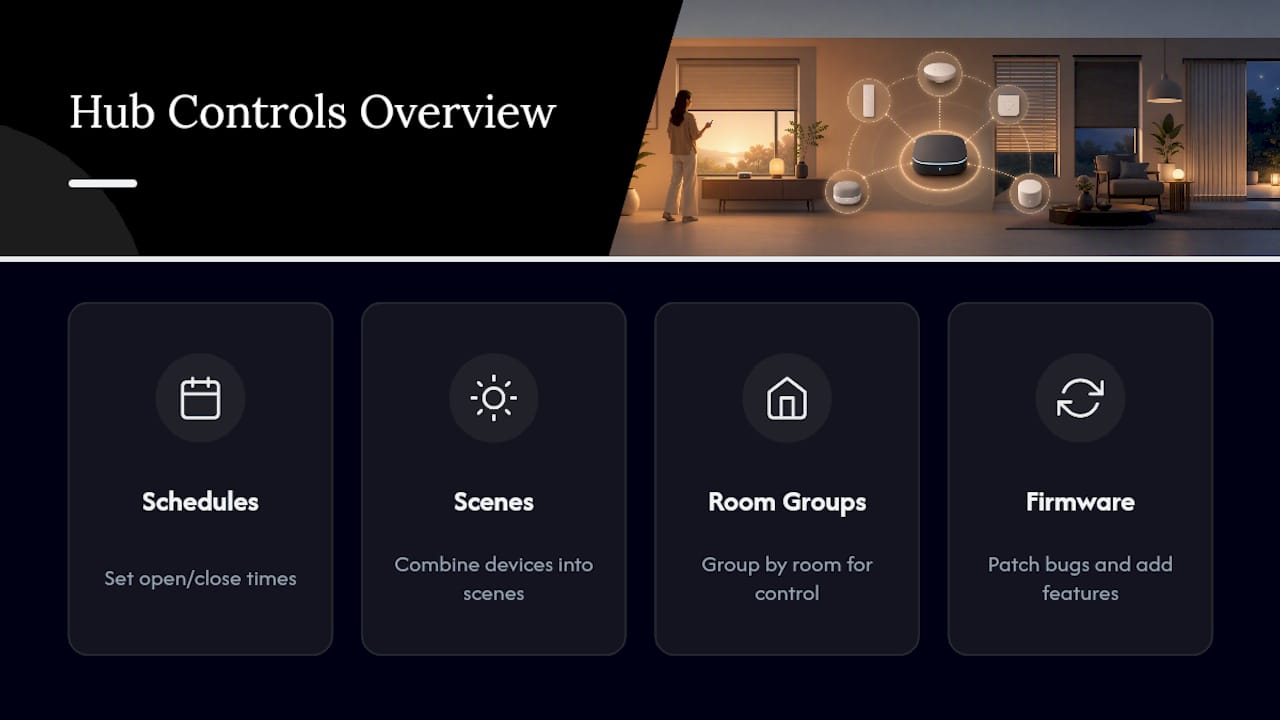
Firmware updates matter more than people assume. They patch connectivity bugs, improve battery efficiency, and sometimes add features your shade didn’t originally ship with, like sunrise/sunset scheduling based on your location. Check your app’s settings menu every couple of months; most brands push updates automatically over Wi-Fi, but some require you to tap “check for updates” manually.
If you’re using Apple Home, Alexa, or Google Home, expect occasional app resyncing after major phone OS updates. This is normal and usually resolves with a simple remove-and-re-add of the device rather than a full factory reset.
One practical habit: name your shades clearly in the app (Kitchen West, Bedroom North) rather than leaving generic device names. It sounds minor, but once you have six or seven shades paired, “Shade 4” means nothing to you at 10 PM when you’re trying to close the bedroom blind through Siri.
Are Smart Blinds a Security or Privacy Risk?
Any device that connects to your home network technically expands what’s called your attack surface, meaning there’s one more entry point for someone to potentially exploit. That said, smart shades are a fairly low-risk category compared to, say, smart cameras or door locks, since most don’t collect or transmit sensitive personal data.
Still, basic hygiene applies. Security recommendations for smart home devices generally include using a strong, unique Wi-Fi password, keeping your router’s firmware updated, and placing your hub centrally rather than near an exterior wall where its signal (and your network’s exposure) extends further than necessary.
If privacy is a top concern, check whether your shade’s brand requires cloud account creation or works fully on a local network. Matter and Thread devices increasingly support local control, meaning your shade commands stay on your home network rather than routing through a manufacturer’s server.
What Does Smart Blinds Installation Actually Cost?
Budget is often the deciding factor between DIY and professional installation, so let’s talk real numbers.
HomeAdvisor’s cost data shows that motorized and electric blind installation costs vary widely per window depending on size, motor type, and whether you’re paying for professional labor on top of materials. DIY installation obviously cuts out that labor cost entirely, since you’re providing the drill time yourself.
Beyond the shade itself, factor in a hub or gateway if you want full smart-home integration (a one-time purchase that typically covers multiple shades), plus any mounting hardware upgrades like heavy-duty anchors for older plaster walls. Most homeowners find the smartest budget move is piloting one window first, confirming fit and function, before committing to a whole-house rollout.
My Take on DIY Smart Blinds Installation
DIY smart blinds installation is genuinely accessible for most homeowners; I’d stake real confidence on that. Start with one window before ordering a houseful. Follow your manufacturer’s manual on safety locks and anchors every single time, no shortcuts.
— Sunny
Get Custom Motorized Shades Without the Installation Guesswork
Ordering off-the-shelf smart blinds means gambling on whether the size, mount type, and motor actually fit your windows. Some companies offer shades built to exact measurements, backed by a warranty, and paired with free fabric swatches to help you choose color accurately.

If you’re not sure whether you need inside mount, outside mount, or a ceiling install, support teams can assist, and professional measuring or installation may be advisable for oversized or high windows where a solo DIY attempt gets riskier. Start by requesting free swatches to confirm your fabric and color, then head to the Window Treatment Design Studio to build your custom motorized shade and lock in your exact sizing.
Sources
When your specific model doesn’t match the general steps above, go straight to the source. The GE Smart Shades Installation Guide and SmartWings installation guide cover model-specific bracket and pairing steps in detail.
- GE Smart Shades Installation Guide
- SmartWings installation guide (roller shade)
- Getting started with smart blinds - IKEA
- How Much Do Motorized or Electric Blinds Cost to Install? - HomeAdvisor
- The 4 Best Smart Window Shades, Blinds, and Curtains of 2026 | Reviews by Wirecutter
FAQ
How Much Does It Cost to Install Smart Blinds?
Cost varies by window size, motor type, and whether you hire a pro versus doing it yourself, and HomeAdvisor’s pricing data breaks down typical ranges by these factors. DIY installation removes labor costs since you’re only paying for the shade and mounting hardware.
Are Smart Blinds Easy to Install?
Yes. The mechanical mounting is very similar to installing a standard blind, and most battery-powered models need no electrician at all. The smart setup, pairing with your app or hub, is usually the longer step, not the drilling.
Can You Make Existing Blinds Smart?
Some retrofit motor kits exist for certain blind styles, but fit and compatibility vary a lot by shade type and headrail design. For reliable results and proper safety lock engagement, a purpose-built motorized shade is generally the safer bet.
Do I Need a Hub for Smart Blinds?
Not always. Many battery-powered shades pair directly with your phone’s app, but a hub like a Lutron Caséta bridge or a Matter-compatible router becomes useful once you’re running multiple shades or want voice assistant integration across rooms.
How Long Do Smart Blind Batteries Last?
After the recommended initial charge of six or more hours, most rechargeable smart shades go months between charges depending on how often you operate them daily.