

Blinds direct installation guide: DIY steps made easy
TL;DR:
- Proper measurement, preparation, and tool use are essential for a successful DIY window blind installation. Accurate assessments of mount type and wall conditions ensure a precise fit and long-lasting support. Following step-by-step guidance and troubleshooting tips helps achieve a professional-looking result on your first attempt.
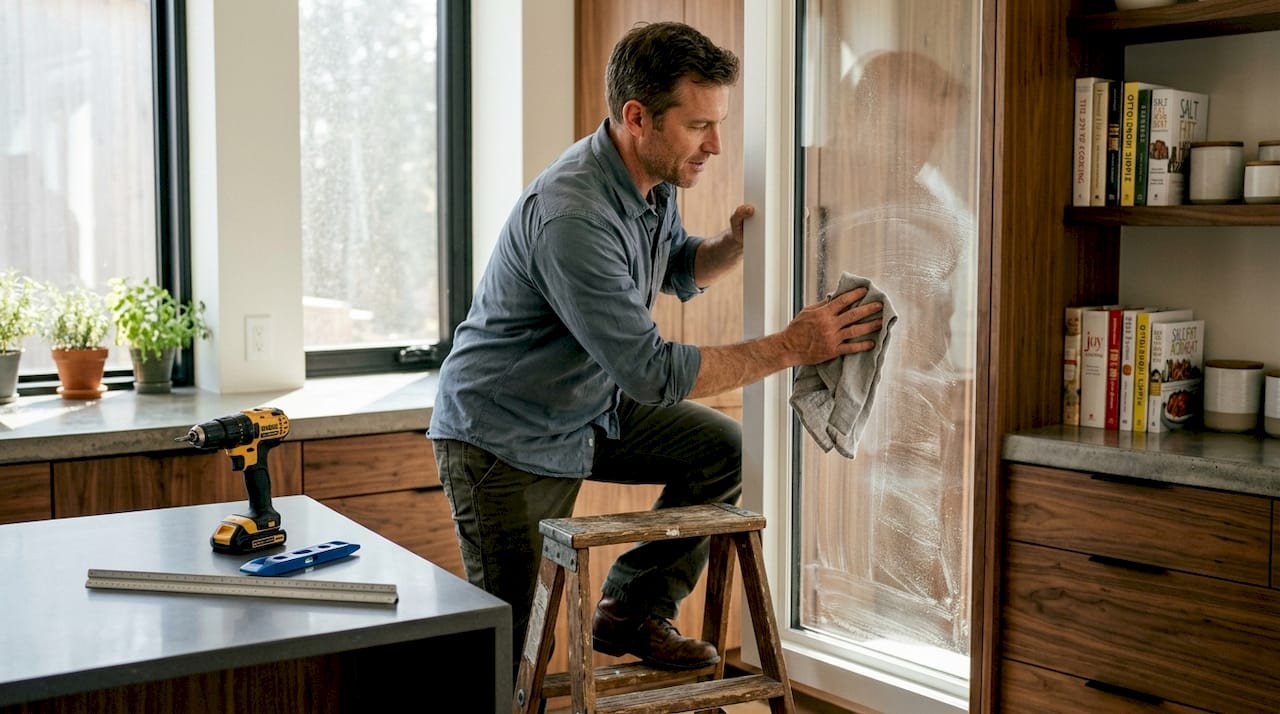
Installing custom window blinds sounds straightforward until you’re standing on a step stool with a drill in one hand and a mounting bracket in the other, wondering if you measured the right direction. This blinds direct installation guide exists to take that uncertainty off the table. Done right, a clean blind installation sharpens your room’s look, controls light the way you actually want, and costs a fraction of professional labor. Done wrong, it means wobbly blinds, stripped screws, and a return trip to the hardware store. Follow these steps and you’ll get it right the first time.
Table of Contents
- Blinds direct installation guide: gathering tools and measuring your windows
- Preparing your workspace and mounting options
- Step-by-step installation process for custom blinds
- Troubleshooting common installation issues
- Verifying installation quality and maintenance tips
- Why precise measuring and preparation are the true keys to DIY success
- Explore custom blinds and installation support at Value Blinds Direct
- Frequently asked questions
Key Takeaways
| Point | Details |
|---|---|
| Accurate measuring essential | Measuring your windows precisely is the foundation for a successful blind installation. |
| Prepare workspace thoroughly | Clear and level your window area to avoid common installation issues. |
| Follow steps carefully | Sequential and accurate execution of installation steps prevents costly mistakes. |
| Troubleshoot common issues | Identifying and correcting misalignment or binding ensures smooth blind operation. |
| Maintain for longevity | Regular checks and cleaning keep your blinds working efficiently over time. |
Blinds direct installation guide: gathering tools and measuring your windows
Before anything touches your wall, you need the right tools and accurate measurements. Skipping this step is the single most common reason a blind installation fails, and it happens long before anyone picks up a drill.
Essential tools for the job:
- Electric drill with Phillips and flathead bits
- Tape measure (metal, not fabric)
- Pencil for marking bracket positions
- Level (a 24-inch level works best for most windows)
- Screwdriver for tightening hardware
- Stud finder (for outside mount installations)
- Anchors and screws appropriate for your wall type
The most important decision you’ll make before measuring is whether you want an inside mount or an outside mount. An inside mount sits within the window frame, giving a clean, built-in look. An outside mount attaches to the wall or window trim above and around the frame, covering more of the opening. As any window blinds setup guide will tell you, mount type affects both fit and appearance significantly.
| Mount type | Best for | Measurement adjustment |
|---|---|---|
| Inside mount | Recessed frames, clean look | Measure exact window opening |
| Outside mount | Shallow frames, light blocking | Add 2–3 inches each side |
| Ceiling mount | High ceilings, minimal hardware visible | Measure from ceiling to desired length |
How to measure correctly:
For an inside mount, measure the width of the window opening at the top, middle, and bottom. Use the narrowest measurement. Then measure height on the left, center, and right sides, using the longest reading. Windows are rarely perfectly square, and this accounts for that. For an outside mount, decide how far past the frame you want the blind to extend, then measure that total span.
Always check for obstacles like window cranks, handles, or deep sills that could prevent an inside mount from sitting flush. A curtain measurement guide uses the same principle: obstructions define your minimum clearance, not just your window size.
Pro Tip: Measure each window individually, even if they look identical. Manufacturing tolerances in homes mean two “same-size” windows can vary by a quarter inch or more.
Preparing your workspace and mounting options
With your tools ready and measurements taken, it’s important to prepare your window area and decide on the ideal mounting style before a single screw goes in.
Clear everything off the windowsill and lay a drop cloth or towel on the floor below. This catches screws and protects your flooring. If you’re working with painted trim or drywall, tape the wall lightly around your bracket positions to prevent scuffs. Check whether your window frame is solid wood, hollow vinyl, or drywall only. Each requires a different anchor type, and using the wrong one is how brackets pull free six months later.
Mounting style comparison:
- Inside mount: Creates a tailored, minimal appearance. Works best when your frame depth is at least 1.5 inches. Leaves the trim fully visible.
- Outside mount: Allows the blind to cover the full window area and any surrounding wall space. Better for light blocking and ideal for windows with irregular or shallow frames.
For a deeper look at how mounting choices affect the final result, the blinds mounting options resource covers material-specific recommendations and visual examples.
“A crooked bracket at the start creates a crooked blind at the end. Five minutes with a level before drilling saves an hour of adjustments after.”
Before drilling, use your level to confirm the window frame is actually square. Many older homes have frames that are slightly off. Knowing this in advance lets you compensate with your bracket placement rather than discovering the problem after your blind hangs at a visible tilt. You can also reference a window treatment installation DIY reference to double-check bracket spacing for your specific blind width.
Pro Tip: Wipe down the inside of the window frame with a damp cloth and let it dry before installation. Dust and debris on the frame can shift once the blind is in place and throw off your level.
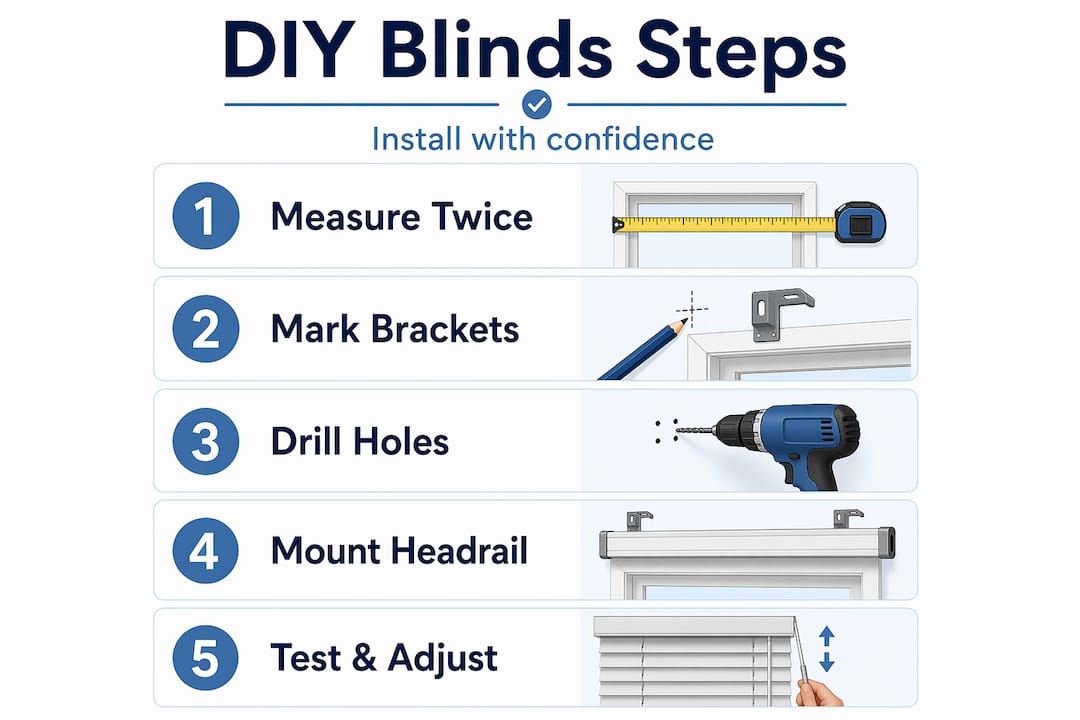
Step-by-step installation process for custom blinds
Now that your workspace is prepped, follow these steps to install your blinds correctly the first time. This blinds installation tutorial works for the majority of horizontal and vertical blind styles.
-
Mark your bracket positions. Hold the headrail (the top bar of the blind) up to the window in your chosen mount position. Use a pencil to mark the outer edges of each bracket location. For most blinds, two brackets is standard, but wider blinds (over 48 inches) need a center support bracket.
-
Drill pilot holes. A pilot hole is a small guide hole drilled before the main screw. It prevents wood from splitting and ensures your screw goes in straight. For drywall, insert a wall anchor before driving the screw.
-
Install the brackets securely. Attach each bracket using the provided hardware, checking with your level that all brackets sit at exactly the same height. Even a 1/8-inch difference will cause your blind to hang unevenly.
-
Mount the headrail. Slide or snap the headrail into the brackets. You should hear or feel a distinct click when it locks in. If it doesn’t click, the bracket may be misaligned. Installation with pre-configured components is designed to be intuitive, so if it feels forced, stop and recheck.
-
Attach slats or fabric. For slatted blinds, hang the bottom rail and feed slats through the ladders. For roller or cellular shades, the fabric is pre-attached to the headrail.
-
Test the mechanism. Raise and lower the blind several times. It should move smoothly with no binding or side-to-side drift. Check the tilt rod or cord lock if using corded styles.
| Common mistake | What it causes | How to prevent it |
|---|---|---|
| Uneven bracket height | Tilted blind | Use a level on every bracket |
| Skipping pilot holes | Stripped screws, split wood | Always pre-drill |
| Over-tightening screws | Cracked frame or bracket | Snug, not cranked |
| Wrong anchor for wall type | Bracket pulls out | Match anchor to wall material |
For step-by-step guidance on cordless styles specifically, the installing cordless blinds walkthrough covers the tensioning mechanism in detail. The easy blinds installation guide is another solid companion for first-timers.
Pro Tip: Before drilling into any wall, confirm there are no electrical wires or plumbing behind it. A stud finder with AC wire detection is worth the extra few seconds.
Troubleshooting common installation issues
Even the best installation can encounter hiccups. Here’s how to diagnose and fix the most frequent problems before they become permanent annoyances.
Blind drifts to one side when raising or lowering
This usually means one bracket is mounted slightly higher or farther forward than the other. Remove the headrail, recheck your bracket heights with a level, and adjust the lower bracket up or the higher one down by loosening its screws and repositioning.
Blind binds or sticks when operating
Check that the headrail is fully seated in both brackets. A partially clicked bracket lets the rail flex, which pinches the internal mechanism. Press each bracket cover firmly until you feel it lock. Uneven mounting and poor calibration are the two most cited causes of operational problems in post-installation reports.
Motorized blinds won’t respond to limits
Motorized blinds need their upper and lower travel limits set after installation. Most models have a simple button sequence to set limits, covered in the manufacturer’s guide. If the blind overshoots or stops short, a full limit reset typically resolves it. For a complete walkthrough of these adjustments, the install blinds troubleshooting guide covers motorized and manual models.
“A blind that works perfectly on day one but gradually starts sticking is almost always a fastener that wasn’t fully tightened. Go back and check every screw before assuming the product is defective.”
Bracket screws won’t tighten
This happens when a pilot hole is too large or the anchor wasn’t seated properly. Remove the screw, fill the hole with a wooden toothpick and wood glue, let it dry, and redrive the screw. This simple fix works reliably in wood frames and hollow vinyl alike.
Pro Tip: If you’re installing motorized blinds across multiple windows, label each blind’s headrail with a piece of masking tape and a room name before pairing it to your app. Pairing the wrong blind to the wrong room name is a frustrating error that’s easy to avoid.
Verifying installation quality and maintenance tips
Once installed, ensuring your blinds work flawlessly and stay in good condition extends their lifespan and your satisfaction.
Run through this post-installation checklist before calling the job done:
- Smooth operation: Raise and lower each blind fully three times. No sticking, binding, or uneven movement.
- Level hang: Stand back and visually check that the bottom rail is parallel to the windowsill.
- Bracket tightness: Wiggle the headrail gently. There should be zero wobble. Proper use and regular checks are the simplest way to extend functional life.
- Hardware snug: Go over every screw with a screwdriver. Vibration from opening and closing windows can loosen fasteners over the first few weeks.
For ongoing maintenance, the cleaning method depends on your blind material. Faux wood and aluminum slats can be wiped with a damp microfiber cloth. Fabric shades and cellular blinds respond better to a dry brush or low-suction vacuum with a brush attachment. Avoid soaking fabric shades, as moisture can warp the internal cell structure.
The window blinds maintenance tips resource covers material-specific cleaning in more detail, including how to handle stains on fabric without damaging the backing.
Pro Tip: Schedule a quick check of motorized blinds every 12 months. Recharge or replace the battery pack before it drains fully, since a dead battery can sometimes reset the programmed limits and require recalibration.
Why precise measuring and preparation are the true keys to DIY success
Here’s an observation that most blinds installation tutorials gloss over: the drilling and mounting are actually the easy part. A competent DIYer can hang brackets in 20 minutes. What takes real attention, and what determines whether that 20-minute job needs to be redone, is everything that happens before the drill comes out.
Measuring twice and thorough preparation aren’t just cautious advice for beginners. They’re the habits that separate a blind that fits perfectly from one that looks slightly off and bugs you every single day. A quarter-inch measurement error on a custom blind isn’t correctable after the fact. The blind is built to your numbers. If those numbers are wrong, you’re either living with the result or reordering.
The same logic applies to wall prep. A homeowner who spends three minutes checking wall material, choosing the right anchor, and confirming the frame is level will never deal with a bracket pulling loose. One who skips those checks may not notice the problem for months, and by then the mounting hole has widened and the fix is more involved.
There’s also a confidence dimension to good preparation. When you know your measurements are right and your wall is ready, you drill without hesitation. That decisiveness shows in the result. Tentative drilling, stopping and starting, repositioning mid-process, creates the crooked installs and stripped holes that give DIY a bad reputation.
The goal isn’t just to get the blind up. It’s to get it up once, have it work perfectly, and feel genuinely good about the result. For accurate measurement guidance before you order, the measuring for blinds accurately guide is worth reading before you even open a product page.
Pro Tip: Invest in a quality digital level with an audible alert. The $20 to $30 price difference over a basic bubble level pays back immediately in brackets that go in right the first time, with no eyeballing required.
Explore custom blinds and installation support at Value Blinds Direct
Ready to put this guide into action? Value Blinds Direct makes it easy to move from measuring to ordering to installing without second-guessing yourself at any stage.

Browse the full high-quality blinds collection to find styles sized and built for your exact window dimensions. If you want the simplest possible installation experience, the cordless blinds collection is specifically designed for DIY homeowners who want clean results without complex hardware. Not sure which style fits your space? The window treatment design studio offers expert guidance and visual tools to match your room, light control needs, and personal style, so you order with confidence and install with ease.
Frequently asked questions
What tools do I need to install custom blinds myself?
A drill, level, metal tape measure, pencil, and appropriate screws or wall anchors cover most custom blind installations at home. A stud finder is helpful for outside mount installations on drywall.
How do I know if I should use an inside mount or outside mount for my blinds?
Inside mount works best when your frame has at least 1.5 inches of depth and you want a minimal look. Outside mount is the better choice when you need more light blocking or your frame is shallow or irregularly shaped.
What are common mistakes to avoid during blind installation?
Measuring only once and skipping the squareness check are the most common errors, followed by installing brackets at uneven heights and rushing the calibration of motorized travel limits.
Can I install motorized blinds myself or should I hire a professional?
Most battery-powered motorized blinds are DIY-friendly with careful preparation and limit-setting. Professional installation is recommended for hardwired systems, very large windows, or high-ceiling installations where access and safety are concerns.


